
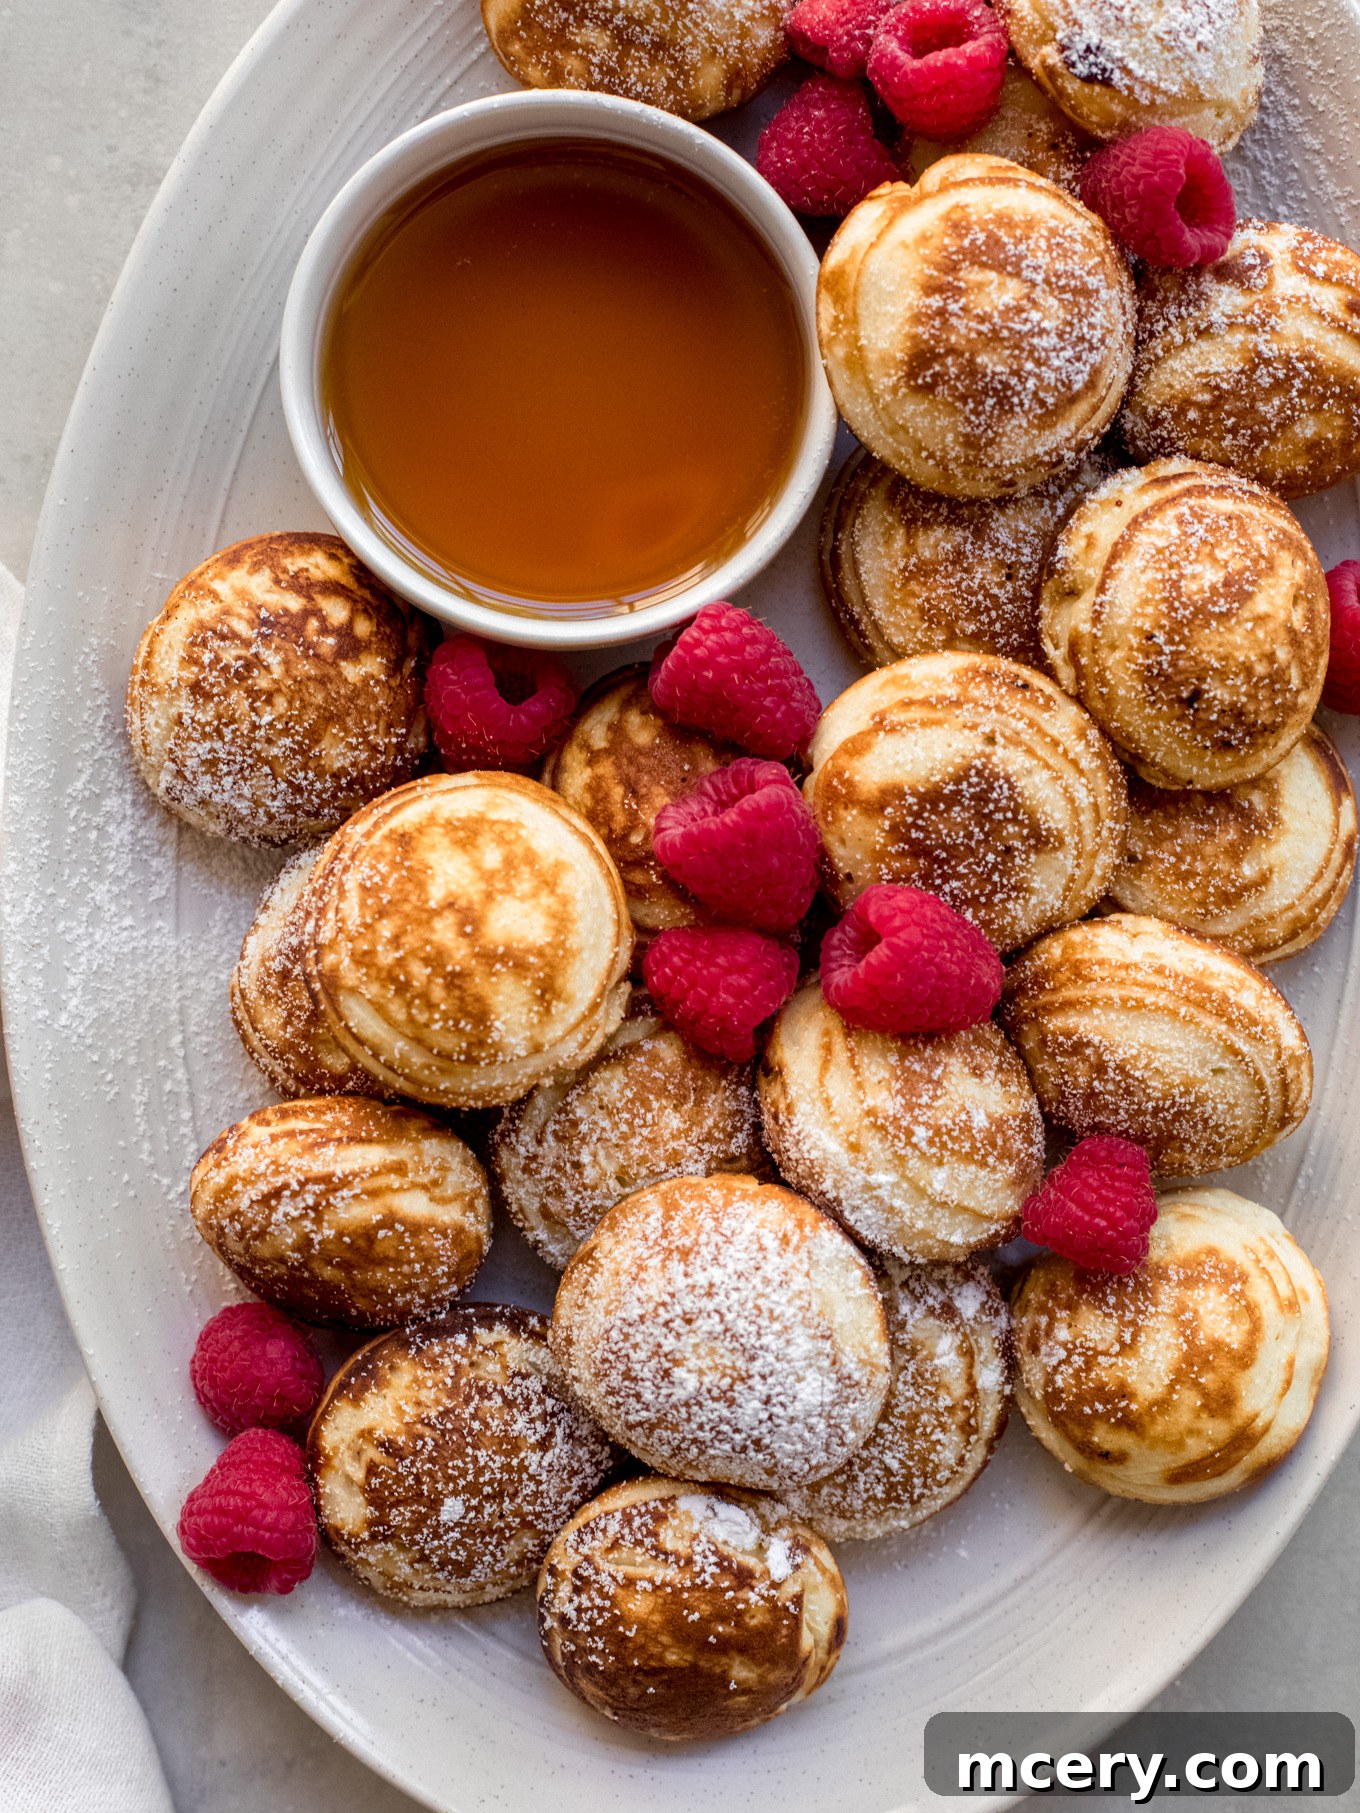
Discover the Delight of Danish Pancakes: A Traditional Æbleskiver Recipe
Step into the heartwarming tradition of Denmark with a beloved breakfast staple: Danish Pancakes, also known as Æbleskiver. These irresistible, puff-ball pancakes are a cherished classic in countless Danish homes, particularly during the festive winter months. Famed for their buttery flavor, light-as-air texture, and golden-crisp exterior, Æbleskiver are surprisingly quick to prepare, incredibly versatile, and profoundly delicious. Whether served plain with a dusting of powdered sugar or bursting with sweet fillings, they offer a taste of Scandinavian comfort that will brighten any morning or holiday gathering.
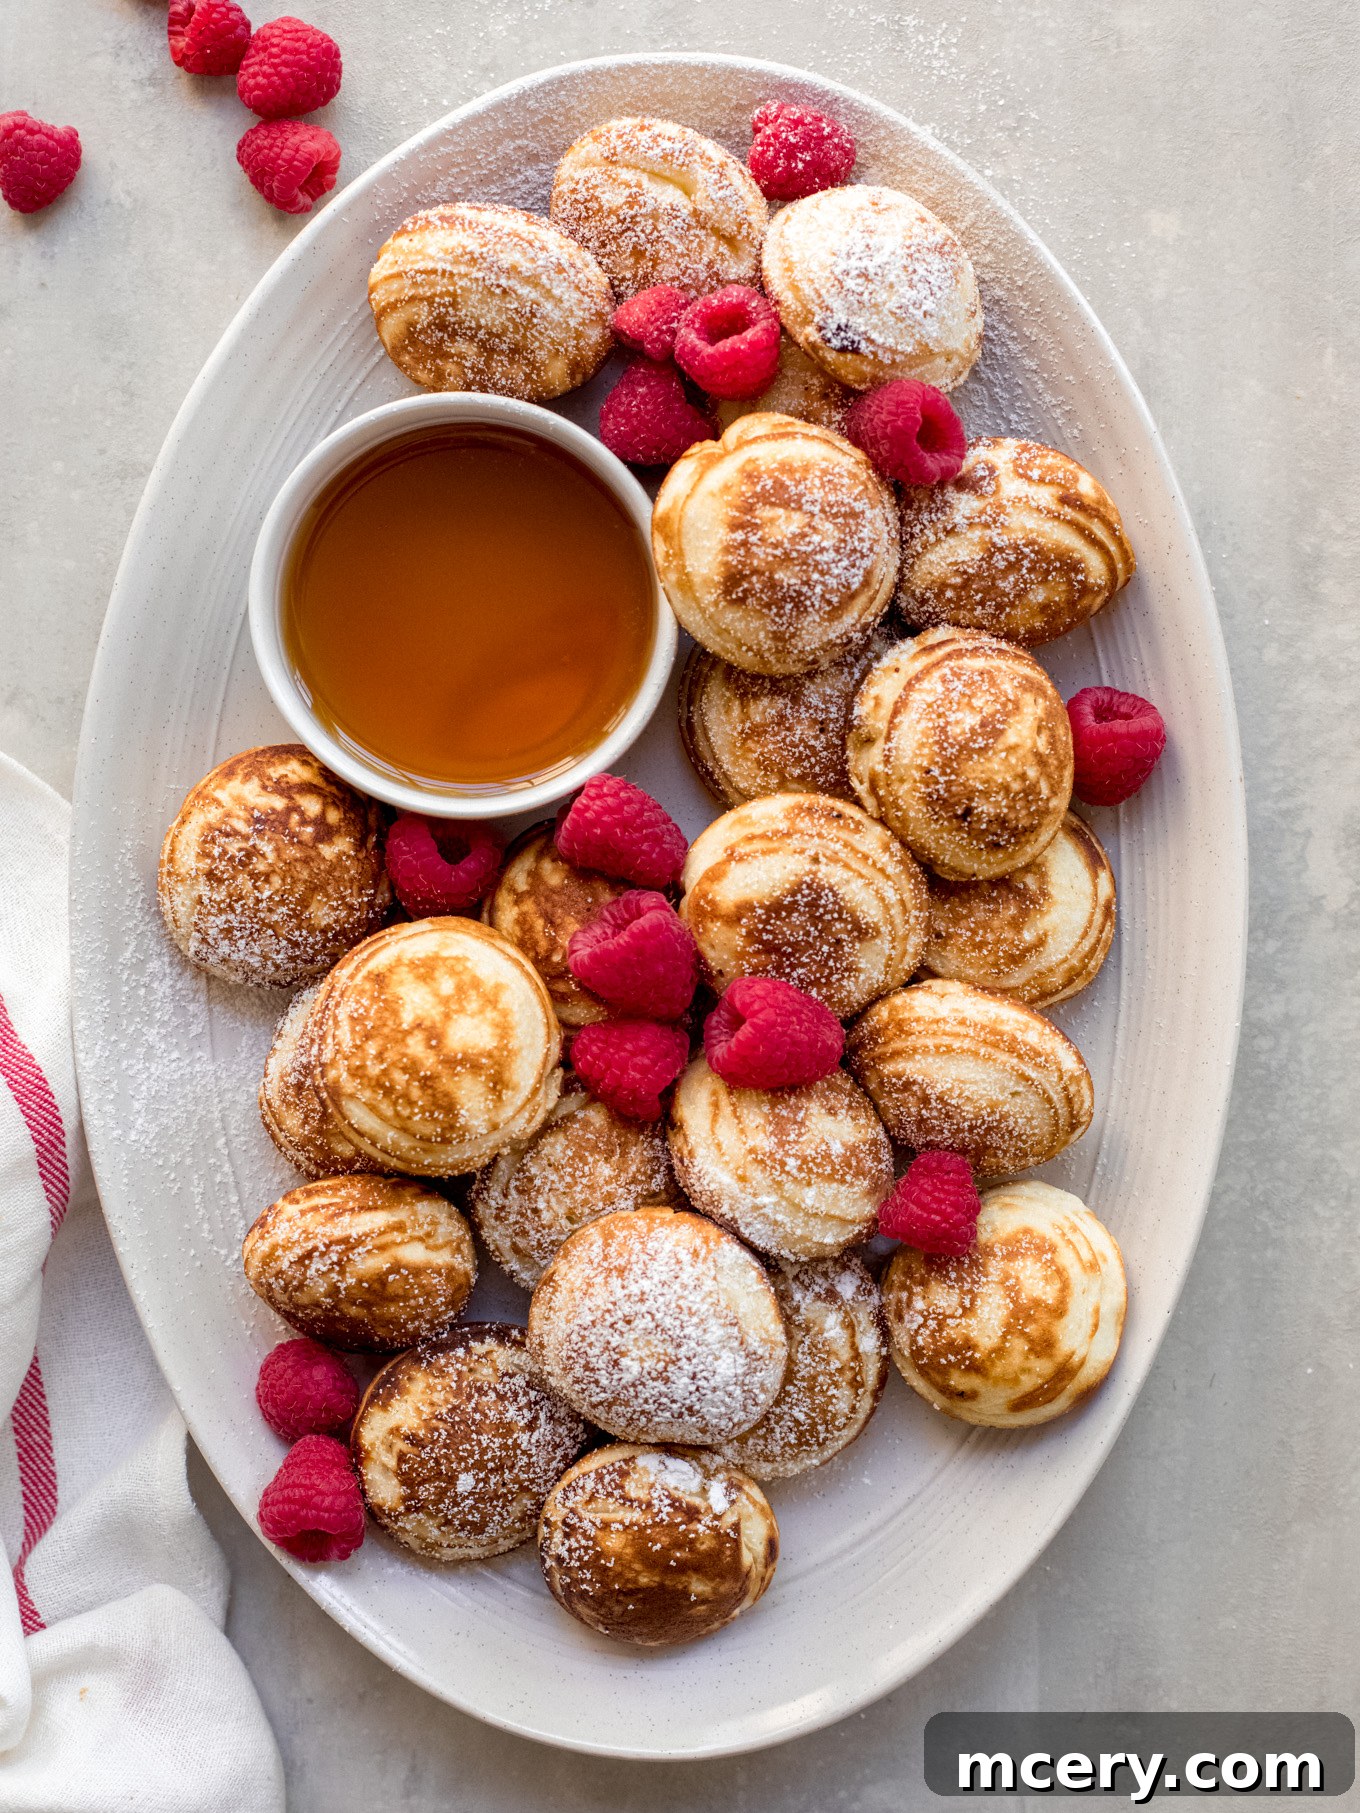
Craving more delightful breakfast recipes? Expand your repertoire with a vibrant Fruit Toast with Honey-Vanilla Mascarpone, luxurious Brioche French Toast, or our fluffy Blueberry Ricotta Pancakes for an unforgettable start to your day.
What Exactly Are Danish Pancakes (Æbleskiver)?
Danish Pancakes, universally recognized as Æbleskiver, are a beloved traditional Danish delicacy. While enjoyed year-round, they hold a special place in the hearts of Danes during the month of December, becoming an iconic part of Christmas celebrations. These charming, spherical delights are traditionally crafted from a rich buttermilk batter, resulting in a wonderfully crisp, golden-brown exterior that encases an incredibly light, airy, and fluffy interior.
The distinctive shape of Æbleskiver is achieved using a specialized cooking pan, aptly named an æbleskiver pan. This unique pan features multiple round indentations or wells, perfectly designed to cradle the batter as it cooks and transforms into its signature puff-ball form. The batter itself shares similarities with conventional pancake batter but is often enhanced with additional richness and creaminess thanks to a generous inclusion of eggs, butter, and milk. Some traditional recipes may even call for specific spices like cardamom or lemon zest to add an extra layer of flavor.
Interestingly, the name “Æbleskiver” literally translates to “apple slices.” This originates from the dish’s historical roots, where these ball-shaped pancakes were originally made with small pieces of apple baked inside. Over time, however, the recipe has evolved significantly. While some variations still incorporate apple, modern Æbleskiver recipes often feature a variety of different fillings—from fruit preserves to chocolate—or are enjoyed plain, allowing the pure, buttery pancake flavor to shine through. This adaptability makes Æbleskiver a versatile treat suitable for any palate.
Essential Ingredients for Fluffy Danish Pancakes
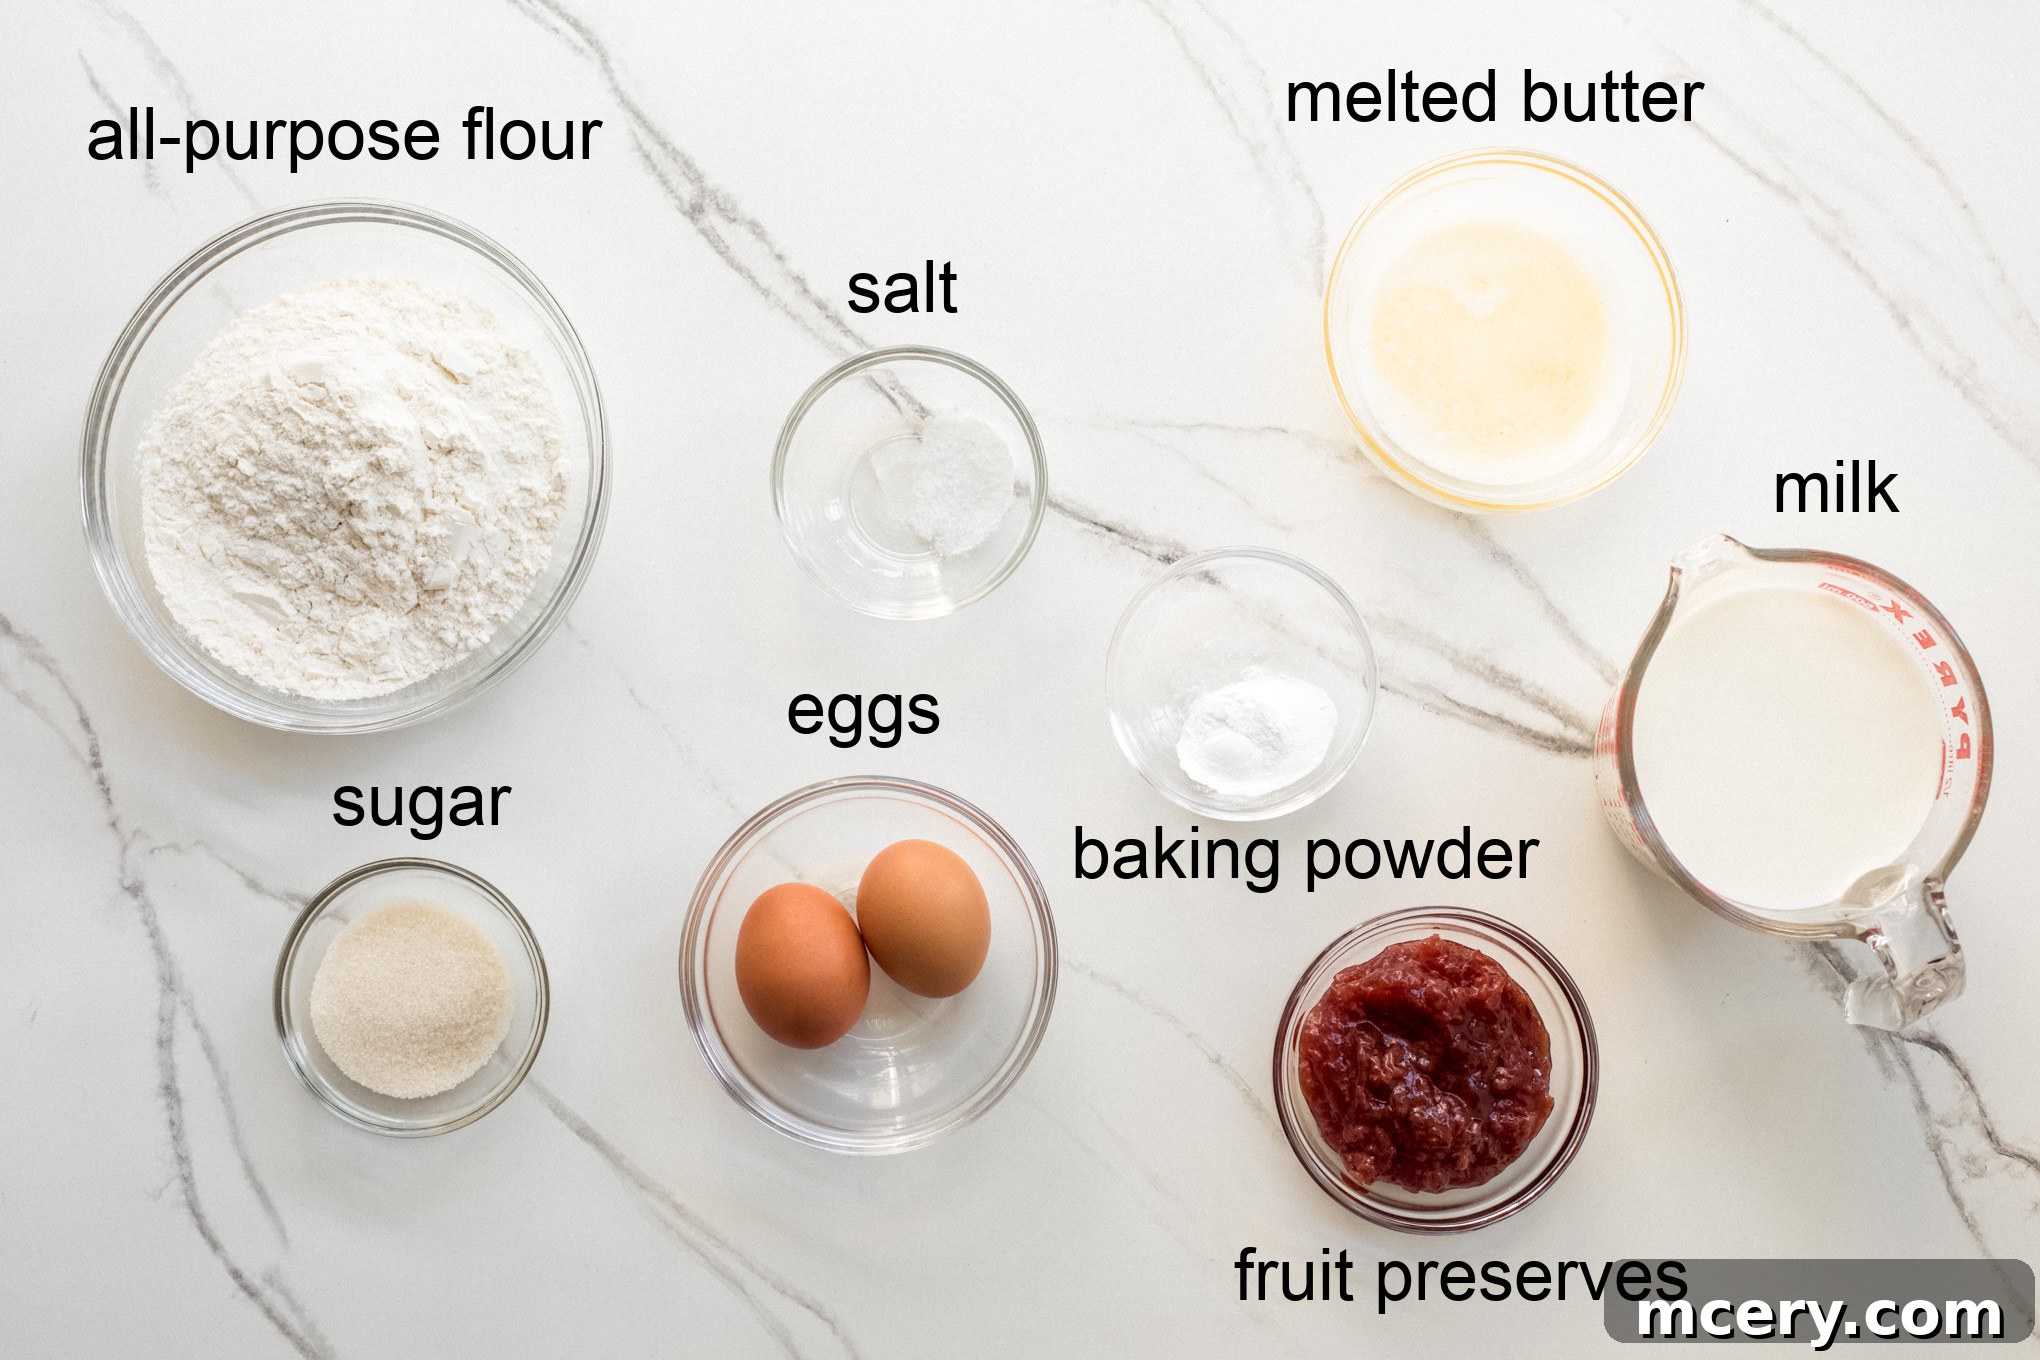
Creating these delightful Danish pancake balls requires a few basic ingredients, all of which are readily available at your local grocery store. The magic truly happens when these simple components come together to form a rich, airy batter that puffs up beautifully in the æbleskiver pan.
- All-purpose flour: This forms the essential structure and foundation for the perfect pancake texture. It provides the right balance of protein and gluten to ensure your Æbleskiver are both tender and capable of holding their spherical shape.
- Baking powder: The primary leavening agent, baking powder is the “magic ingredient” responsible for the incredible rise and signature light, fluffy texture of these pancakes. It reacts when wet and with heat, creating air bubbles that make the pancakes wonderfully airy.
- Kosher salt: A pinch of salt is crucial for balancing out the sweetness of the sugar and any fillings. It enhances all the other flavors, preventing the pancakes from tasting flat and adding a subtle depth.
- Cane or granulated sugar: Sugar sweetens the pancakes to perfection and contributes significantly to the desirable golden-brown, slightly crispy crust that forms as they cook in the hot pan.
- Large Eggs: Eggs serve multiple vital roles in the batter. The yolks add richness, moisture, and a beautiful yellow hue, while the whites, when beaten separately, are gently folded in to incorporate air, which is key to achieving that characteristic light and fluffy interior. They also act as a binder, holding everything together.
- Whole Milk: Milk adds essential moisture to the batter, creating a tender and soft crumb. Using whole milk contributes to a richer flavor profile and a more luxurious texture compared to lower-fat alternatives.
- Unsalted Butter: Melted unsalted butter is folded into the batter, adding an extra layer of decadence, richness, and an unmistakable buttery flavor that is central to traditional Danish pancakes.
- Pure Vanilla Extract (Optional): While not strictly traditional, a touch of vanilla extract can enhance the overall sweetness and aroma, adding a comforting, familiar note to your Æbleskiver.
- Fruit preserves: For the classic filled Æbleskiver, fruit preserves or jam provide a natural sweetness and a vibrant burst of fruit flavor in the center of each pancake. Strawberry, raspberry, or apricot preserves are popular choices.
Crafting Perfect Danish Pancakes: A Step-by-Step Guide
Making these mouth-watering Æbleskiver is an incredibly rewarding experience, and easier than you might think! By following these clear, easy-to-understand steps, you’ll be whipping up a batch of these golden, fluffy Danish pancakes in no time. For a quick overview, refer to the recipe card below.
Essential Tools for Æbleskiver Success
Before you dive into the delicious process of making Æbleskiver, ensure you have these specific tools on hand. They are key to achieving the traditional shape and perfect texture of Danish pancakes:
- Danish Pancakes Pan (Æbleskiver Pan): This is the most crucial tool. The specialized pan with its distinct round wells is what gives Æbleskiver their signature spherical shape. You can typically find these at well-stocked kitchen stores, online retailers like Amazon, or specialty Scandinavian shops. Cast iron versions are excellent for even heat distribution and durability.
- Pastry Brush or Non-Stick Spray: You’ll need a way to lightly grease the wells of your æbleskiver pan before adding the batter. A pastry brush is ideal for evenly distributing melted butter, which adds an extra layer of flavor and ensures easy release. Alternatively, a good quality non-stick cooking spray works just as effectively and is often quicker.
- Sharp Tool for Turning: To flip the partially cooked pancakes and help them form their round shape, a thin, sharp tool is indispensable. A wooden skewer, a traditional chopstick, or even a knitting needle are perfect for this delicate task. Their pointed tips allow you to gently rotate the pancakes without deflating them.
Detailed Instructions for Making Æbleskiver
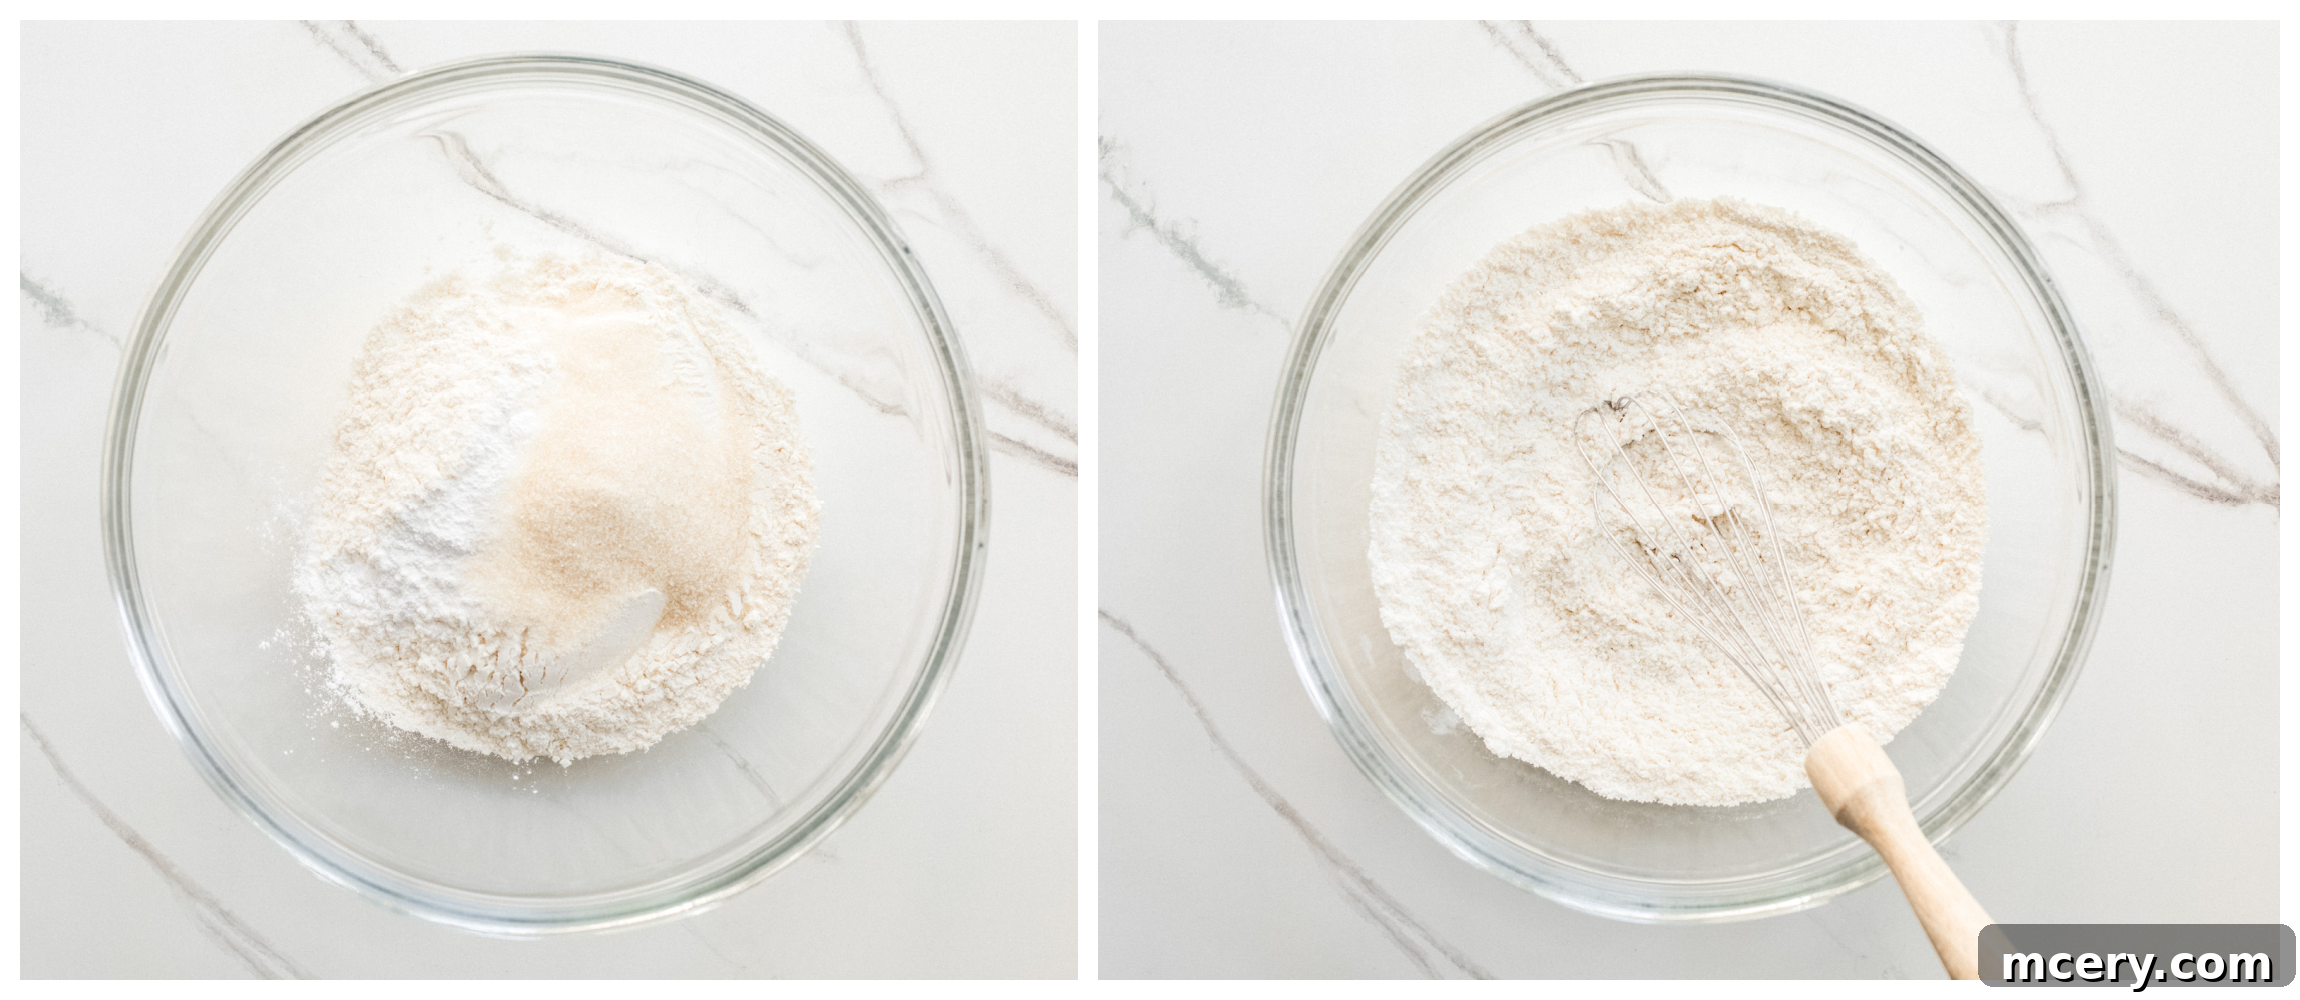
- Combine Dry Ingredients: In a large mixing bowl, thoroughly whisk together the all-purpose flour, baking powder, kosher salt, and granulated sugar. Ensure these dry ingredients are well combined to distribute the leavening evenly, guaranteeing a consistent rise.
- Prepare Wet Ingredients: In a separate, medium-sized bowl, lightly whisk the egg yolks until smooth. Then, gradually add the whole milk, melted (and slightly cooled) unsalted butter, and optional pure vanilla extract. Whisk everything together until you have a cohesive yolk mixture.
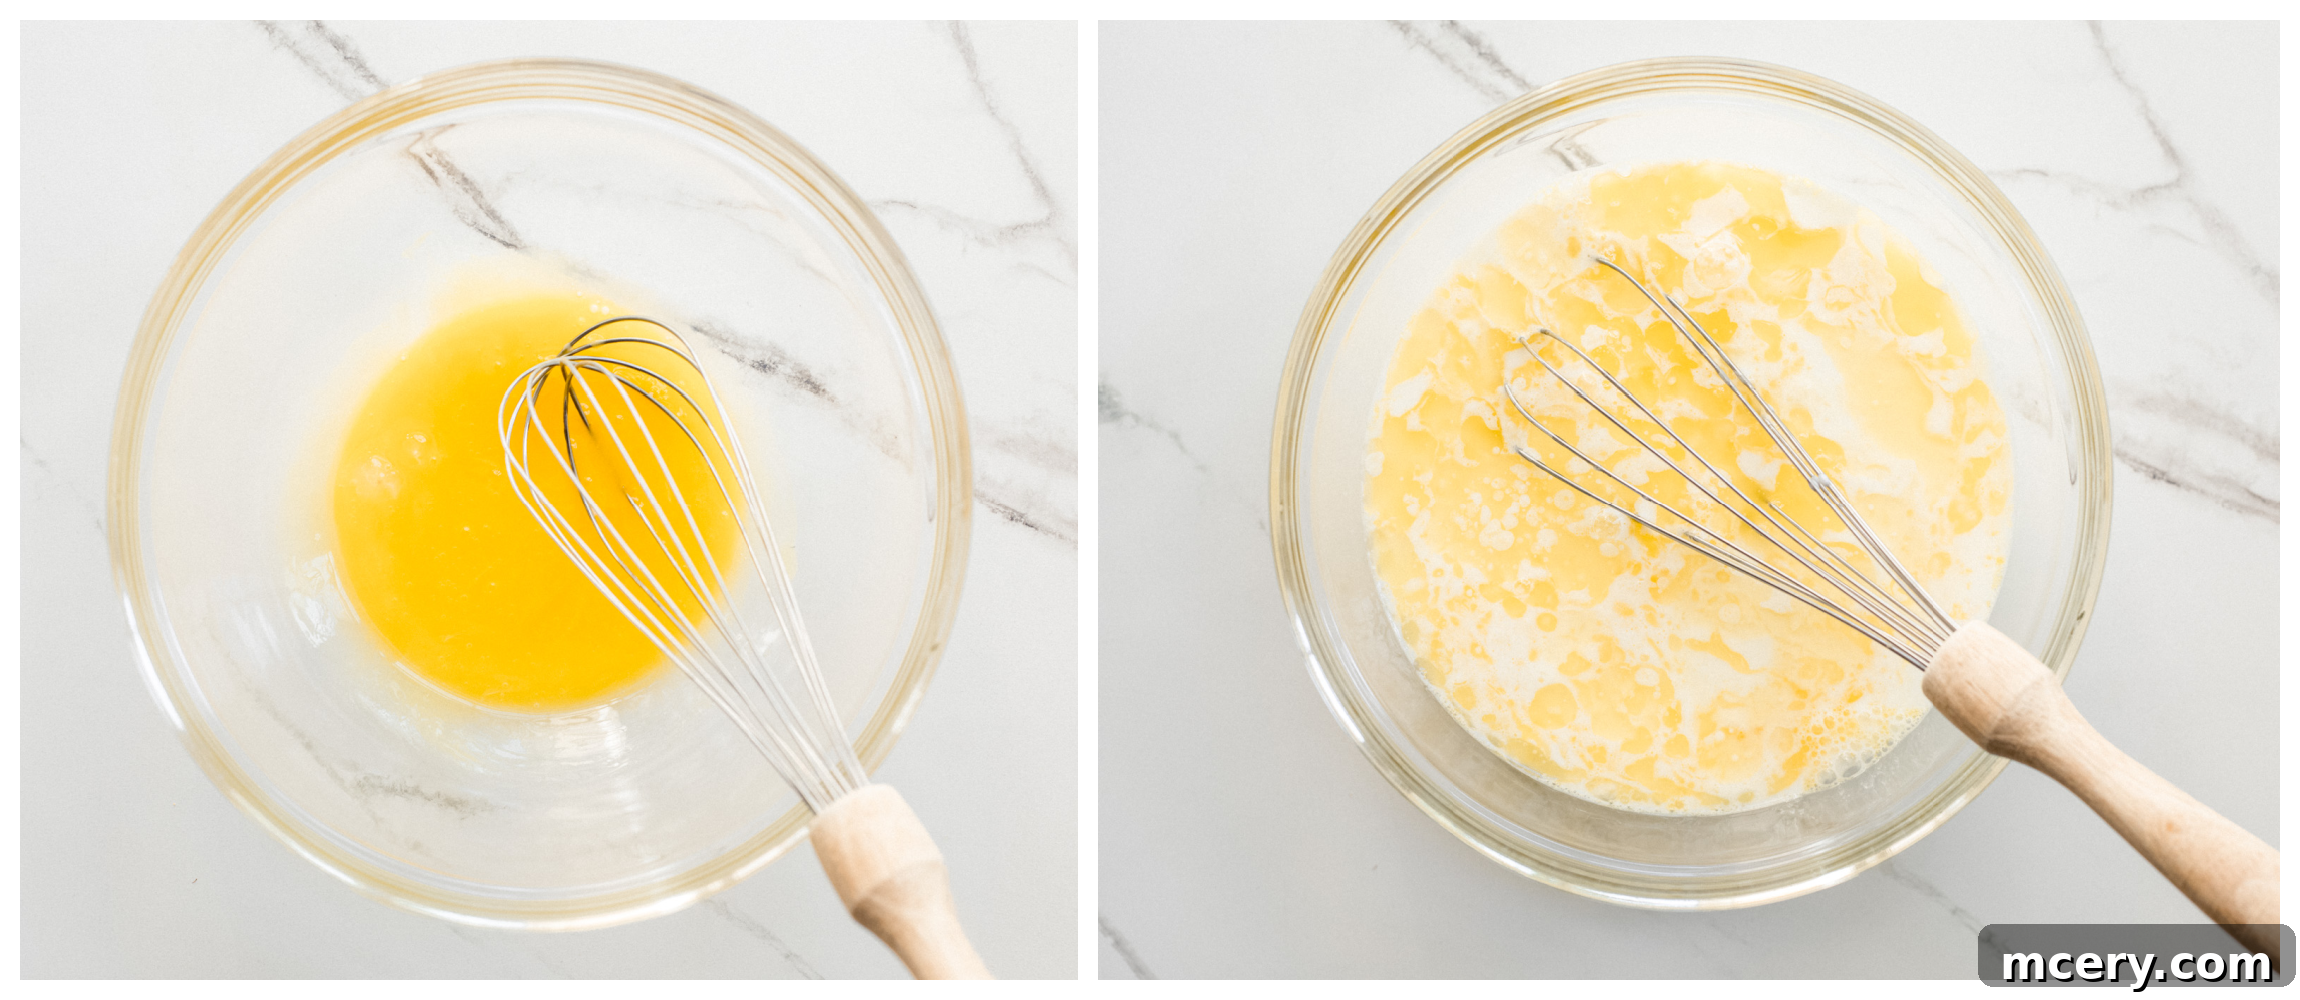
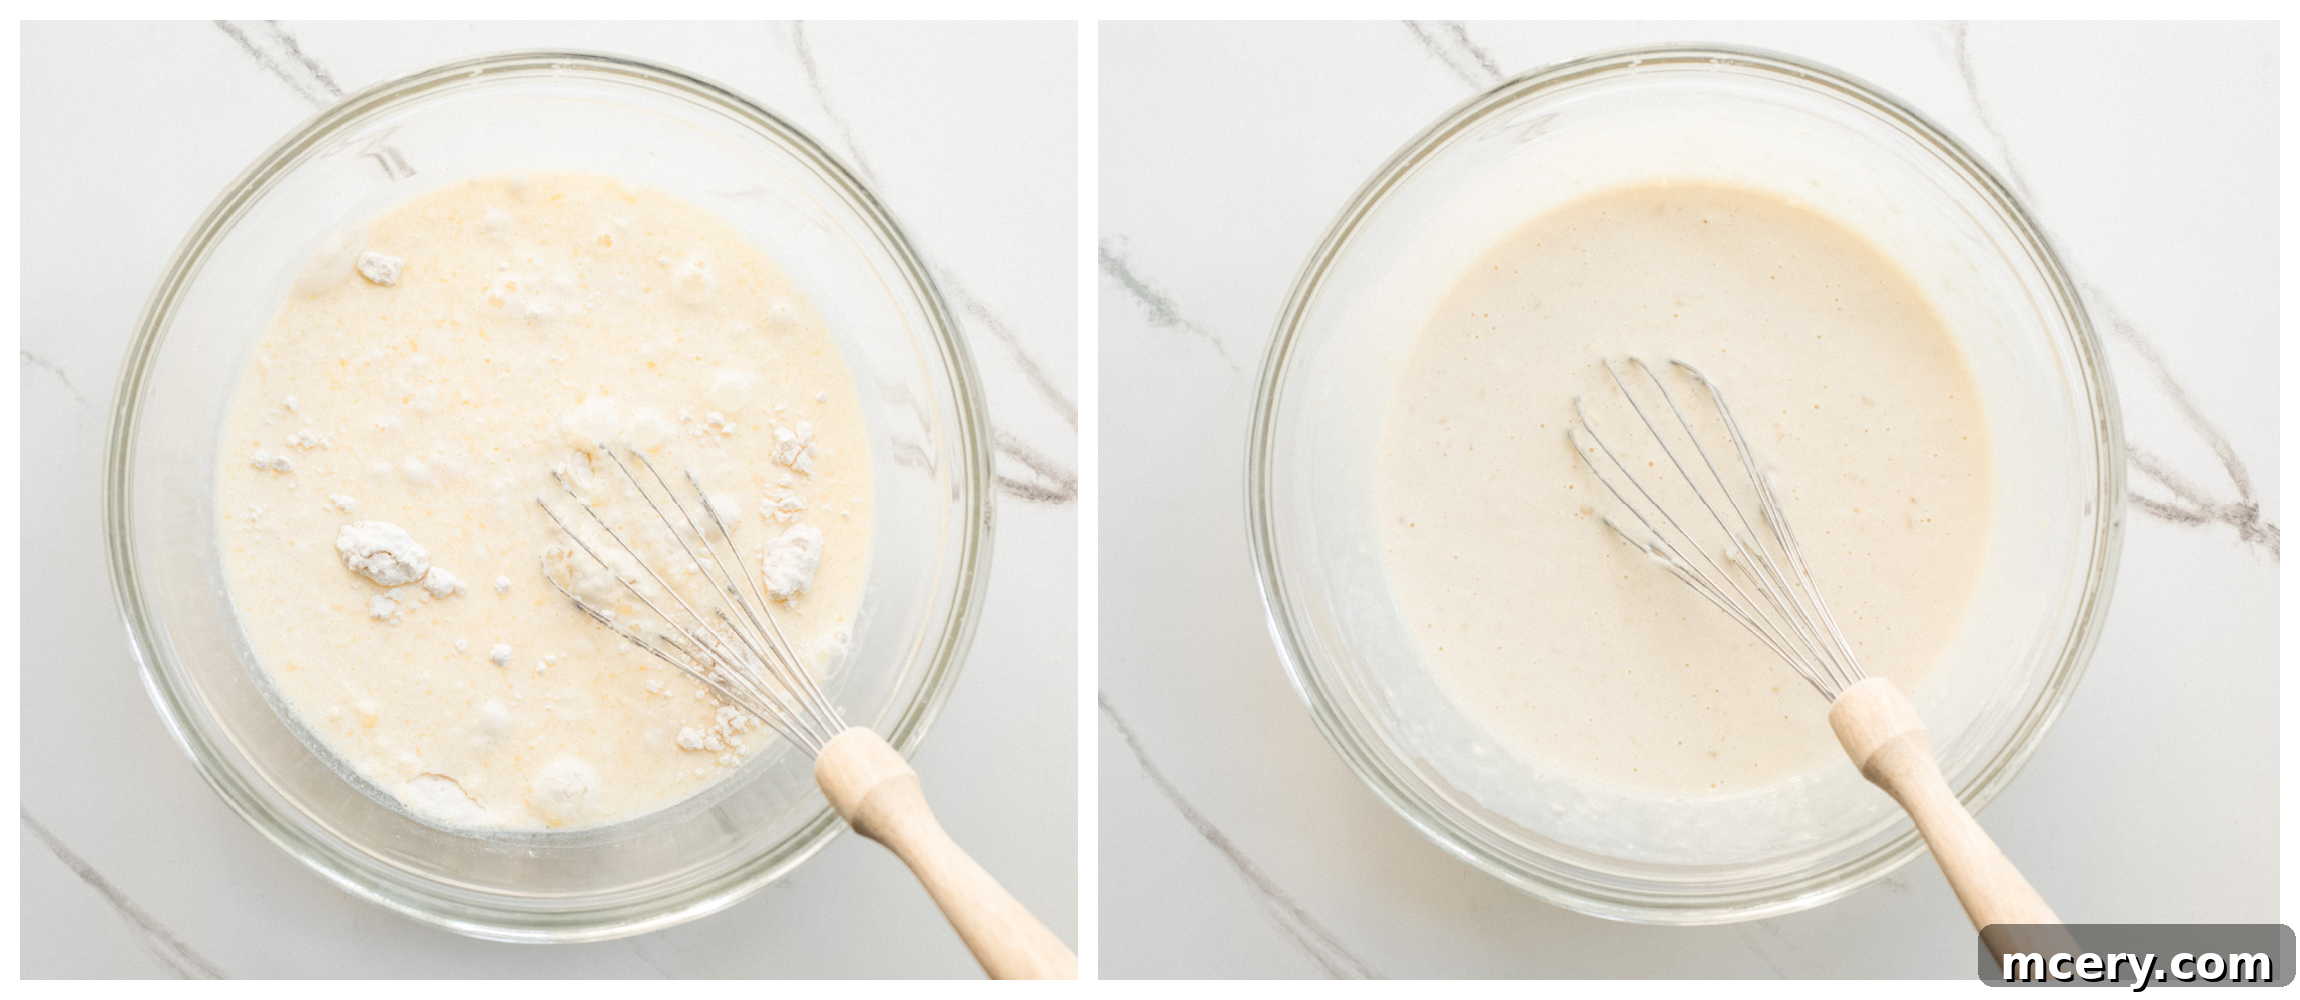
- Combine Wet and Dry: Pour the wet yolk mixture into the bowl with your dry ingredients. Whisk gently until just combined. A few small lumps are perfectly fine and even desirable; overmixing can develop gluten too much, leading to tough pancakes.
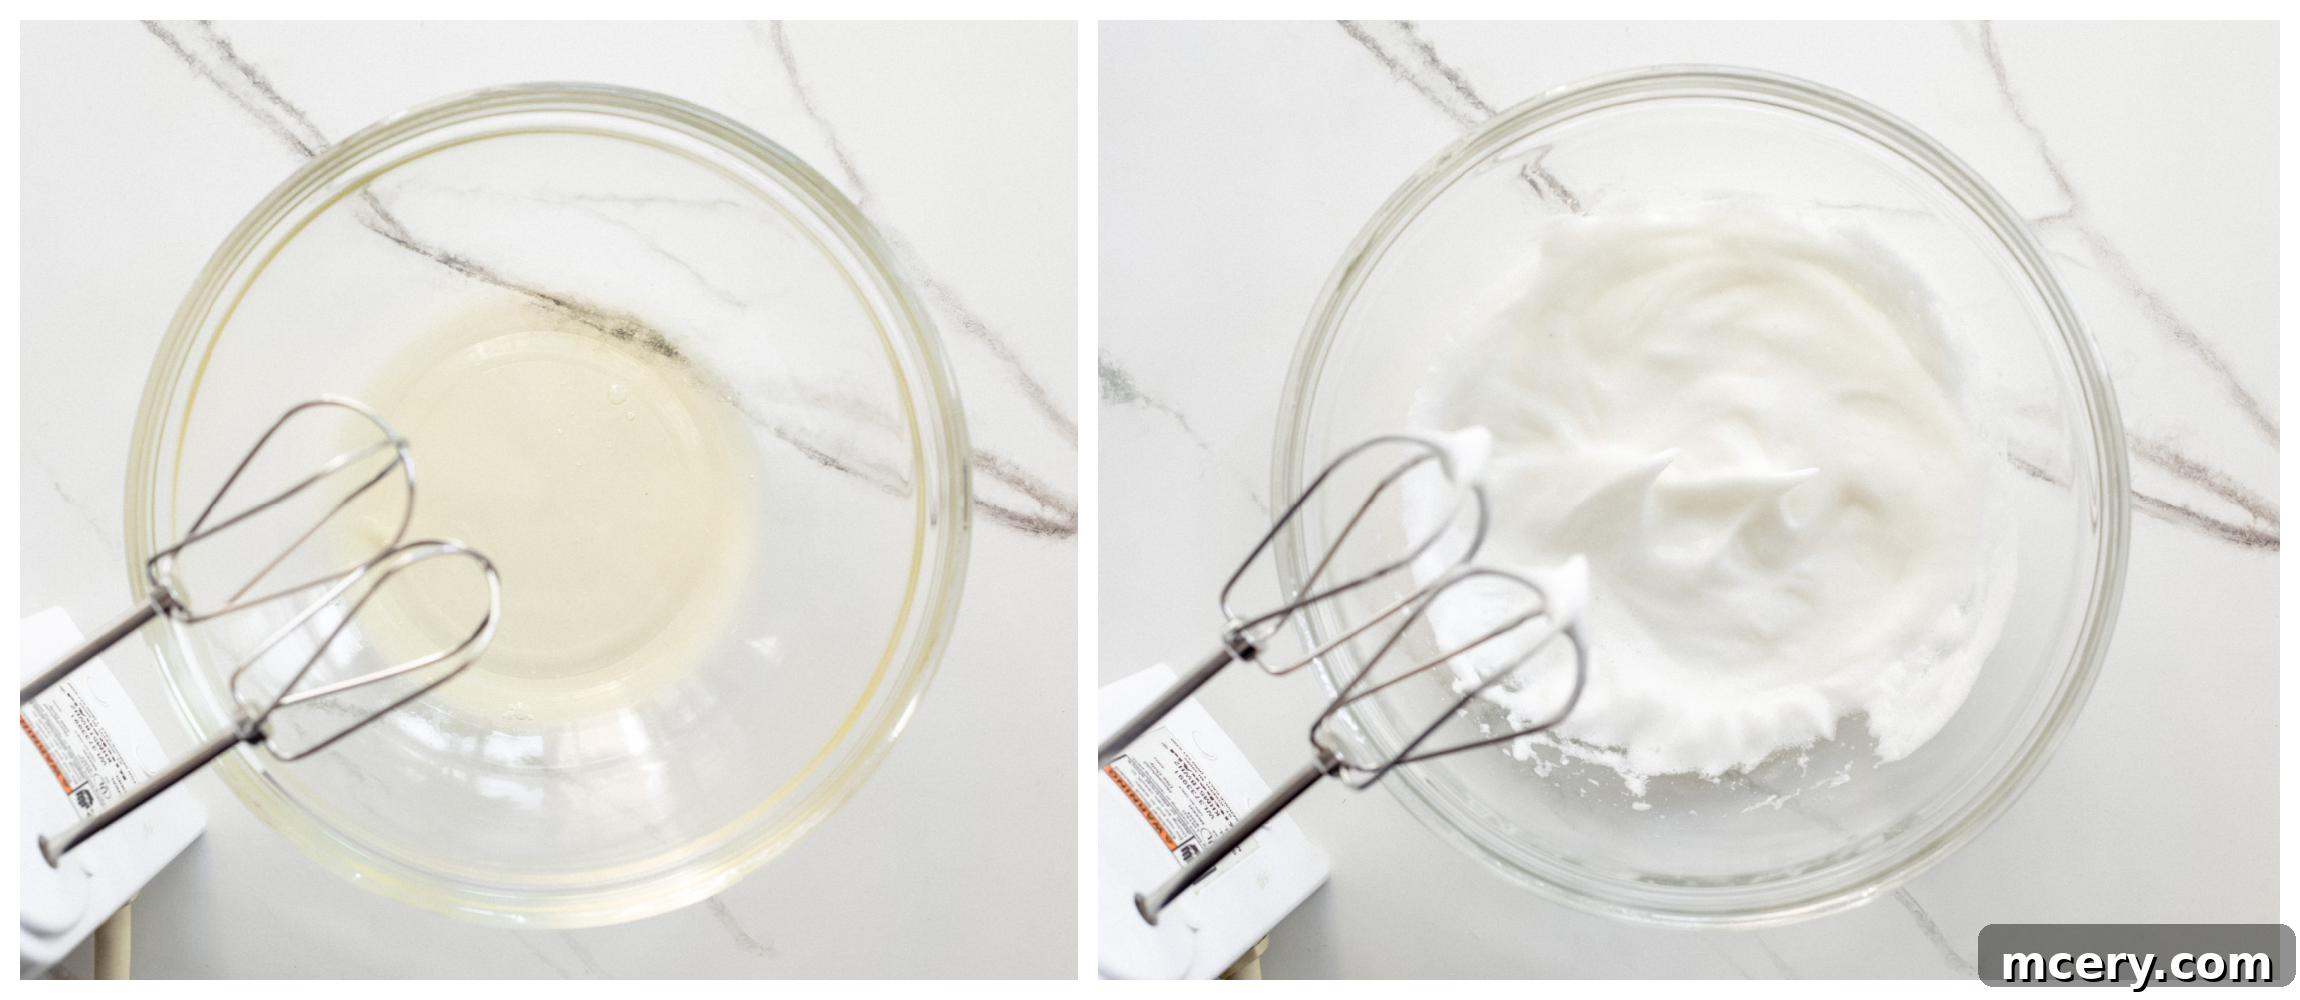
- Whip Egg Whites: In a separate, clean bowl, add the two egg whites. Using an electric mixer (or a whisk and a lot of elbow grease!), beat the egg whites on high speed until they form medium-stiff peaks. This means the peaks should hold their shape firmly when you lift the beaters, but the very tip might curl slightly. This process usually takes about 2 to 3 minutes. These whipped whites are crucial for the Æbleskiver’s airy texture.
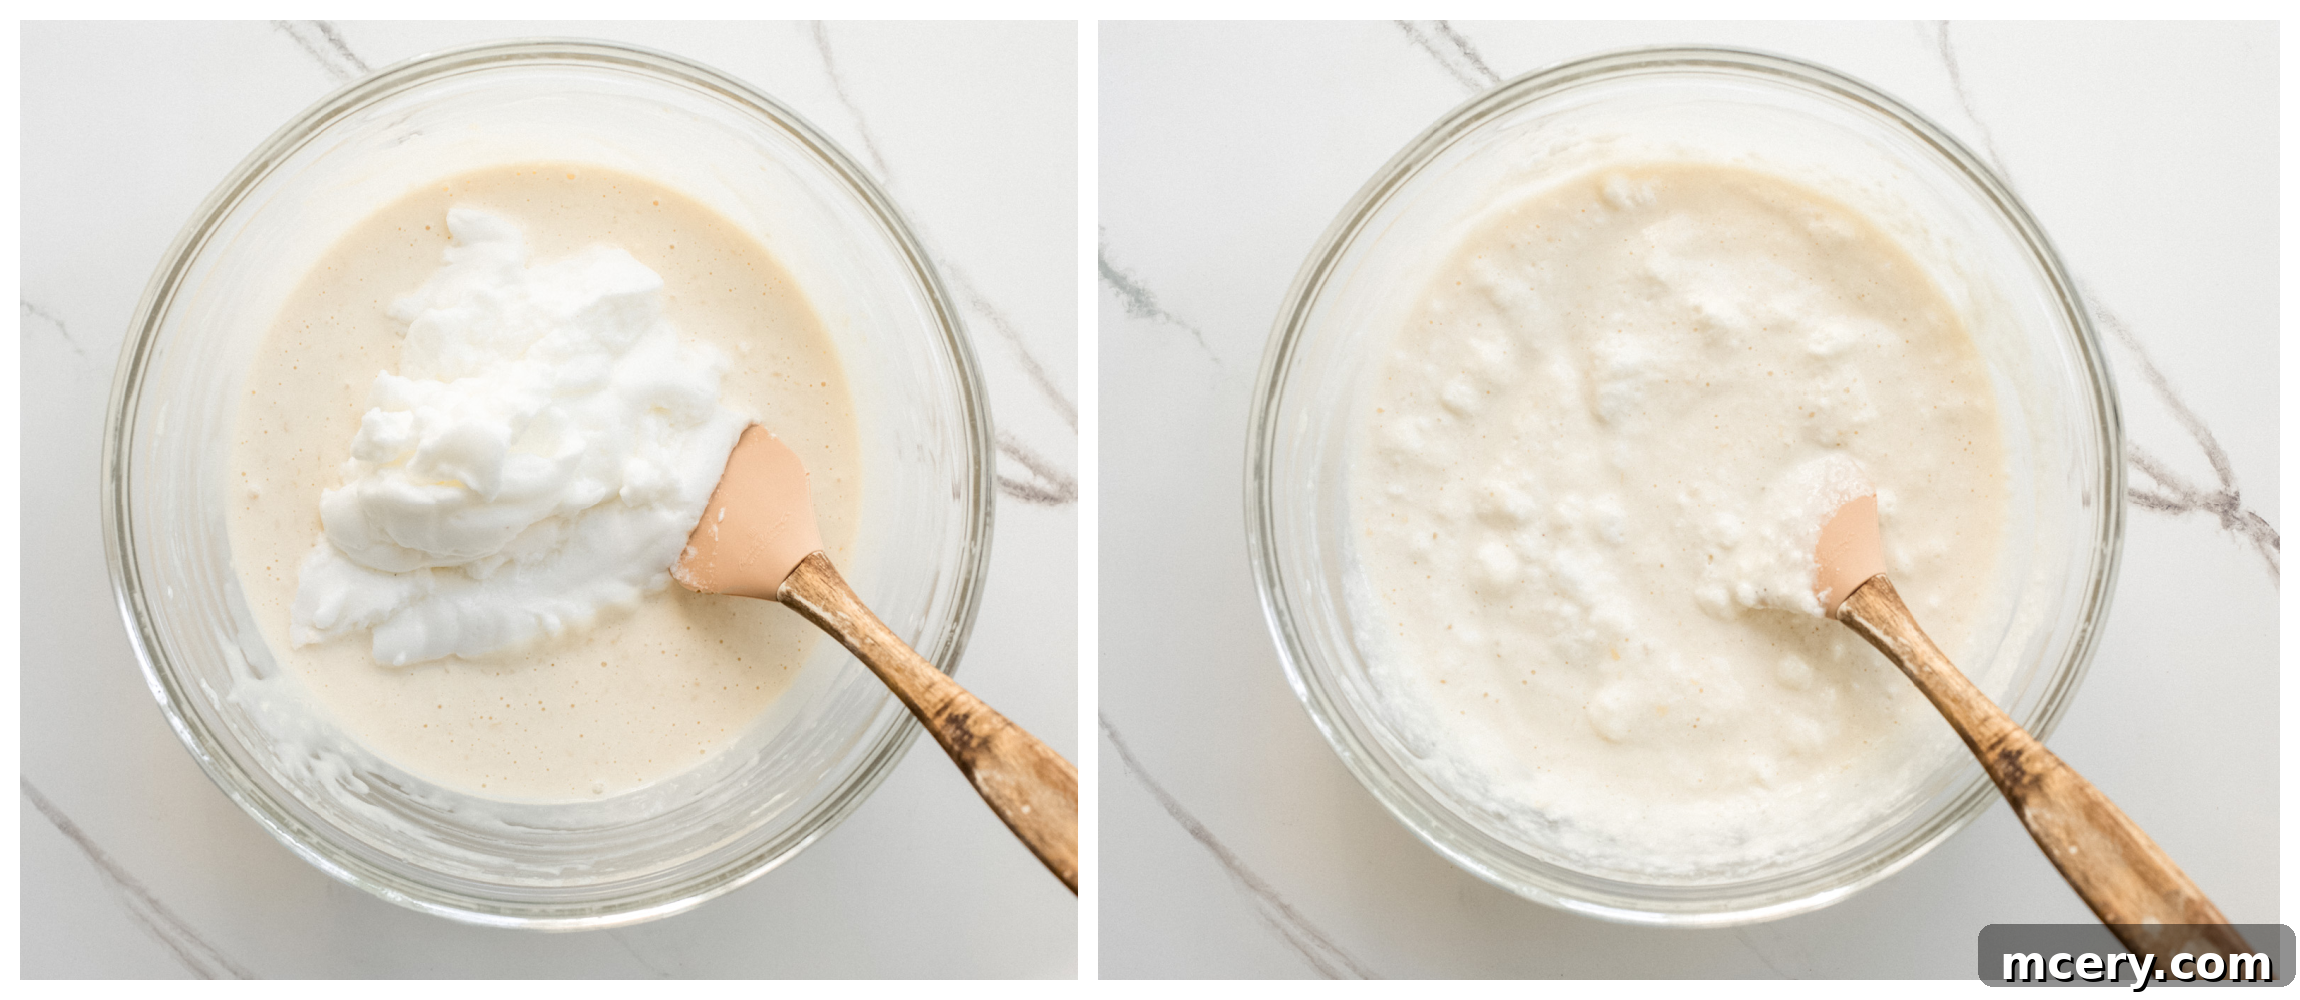
- Fold into Batter: Carefully and gently, using a rubber spatula, fold the beaten egg whites into the prepared pancake batter. Use a light hand to preserve as much air as possible in the whites. This folding technique is essential for achieving the characteristic light and fluffy internal texture of Æbleskiver.
- Heat and Grease the Pan: Place your æbleskiver pan over medium heat. Allow it to heat for a few minutes until it’s warm but not smoking. Lightly coat each round well with cooking spray or brush with a little melted butter. This prevents sticking and helps create a beautiful golden crust.
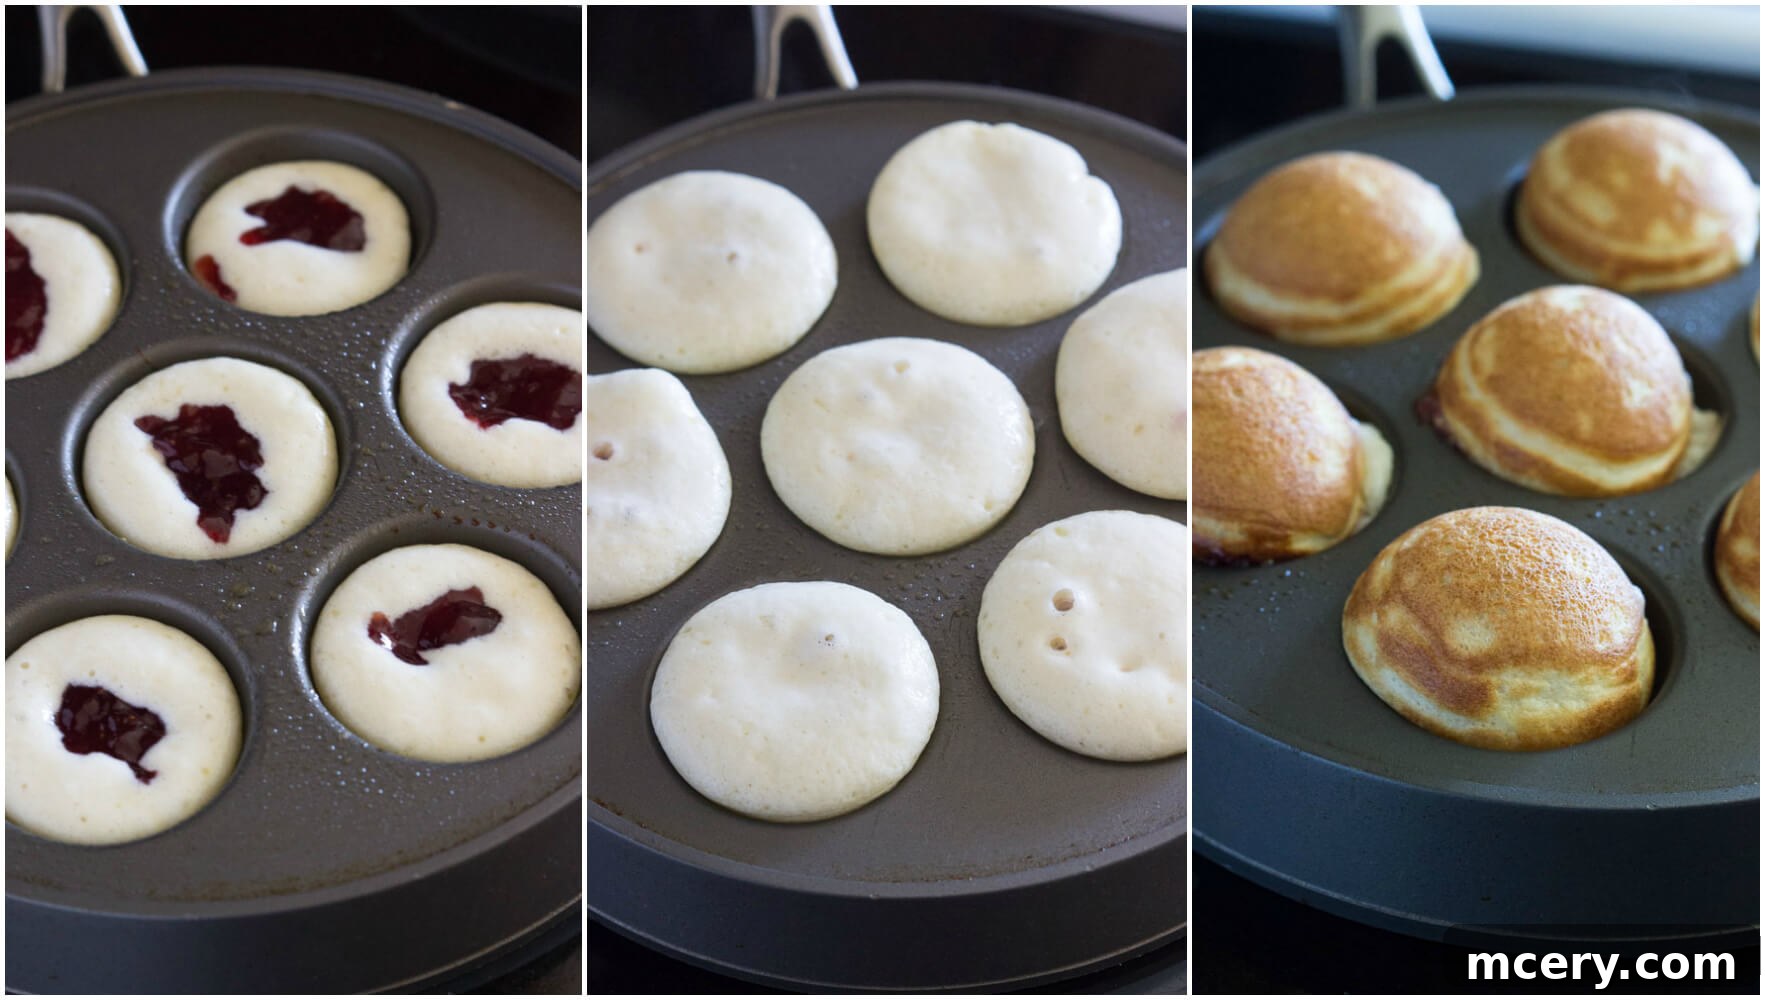
- Cook the Pancakes: Spoon approximately 1 tablespoon of batter into each well of the hot pan. Immediately, if desired, add about 1 teaspoon of your chosen fruit preserves (or other filling) into the center of the batter in each well. Then, top off each well with another tablespoon of batter, ensuring the filling is enclosed. Cook for about 2-3 minutes, or until the bottoms are golden brown and the edges appear set.
- Flip and Finish: Using two wooden skewers or chopsticks (or your designated sharp turning tool), gently insert them into the side of each pancake and carefully flip them over. The goal is to rotate them so they cook on the other side and begin to form a complete spherical shape. Continue cooking for another 2-3 minutes, or until they are golden brown all around and cooked through to the center. You might need to rotate them a few times to achieve even browning and a perfectly round shape.
- Keep Warm and Repeat: As each batch of Æbleskiver finishes cooking, transfer them to a plate. If you’re making a larger quantity, you can keep them warm in a preheated oven at 275°F (135°C) on a baking sheet lined with parchment paper while you cook the remaining batter. This ensures all your delicious Danish pancakes are warm and ready to enjoy together.
Exciting Variations for Your Danish Pancake Balls
While traditional Æbleskiver are utterly delicious on their own, part of their charm lies in their adaptability. Don’t hesitate to personalize your Danish pancake balls recipe with these fun and easy variations, adding your unique culinary touch and exploring new flavor profiles:
- Go Nuts for Flavor and Crunch: For an added layer of texture and a rich, nutty flavor, stir in ¼ cup of finely chopped nuts directly into the batter. Walnuts, pecans, almonds, or even pistachios would be fantastic choices, providing a delightful crunch with every bite.
- Embrace Fruity Goodness: Move beyond preserves and experiment with fresh fruit for a brighter, more natural flavor. Instead of jam, tuck small pieces of fresh fruit like finely diced strawberries, tiny blueberries, or thinly sliced peaches into the center of each pancake. The warmth of the cooking will gently soften the fruit, releasing its juices.
- Get Cheesy for a Savory Twist: For a surprisingly delicious savory take, fill your Æbleskiver with your favorite cheese. A small cube of sharp cheddar cheese or a dollop of creamy goat cheese will melt beautifully inside, offering a delightful contrast to the slightly sweet batter. Serve these savory versions with a sprinkle of fresh herbs or a side of crispy bacon.
- Spice It Up for Warmth: Infuse your Danish pancakes with warm, aromatic spices. Add a pinch of ground cinnamon, nutmeg, ginger, or even a touch of cardamom (a staple in Scandinavian baking) to the dry ingredients for a cozy and inviting flavor, perfect for chilly mornings.
- Indulge with Chocolate: For the ultimate sweet treat, incorporate chocolate! Add a few mini chocolate chips to the batter, or for a molten center, place a small dollop of Nutella or a square of your favorite chocolate bar into the middle of each pancake before adding the second layer of batter.
- Citrus Zest: Grate in a teaspoon of lemon or orange zest into the batter for a bright, refreshing aroma and flavor that beautifully complements the richness of the pancakes.
- Buttermilk Boost: For an even tangier and more tender Æbleskiver, consider replacing half or all of the whole milk with buttermilk. The acidity in buttermilk reacts with baking powder to create an even lighter, more tender crumb.
Pro Tips for Flawless Danish Pancakes
To ensure your Danish pancakes turn out perfectly golden, fluffy, and absolutely delicious every single time, keep these expert tips in mind. They’ll help you master the art of making Æbleskiver and impress everyone at your breakfast table:
- Proper Pan Preparation is Key: Before you even think about adding batter, make sure your æbleskiver pan is properly preheated and adequately greased. Heat the pan over medium heat for a few minutes. To check if it’s ready, drop a tiny bit of water into a well; if it sizzles and evaporates quickly, the pan is hot enough. Then, lightly coat each well with cooking spray or brush generously with melted butter. This crucial step prevents sticking, ensures easy flipping, and contributes to that beautiful, even golden-brown crust.
- Fold Gently, Don’t Stir Vigorously: When incorporating the beaten egg whites into your batter, the technique is paramount. Always use a rubber spatula and employ a gentle folding motion. Avoid stirring or beating vigorously, as this will quickly deflate the air you’ve worked so hard to incorporate into the egg whites. Losing that air means your pancakes will be denser and less fluffy, missing the signature light texture of Æbleskiver.
- Resist the Urge to Overfill: It’s tempting to fill each well to the brim, but exercise restraint! Only fill each well of the æbleskiver pan about two-thirds full with batter. If you overfill, the batter will expand as it cooks and spill over the edges, making it incredibly difficult to flip the pancakes cleanly and achieve that perfect round shape. Less is more for ideal puffiness and form.
- Monitor Heat for Even Cooking: Keep a close eye on your stovetop heat. Medium heat is typically ideal, but every stove is different. If your pancakes are browning too quickly on the outside but remain raw in the middle, reduce the heat slightly. If they’re not browning enough, increase it a touch. Consistent, moderate heat ensures the pancakes cook through evenly without burning.
- The Art of the Flip: Flipping Æbleskiver requires a bit of practice but is easy to master. Use two wooden skewers or chopsticks. Once the bottom is golden and the edges are set, insert one skewer into the side of the pancake and the other opposite it. Gently roll the pancake about halfway, then add your filling (if using), and cover with more batter. Continue rotating until it’s a full ball and fully cooked. This rolling motion creates the spherical shape.
- Cool Slightly Before Topping: While it’s hard to resist, allowing your warm Æbleskiver to cool slightly for a minute or two after cooking is beneficial. This prevents your toppings—especially powdered sugar, whipped cream, or glazes—from melting too quickly or becoming overly runny, ensuring a prettier presentation and a more enjoyable eating experience.
- Don’t Skimp on Resting Time (if applicable): Some Æbleskiver recipes suggest resting the batter for 15-30 minutes before cooking. While not explicitly mentioned in the core recipe here, if you find your batter a bit too thin or want to ensure maximum tenderness, a short rest allows the flour to fully hydrate and the gluten to relax, which can improve the final texture.
Creative Ways to Serve Danish Pancakes
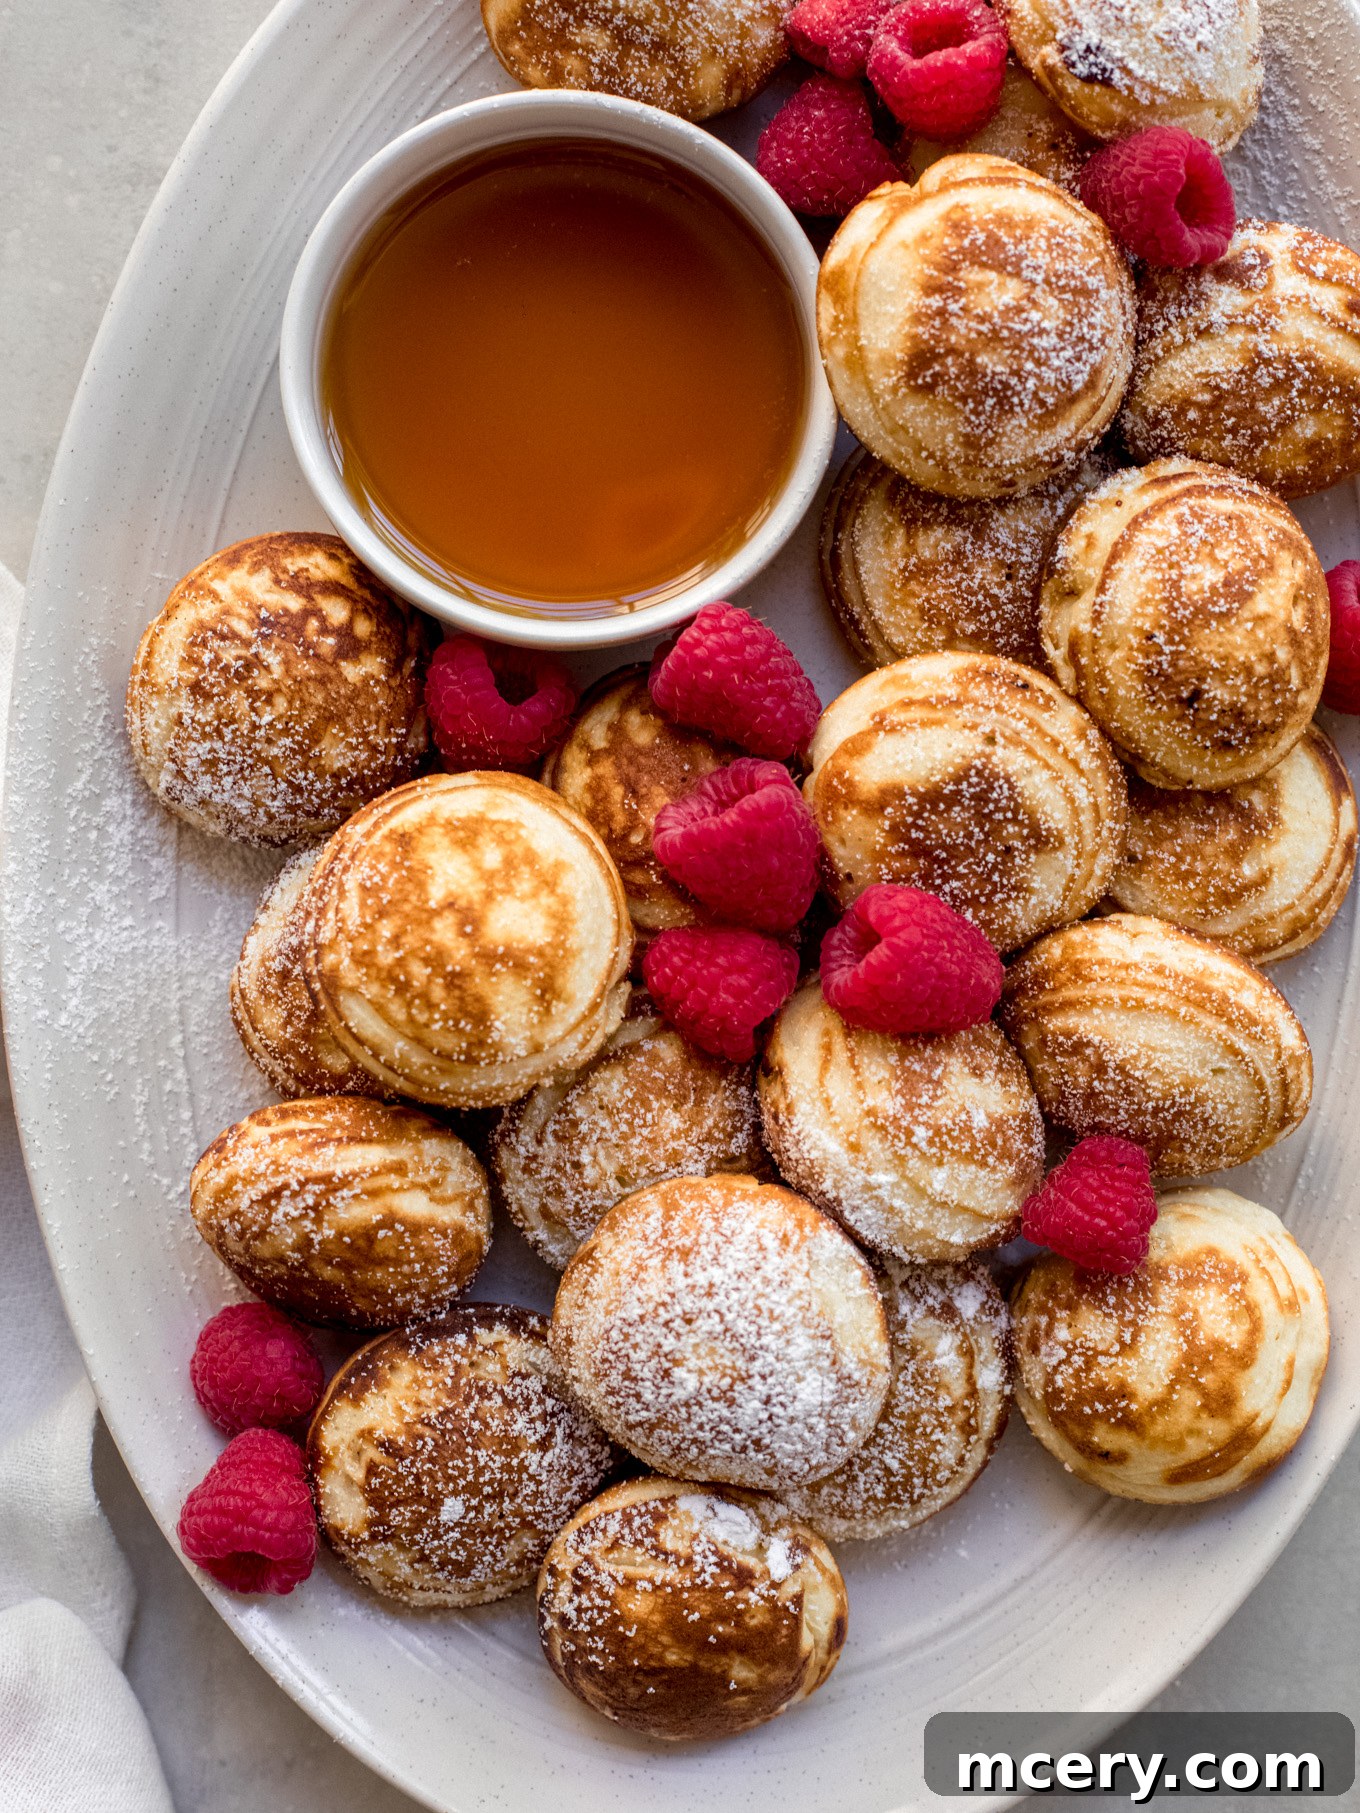
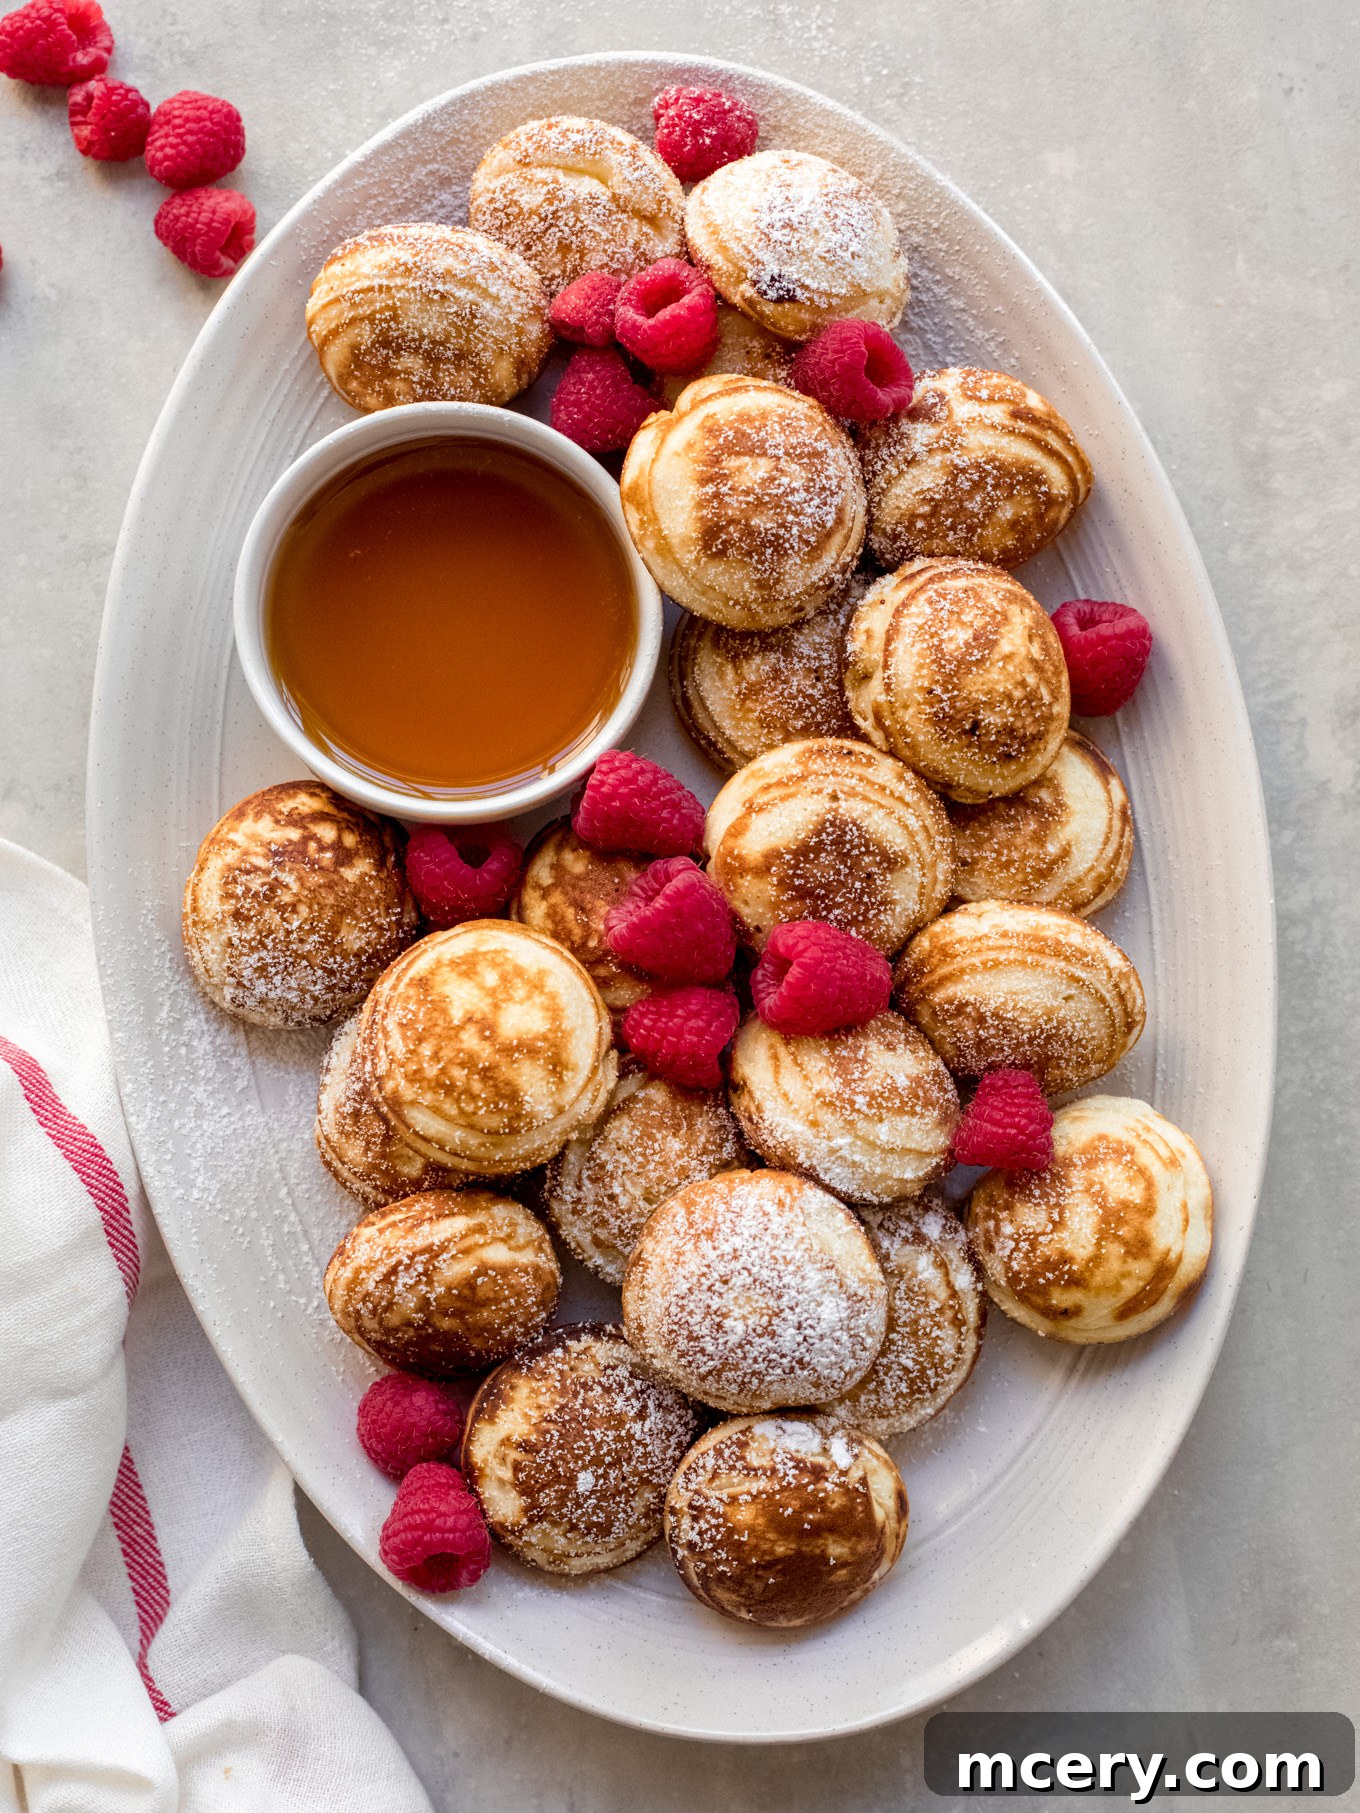
Once your beautiful batch of golden Danish pancakes is ready, the serving possibilities are truly endless, limited only by your imagination! While delightful on their own, a few additions can transform them into an even more memorable treat. The classic and most traditional approach is elegantly simple: a generous dusting of powdered sugar (confectioners’ sugar) over the warm Æbleskiver, often accompanied by a generous pour of pure maple syrup or a side of your favorite fruit jam or preserves.
If you’re aiming for something a bit more elaborate or indulging your sweet tooth, consider topping them with a dollop of freshly whipped cream. Add a medley of vibrant, fresh berries—strawberries, blueberries, raspberries, or a mix—for a burst of color and tangy sweetness that contrasts beautifully with the warm pancakes. For the ultimate indulgence, a drizzle of rich chocolate sauce, a sprinkle of mini chocolate chips, or even a spoonful of warm caramel can elevate these humble pancakes to a gourmet dessert experience.
Danish pancakes are not just for breakfast; they also make a truly delicious and charming addition to any brunch spread or holiday gathering. Pair them alongside savory options like a fluffy Asparagus Frittata, classic bagels with a creamy Smoked Salmon Spread with Greek Yogurt and Cucumbers, and refreshingly healthy sips like our invigorating green Breakfast Power Smoothie. Their unique shape and delightful flavor make them a standout dish that guests will adore. For a truly authentic Danish experience, serve them with a cup of hot coffee or tea, perhaps even spiced mulled wine during the holidays.
Storing & Reheating Tips for Danish Pancakes
While Danish pancakes are undeniably at their absolute best when served fresh and warm straight from the pan, it’s helpful to know how to properly store and reheat any leftovers. This ensures you can enjoy a taste of Denmark even on busy days.
- Keeping Them Warm While Cooking: As you cook multiple batches, you can keep the already prepared Æbleskiver warm. Simply preheat your oven to a low temperature, around 200-275°F (95-135°C), and place the cooked pancakes in a single layer on a baking sheet lined with parchment paper. This will keep them delightfully warm and slightly crisp until everything is ready to serve.
- Refrigerate Leftovers: If you have any Danish pancakes left over, allow them to cool completely to room temperature before storing. Place them in an airtight container or wrap them tightly in plastic wrap to prevent them from drying out. Stored properly in the refrigerator, they will remain fresh for up to 3 to 5 days.
- Freezing for Longer Storage: Danish pancakes freeze remarkably well, allowing you to enjoy them weeks later. Once completely cooled, arrange them in a single layer on a baking sheet and freeze for about an hour until firm. This prevents them from sticking together. Then, transfer the frozen Æbleskiver to a freezer-safe airtight container or a heavy-duty freezer bag. They can be frozen for up to 2 months.
- How to Reheat:
- From Refrigerator: For refrigerated pancakes, you can gently warm them in a microwave for 20-30 seconds per pancake, though this may soften the exterior. For a crispier texture, reheat them on a baking sheet in a preheated oven at 350°F (175°C) for 5-7 minutes, or in a toaster oven. You can also briefly warm them in a dry skillet over medium-low heat.
- From Freezer: Thaw frozen Æbleskiver overnight in the refrigerator. Once thawed, reheat them using the same methods as refrigerated pancakes. For a quicker option, you can reheat them directly from frozen in a toaster oven or conventional oven at 350°F (175°C) for 10-15 minutes, or until warmed through. The microwave is also an option for speed, but again, the texture will be softer.
Frequently Asked Questions About Danish Pancakes (Æbleskiver)
When embarking on your Danish pancake-making adventure, the ideal choice for flour is all-purpose flour. This versatile flour is the most common type used in baking and is perfectly suited for this recipe. It strikes an excellent balance of protein and gluten, which is crucial for achieving that characteristic light, airy, and fluffy texture that Æbleskiver are famous for. All-purpose flour ensures the pancakes rise beautifully and remain tender without being too heavy or dense.
While you might be tempted to experiment, using alternative flours like whole wheat flour could result in a denser, heavier pancake, and cake flour might make them too delicate to flip without breaking. For consistently delicious results that honor the traditional texture, sticking to good quality all-purpose flour is highly recommended.
If you find your delightful Æbleskiver are coming out doughy or raw in the middle, there are a few common culprits to investigate. The primary reason is often insufficient cooking time or an incorrect cooking temperature. Ensuring your æbleskiver pan is adequately hot (but not excessively so) before you add the batter is crucial. The pan should be hot enough to immediately start browning the outside, but moderate enough to allow the heat to penetrate and cook the interior.
Another significant factor could be overfilling the wells of your pan. If you add too much batter to each well, the center becomes too thick to cook properly and evenly before the outside burns. Try reducing the amount of batter for each pancake, aiming for about two-thirds full, and give each side ample time to cook to a golden brown. You might also need to adjust your stovetop heat to a slightly lower setting and cook them for a few extra minutes per side, allowing the interior to fully cook without scorching the exterior.
Yes, absolutely! While the iconic spherical shape of Æbleskiver traditionally requires an æbleskiver pan, you can certainly adapt the recipe to make delicious Danish-style pancakes using standard kitchen equipment. You can use a regular non-stick frying pan or a cast iron skillet to create mini pancakes or silver dollar-sized pancakes. Simply pour small portions of the batter onto the greased, hot pan and cook them just as you would regular pancakes, flipping once one side is golden and bubbles appear.
The method will, of course, be slightly different, and you won’t achieve the exact traditional round, puff-ball shape. However, the incredible taste, light texture, and buttery richness of the Danish pancake batter will remain, offering a wonderfully delicious alternative that captures the essence of Æbleskiver in a more conventional form. You can still incorporate fillings by adding them on top of the first side of batter before flipping.
Yes, you can absolutely make Danish pancakes ahead of time, which makes them a fantastic option for entertaining or for preparing a quick breakfast on a busy morning. They reheat quite well, allowing you to enjoy their delicious flavor even if they’re not fresh off the pan.
To reheat, first ensure the pancakes are at room temperature (if refrigerated) or thawed (if frozen). Then, you can place them in a single layer on a baking sheet and heat them in a preheated oven at 350°F (175°C) for approximately 5-7 minutes, or until warmed through. This method helps to retain some of their exterior crispness. Alternatively, for a faster option, you can reheat them in the microwave for about 20-30 seconds per pancake. Keep in mind that microwaving may result in a slightly softer texture compared to oven reheating, as the crispy exterior might soften. Regardless of the reheating method, they will still taste wonderfully satisfying.
Several key factors differentiate Æbleskiver from typical flat pancakes. Most notably, their distinctive spherical shape sets them apart. This shape is achieved by cooking them in a specialized æbleskiver pan with round wells, and by using a specific flipping technique that encourages them to puff into balls. The batter itself is often richer, frequently incorporating separated eggs where whipped egg whites are folded in, contributing to a much lighter, airier, and almost soufflé-like interior compared to the denser texture of regular pancakes. Traditionally, Æbleskiver can also contain fillings like fruit preserves or apples, which are less common in standard pancake recipes. Finally, their cultural significance, particularly around Christmas in Denmark, gives them a unique place as a festive treat.
Explore More Delicious Pancake Recipes
- Blueberry Ricotta Pancakes: Light, fluffy, and bursting with fresh blueberries and the subtle richness of ricotta cheese.
- Ricotta Hotcakes: Exceptionally tender and moist, these hotcakes offer a refined texture and flavor that’s hard to beat.
- Lemon Ricotta Pancakes: A bright and zesty twist on ricotta pancakes, infused with refreshing lemon and often served with a vibrant fruit syrup.
- Apple Cinnamon Pancakes: Comforting and fragrant, these pancakes are studded with tender apple pieces and warmed with fragrant cinnamon, perfect for autumn mornings.
Print Recipe
Danish Pancakes Recipe (Æbleskiver)
5 Stars
5 from 3 reviews
- Author: Katya
- Prep Time: 20 mins
- Cook Time: 45 mins
- Total Time: 1 hour 5 mins
- Yield: 35–40 pancakes
- Category: Breakfast
- Method: Stovetop
- Cuisine: Danish
Description
Delightfully soft, pillowy Danish ball pancakes filled with sweet fruit preserves, a true taste of traditional Danish comfort.
Ingredients
- 2 cups all-purpose flour
- 1 ¾ tsp. baking powder
- ½ tsp. kosher salt
- 2 Tbsp. cane or granulated sugar
- 2 large eggs, yolks and whites separated
- 2 cups whole milk
- 4 Tbsp. unsalted butter, melted and lightly cooled
- 1 ½ tsp. pure vanilla extract, optional
- Fruit preserves, for filling (e.g., strawberry, raspberry)
- Maple syrup, and powdered sugar, for serving
Tools
- Danish Pancake Pan (Æbleskiver Pan) – options here, here
- Non-stick spray or pastry brush
- Wooden skewers or chopsticks (for flipping)
Instructions
- In a large bowl, whisk together the flour, baking powder, salt, and sugar until well combined.
- In a separate bowl, lightly whisk the egg yolks. Then, whisk in the milk, melted butter (ensure it’s cooled to lukewarm), and the optional vanilla extract. Whisk this yolk mixture into the dry flour mixture until just combined. A few small lumps are acceptable; avoid overmixing.
- In a clean, separate mixing bowl, add the egg whites. Using an electric mixer, beat on high speed until medium-stiff peaks form (the peaks should hold their shape but curl slightly at the tip), which typically takes about 2-3 minutes.
- Gently fold the beaten egg whites into the pancake batter using a rubber spatula. Use a light hand to preserve the air in the whites, which is crucial for fluffy Æbleskiver.
- Heat the æbleskiver pan over medium heat. Lightly coat each well with cooking spray or brush with melted butter. Spoon about 1 tablespoon of batter into each well. If using filling, add 1 teaspoon of fruit preserves into the center of each batter portion, then top with an additional 1 tablespoon of batter to cover. Cook until the bottoms are golden brown and the edges appear set.
- Using 2 wooden skewers or chopsticks, carefully flip each pancake over to continue cooking and form a ball shape. Cook for another 2-3 minutes, rotating as needed, until golden brown all around and cooked through.
- Transfer cooked pancakes to a plate. If preparing a large batch, keep them warm in a preheated oven at 275°F (135°C) on a baking sheet lined with parchment paper while you continue cooking the remaining batter.
- Serve warm with a dusting of powdered sugar and a drizzle of maple syrup or a side of fruit preserves.
Notes
- Filling Ideas: Feel free to get creative with your fillings! Any flavor of fruit preserves or jam works beautifully. For a richer treat, Nutella or a small piece of chocolate can be added. Æbleskiver are also delicious with no filling at all, allowing the pure pancake flavor to shine.
- Leftovers: These Danish pancakes are truly best enjoyed fresh off the pan. Leftovers can be stored in an airtight container in the refrigerator for up to 3-5 days. When reheated, they may lose some of their original crispy exterior, but they will still be flavorful and tender.
Nutrition
- Serving Size: 4 pancakes
- Calories: 227
- Sugar: 11.7 g
- Sodium: 172.4 mg
- Fat: 6.8 g
- Carbohydrates: 34.4 g
- Protein: 6.9 g
- Cholesterol: 87.6 mg
(Note: Nutritional values are estimates and may vary based on specific ingredients and preparation.)
This recipe was originally published in April 2015 and has since been extensively updated with more detailed information, expert tips, and improved instructions for your culinary success.