
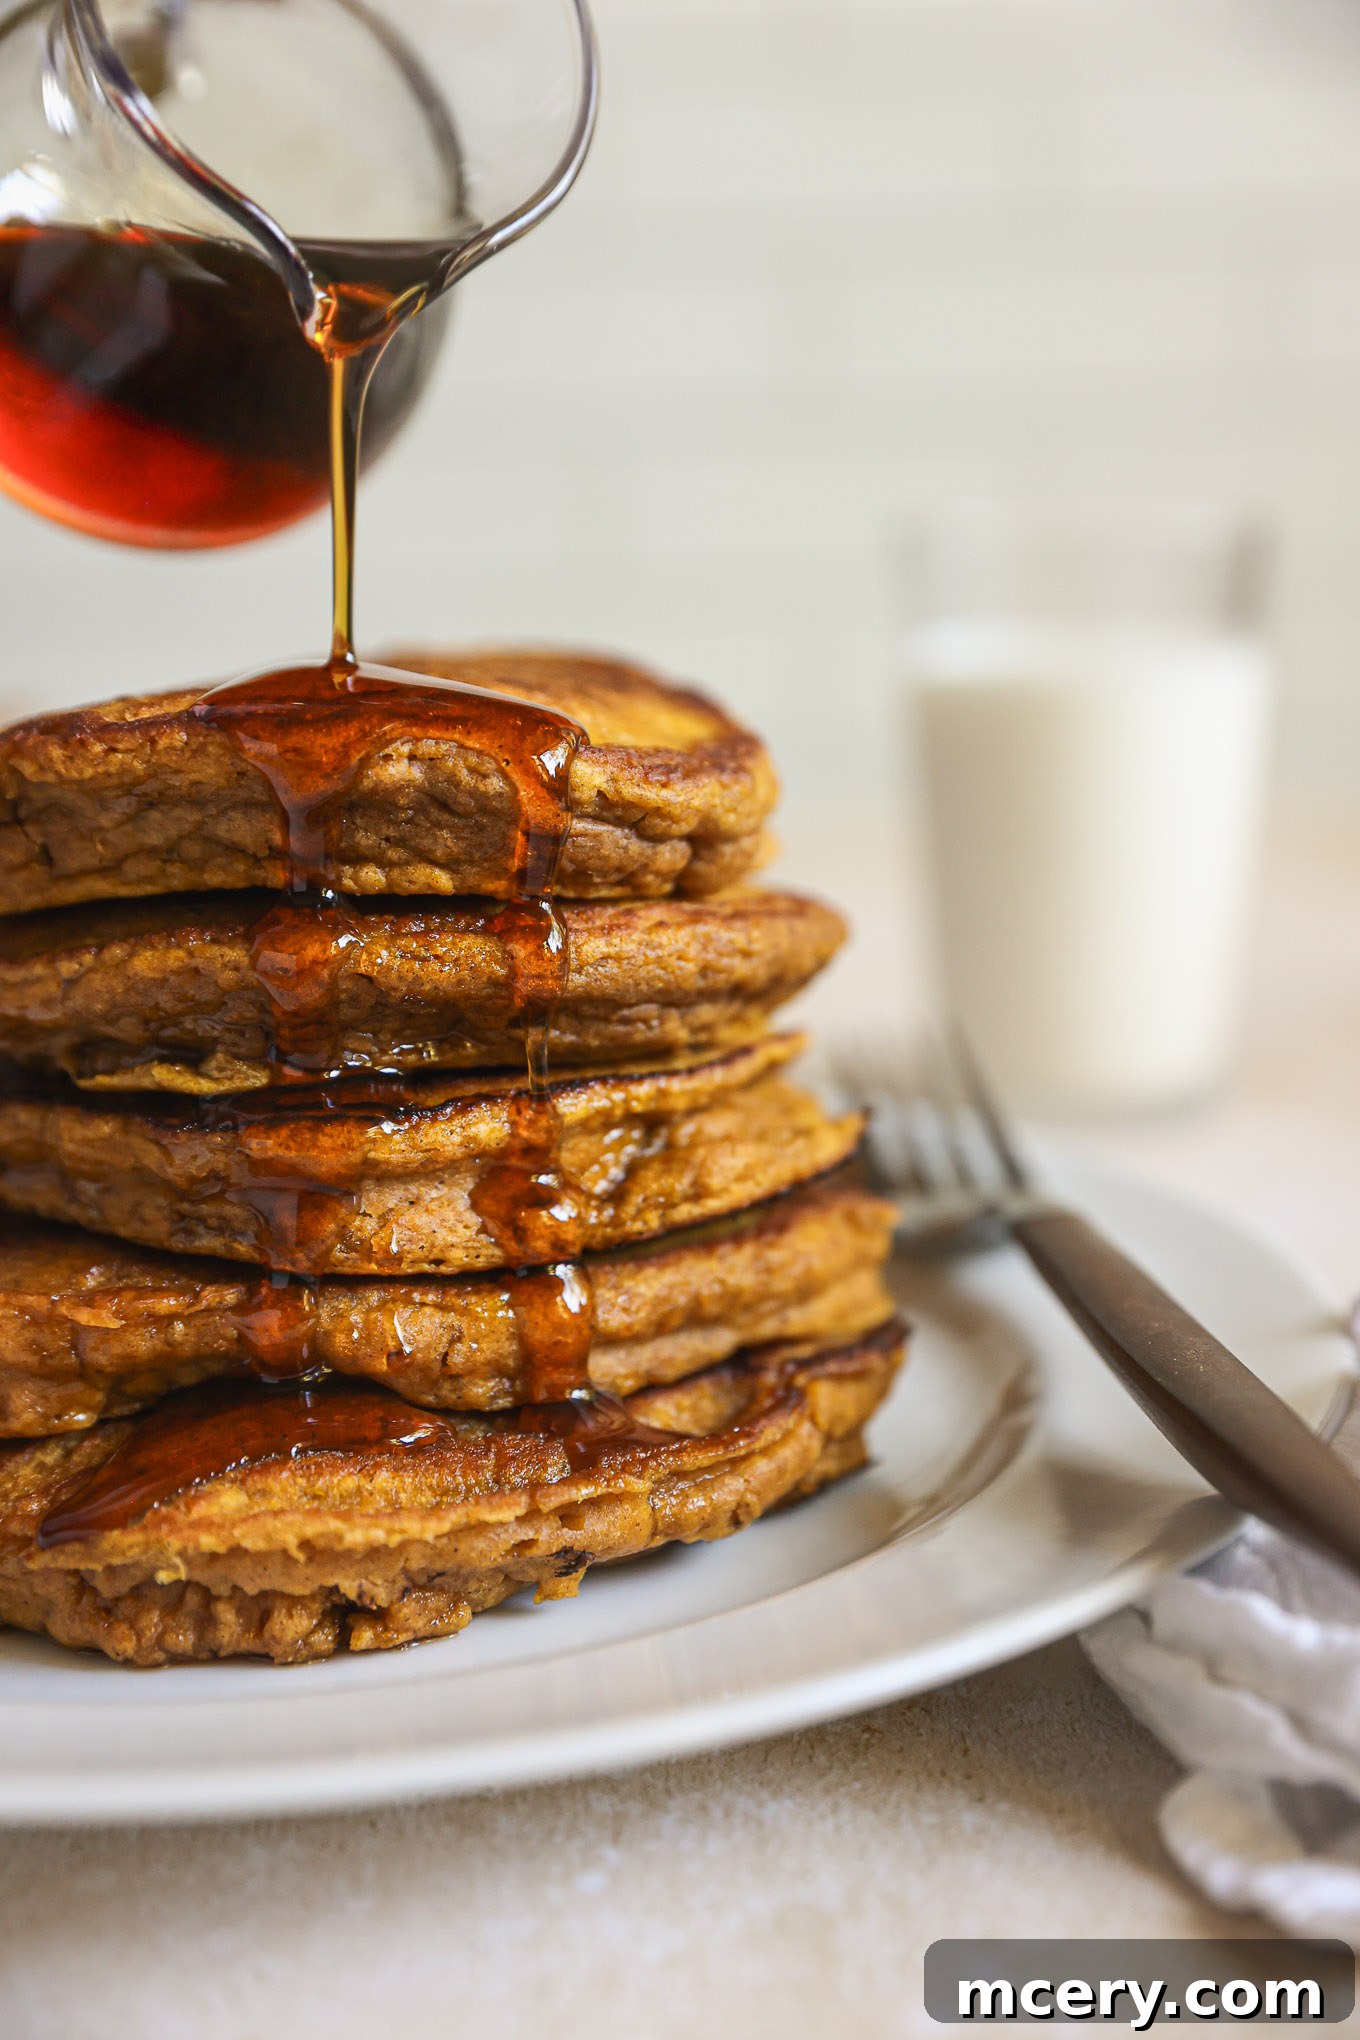
Welcome to the ultimate guide for crafting the most delicious and perfectly fluffy Pumpkin Pancakes! With just a handful of simple ingredients, you can transform your breakfast into a warm, inviting, and subtly spiced delight. These pancakes are not just a seasonal treat; they’re an easy, comforting meal you’ll eagerly anticipate waking up to, any time of the year.
Whether you’re celebrating autumn’s bounty or simply craving a taste of cozy comfort, this recipe promises a stack of golden, aromatic pancakes that are rich in pumpkin flavor and wonderfully light. Forget complicated techniques; we’ll walk you through every step to ensure your pancakes turn out just right, every single time.
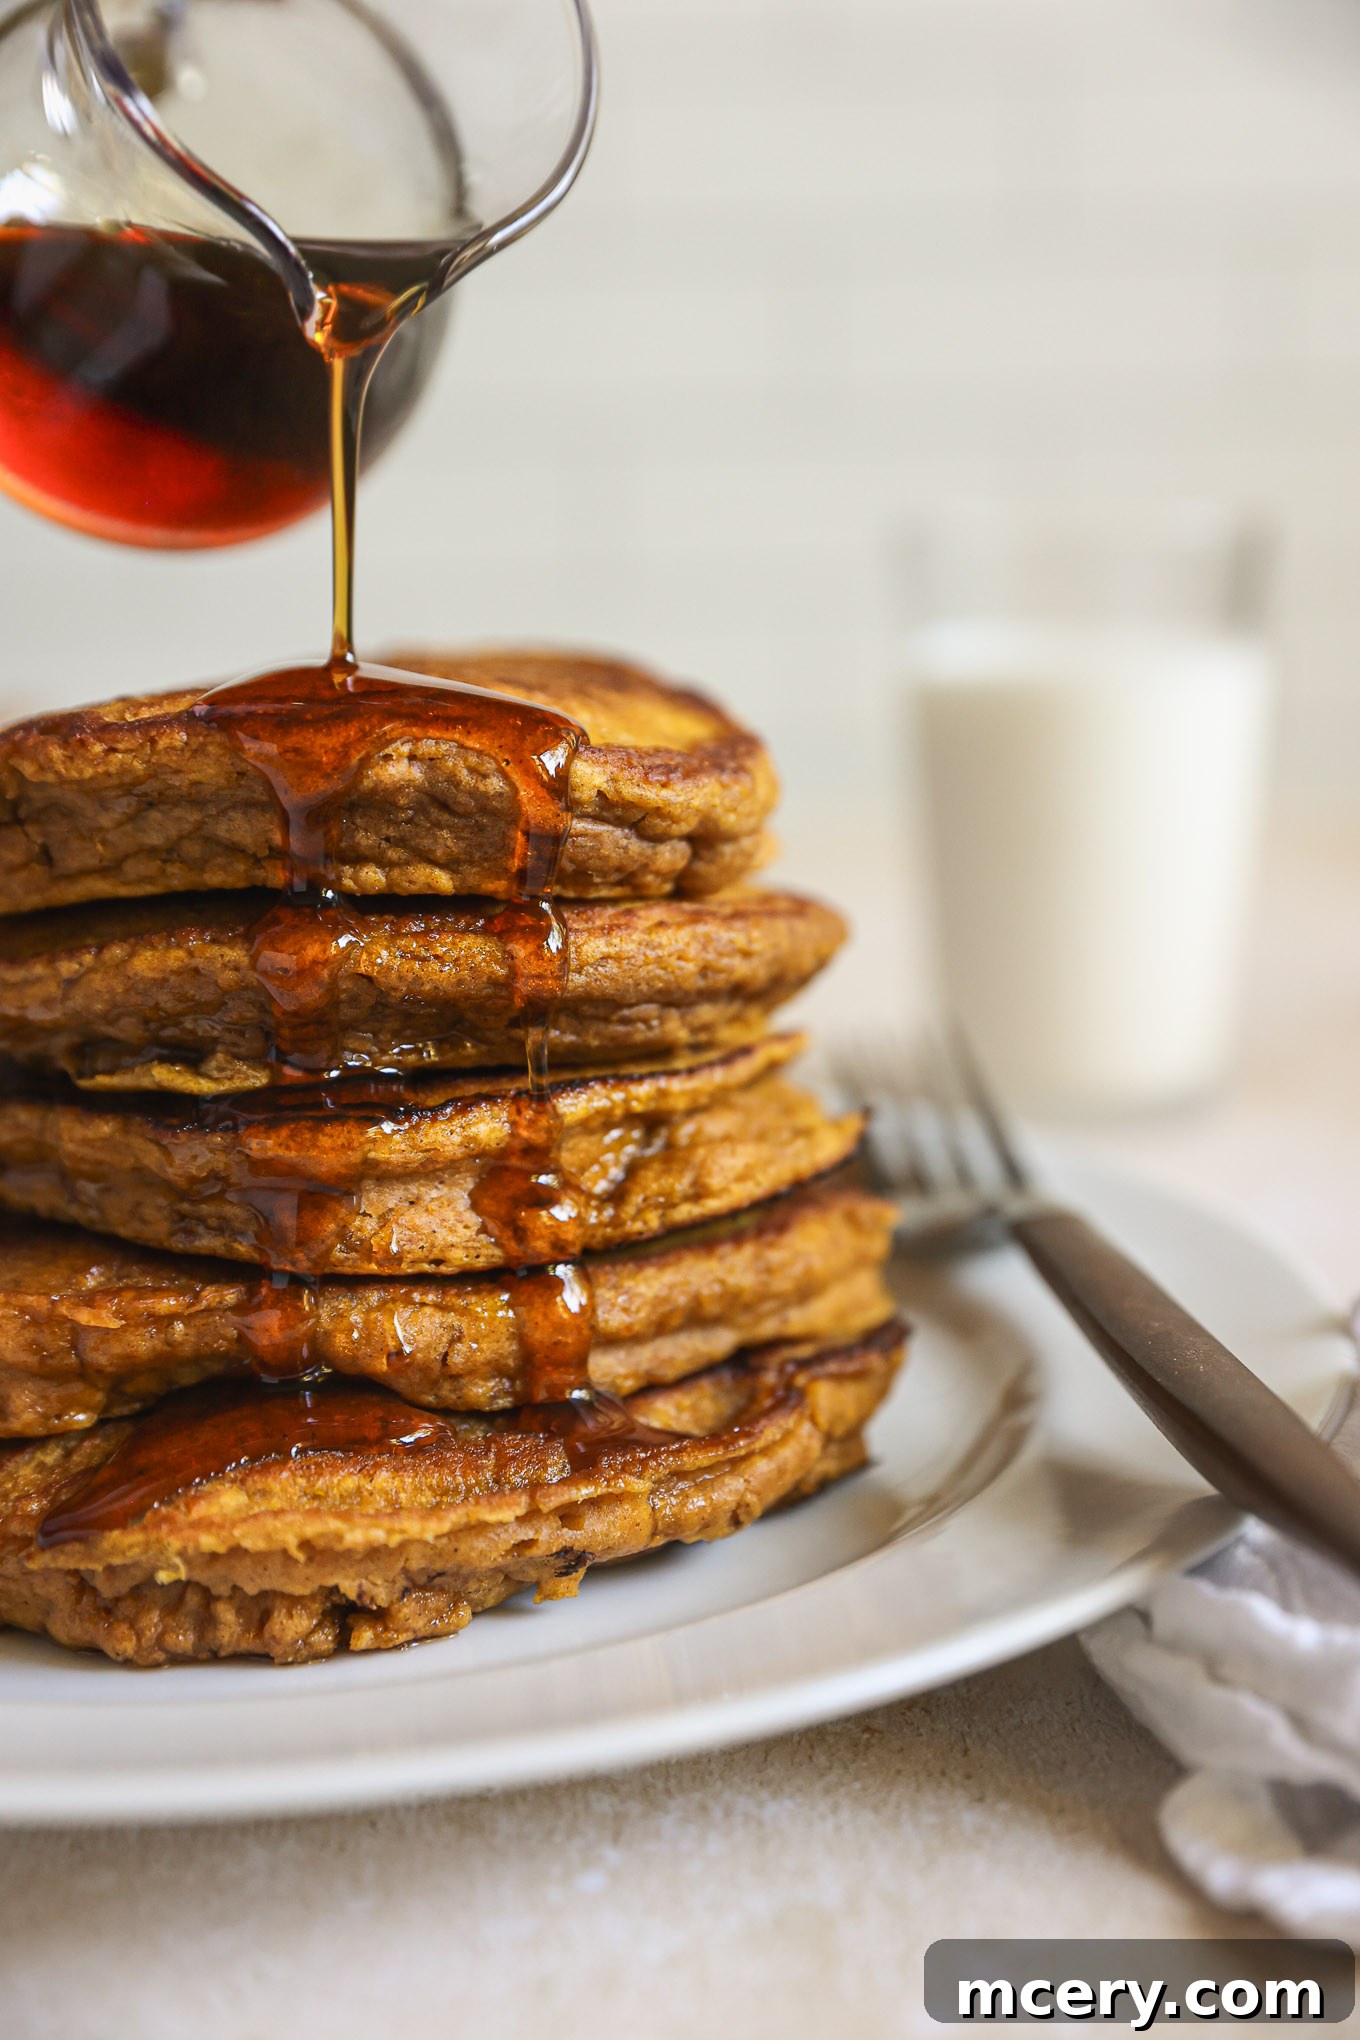
Why You’ll Adore This Pumpkin Pancakes Recipe
Pancakes are a cherished weekend tradition in many homes, and this particular recipe for pumpkin pancakes stands out as an absolute favorite, especially as the crisp air of fall approaches. But honestly, their irresistible charm makes them a year-round staple. Here’s why you’ll fall in love with them:
- Unbeatable Flavor Profile: These pancakes strike the perfect balance between subtle sweetness and aromatic spices. Infused with real pumpkin puree and a medley of warm spices like cinnamon and pumpkin pie spice, they evoke the comforting essence of homemade pumpkin pie in every bite. It’s a dream come true for any pumpkin enthusiast!
- Incredibly Fluffy Texture: Achieving truly fluffy pancakes is an art, and this recipe masters it. Thanks to a careful combination of leavening agents and precise mixing techniques, these pancakes rise beautifully, boasting an airy, tender crumb that simply melts in your mouth. Say goodbye to dense, heavy pancakes!
- Quick & Easy Preparation: Despite their gourmet taste and texture, these pumpkin pancakes are surprisingly simple to make. The batter comes together in minutes, requiring just two bowls, and cooks up quickly on a griddle or non-stick skillet. It’s perfect for busy mornings or when you want a delicious breakfast without the fuss.
- A Family Favorite: Children often adore the bold, delightful pumpkin flavor, making these a hit with even the pickiest eaters. As a bonus, the pumpkin puree sneaks in some extra nutrients, giving you a little peace of mind while everyone enjoys a wholesome treat.
- Excellent for Meal Prep: This recipe yields a generous batch of 18 large pancakes, making it ideal for feeding a crowd or for meal prepping. Leftovers store beautifully and reheat like a dream, tasting almost as fresh as when they were first made. I often make a double batch to freeze, a decision my future self always thanks me for on hectic weekdays!
- Versatile and Customizable: While perfect on their own, these pancakes are also a fantastic canvas for various additions and toppings. Whether you prefer nuts, chocolate chips, or a simple dollop of whipped cream, this recipe adapts effortlessly to your cravings.
Keep reading, and I’ll share all the essential tips and tricks I’ve gathered over the years, ensuring your pumpkin pancakes are perfectly fluffy, golden, and delicious every single time you make them.
Essential Ingredients for Perfect Pumpkin Pancakes
Crafting these delectable pumpkin pancakes requires a selection of readily available ingredients, each playing a crucial role in achieving that signature flavor and fluffy texture. For detailed quantities, please refer to the recipe card below.
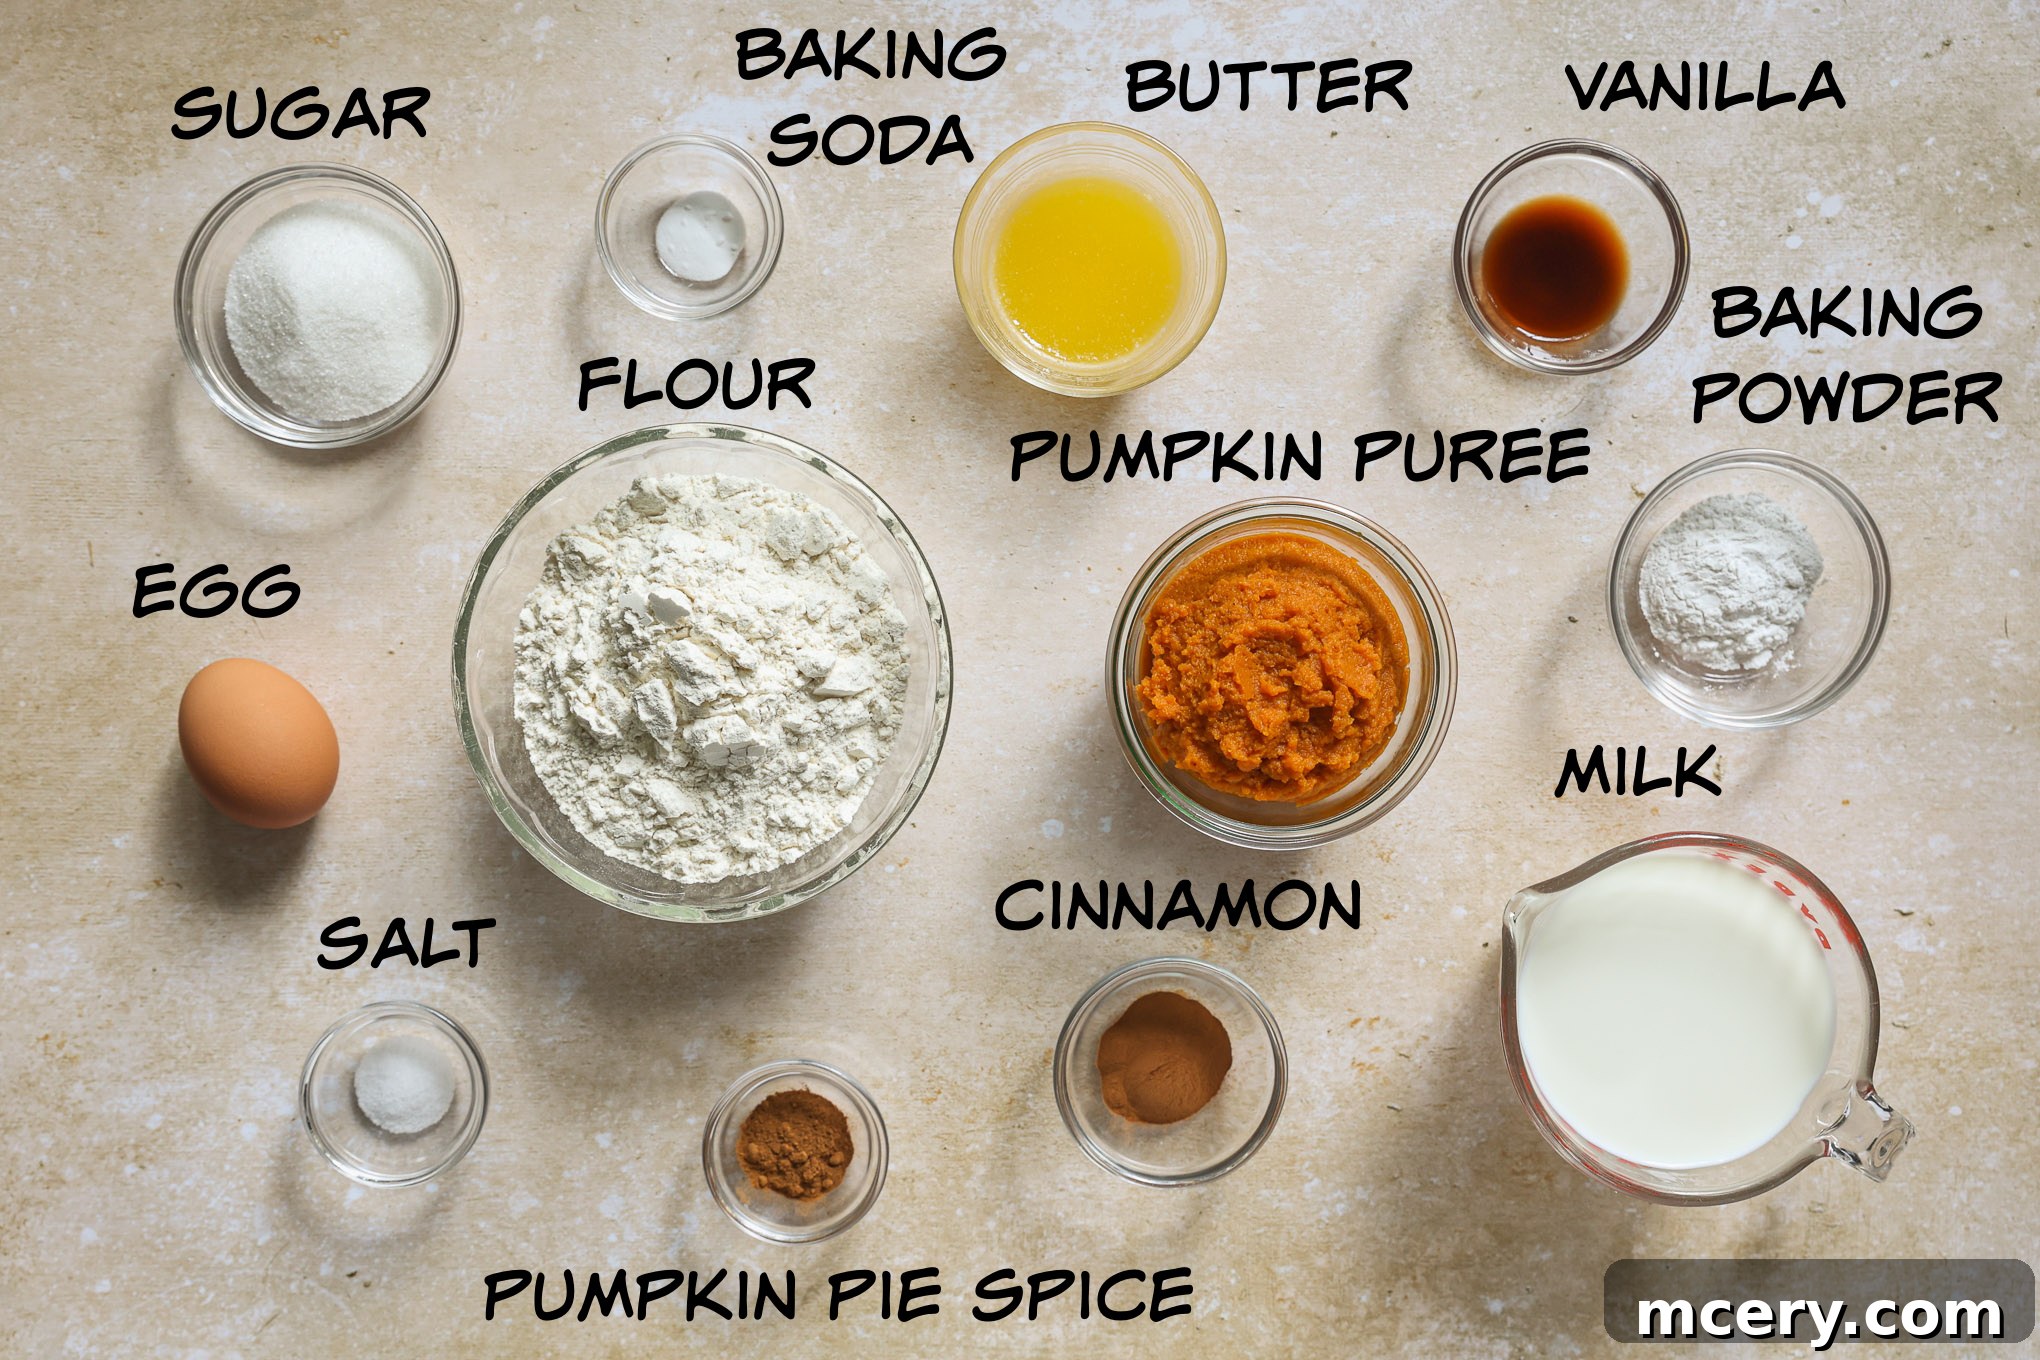
- All-Purpose Flour: This is the fundamental building block of our pancake batter, providing the structure and body. For the fluffiest results, ensure your flour is spooned and leveled, rather than scooped, to avoid adding too much.
- Sugar (Cane or Granulated): A touch of sugar is essential for sweetness, balancing the earthy pumpkin flavor and enhancing the overall deliciousness. Granulated or cane sugar works perfectly, adding just the right amount of sugary goodness.
- Baking Powder and Baking Soda: These dynamic duo of leavening agents are the secret to our pancakes’ incredible fluffiness. Baking powder provides the initial lift, while baking soda reacts with the acidic pumpkin puree to create additional air pockets, resulting in a wonderfully light and airy consistency. Ensure they are fresh for optimal activation.
- Spices: A blend of salt, ground cinnamon, and pumpkin pie spice is what truly makes these pancakes sing. The salt balances the sweetness, while cinnamon and pumpkin pie spice infuse deep, warm, and inviting notes that instantly transport you to a cozy autumn day. This combination makes them taste remarkably like a slice of pumpkin pie!
- Pumpkin Purée: The undeniable star of the show! It imparts the distinct, rich pumpkin flavor and contributes significant moisture, creating a tender pancake. It’s crucial to use 100% pure pumpkin puree, not pumpkin pie filling, which contains added sugars and spices that would alter the recipe’s intended balance.
- Milk: Integral for bringing the batter together, milk hydrates the dry ingredients and helps create a smooth, pourable consistency. Whole milk lends a richer flavor and tenderer crumb, but 2% or even a non-dairy alternative like almond or oat milk can also be used. Buttermilk is another fantastic option, as its acidity further enhances the baking soda’s leavening power.
- Melted Unsalted Butter: A quarter cup of melted butter adds incredible richness, a subtle nutty flavor, and contributes to the pancakes’ tender texture. Make sure it’s slightly cooled before adding it to the wet ingredients to avoid scrambling the egg.
- Pure Vanilla Extract: A dash of high-quality vanilla extract elevates all the other flavors, adding a layer of aromatic depth that makes the pancakes even more irresistible.
- Large Egg: The egg acts as a binder, holding all the ingredients together and providing additional structure and richness to the pancakes, contributing to their lovely golden color and soft interior.
Step-by-Step Guide: How to Make Fluffy Pumpkin Pancakes
Creating these delightful pumpkin spice pancakes is straightforward and enjoyable. You’ll need two mixing bowls and a reliable large non-stick skillet or griddle. This recipe yields a generous 18 pancakes, perfect for a family breakfast or for freezing some for later. For detailed instructions and ingredient measurements, please refer to the recipe card provided at the end of this article.
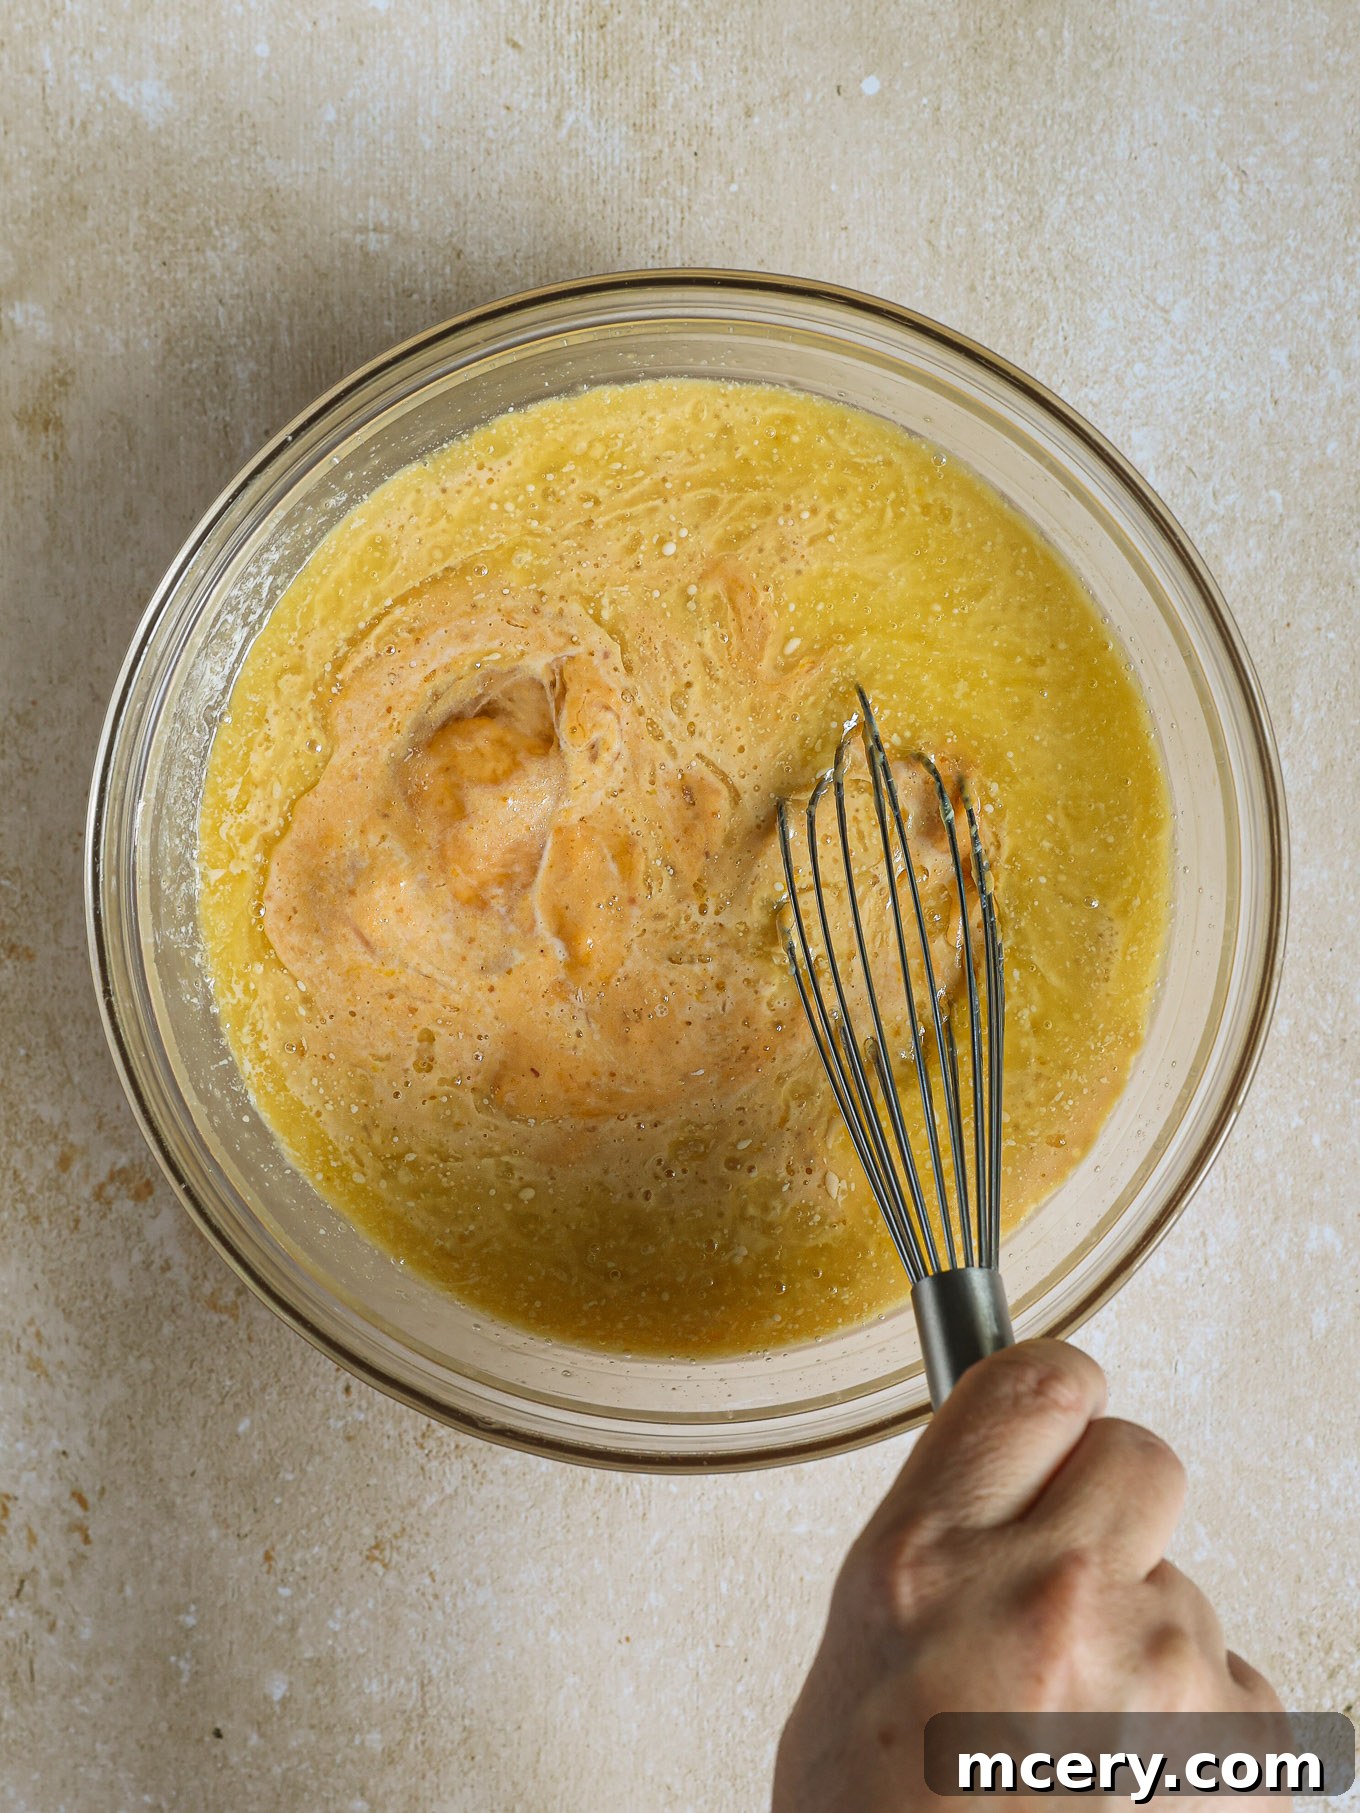
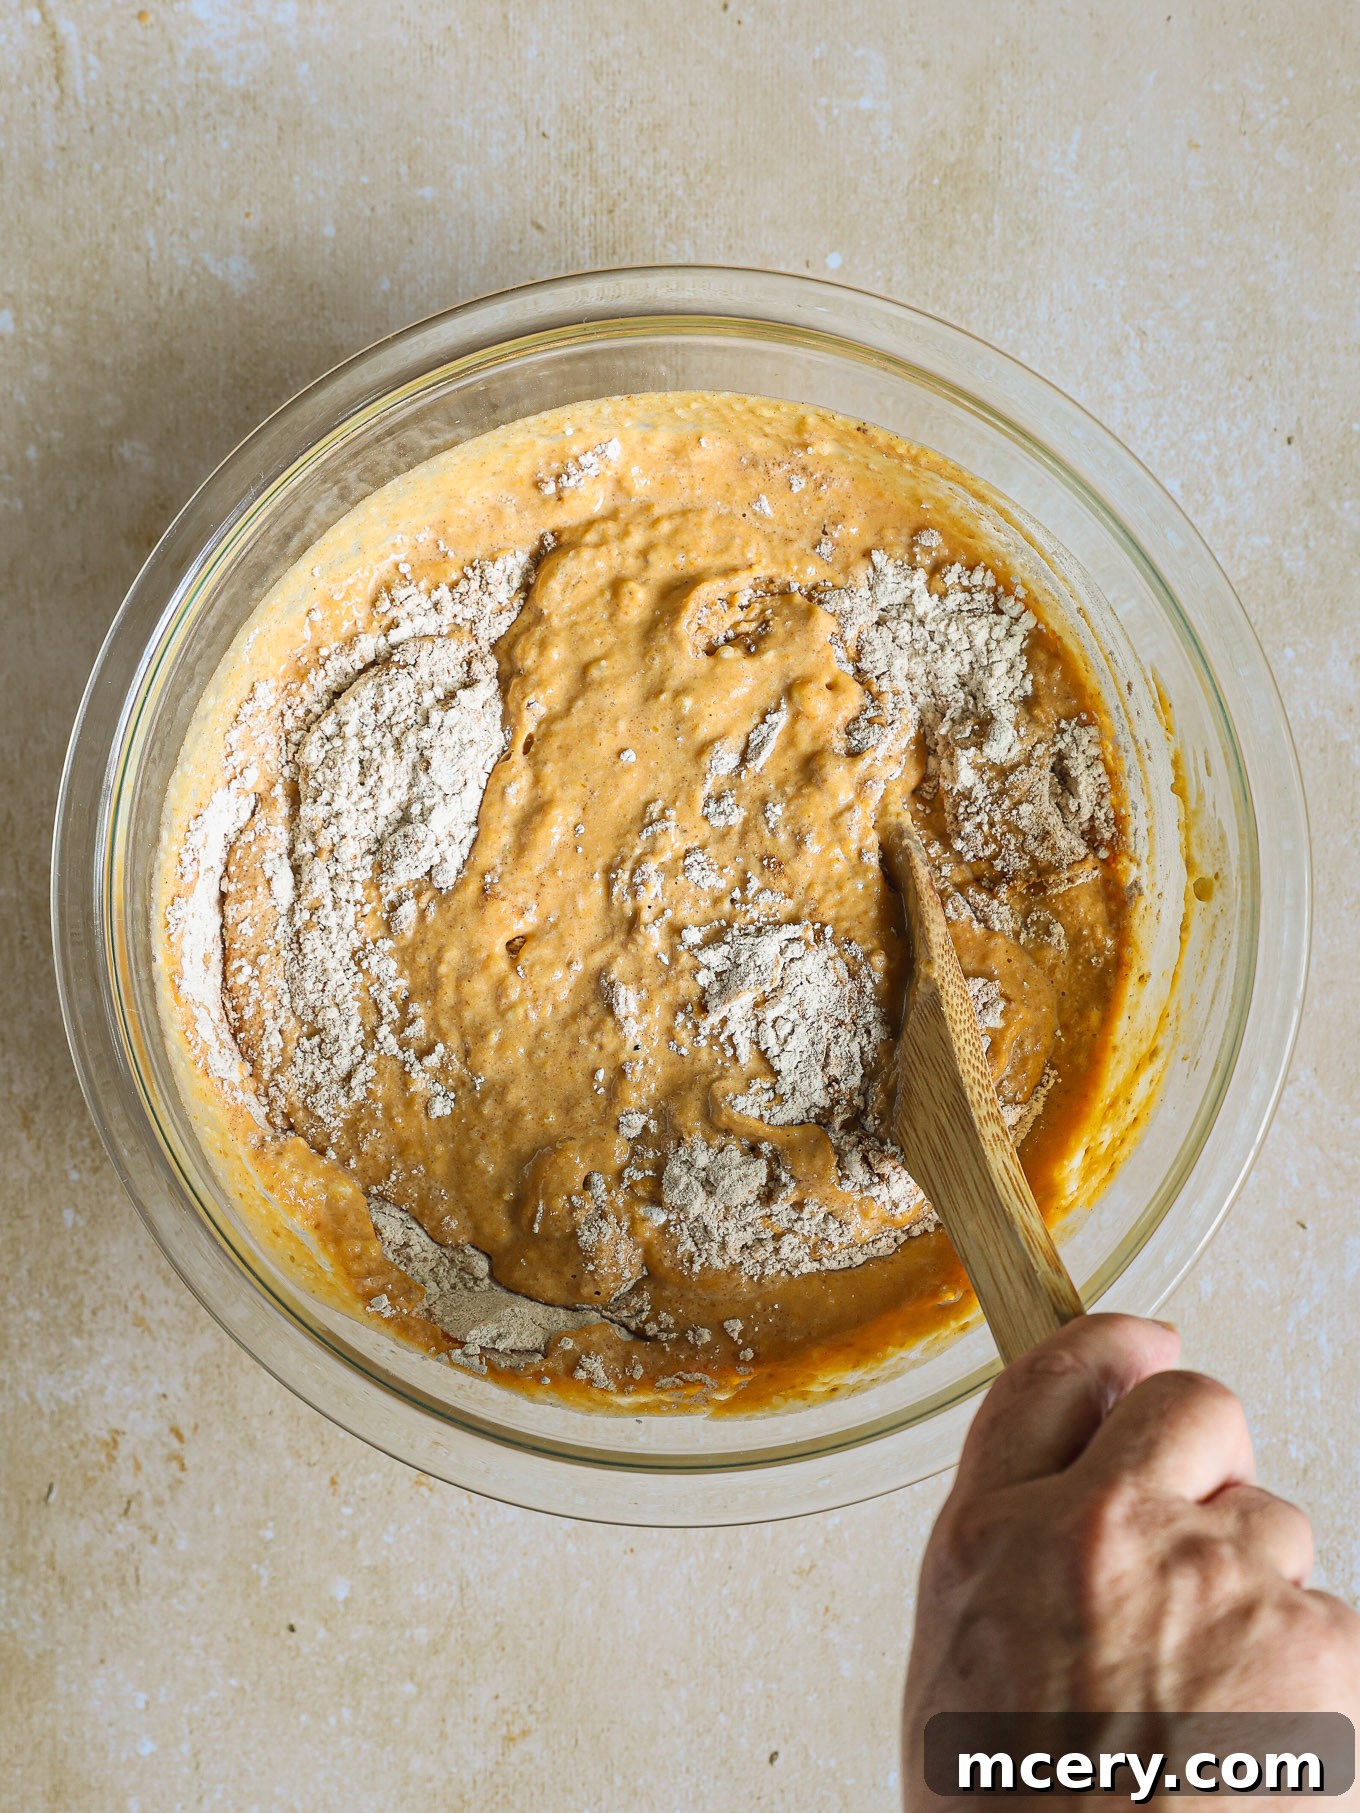
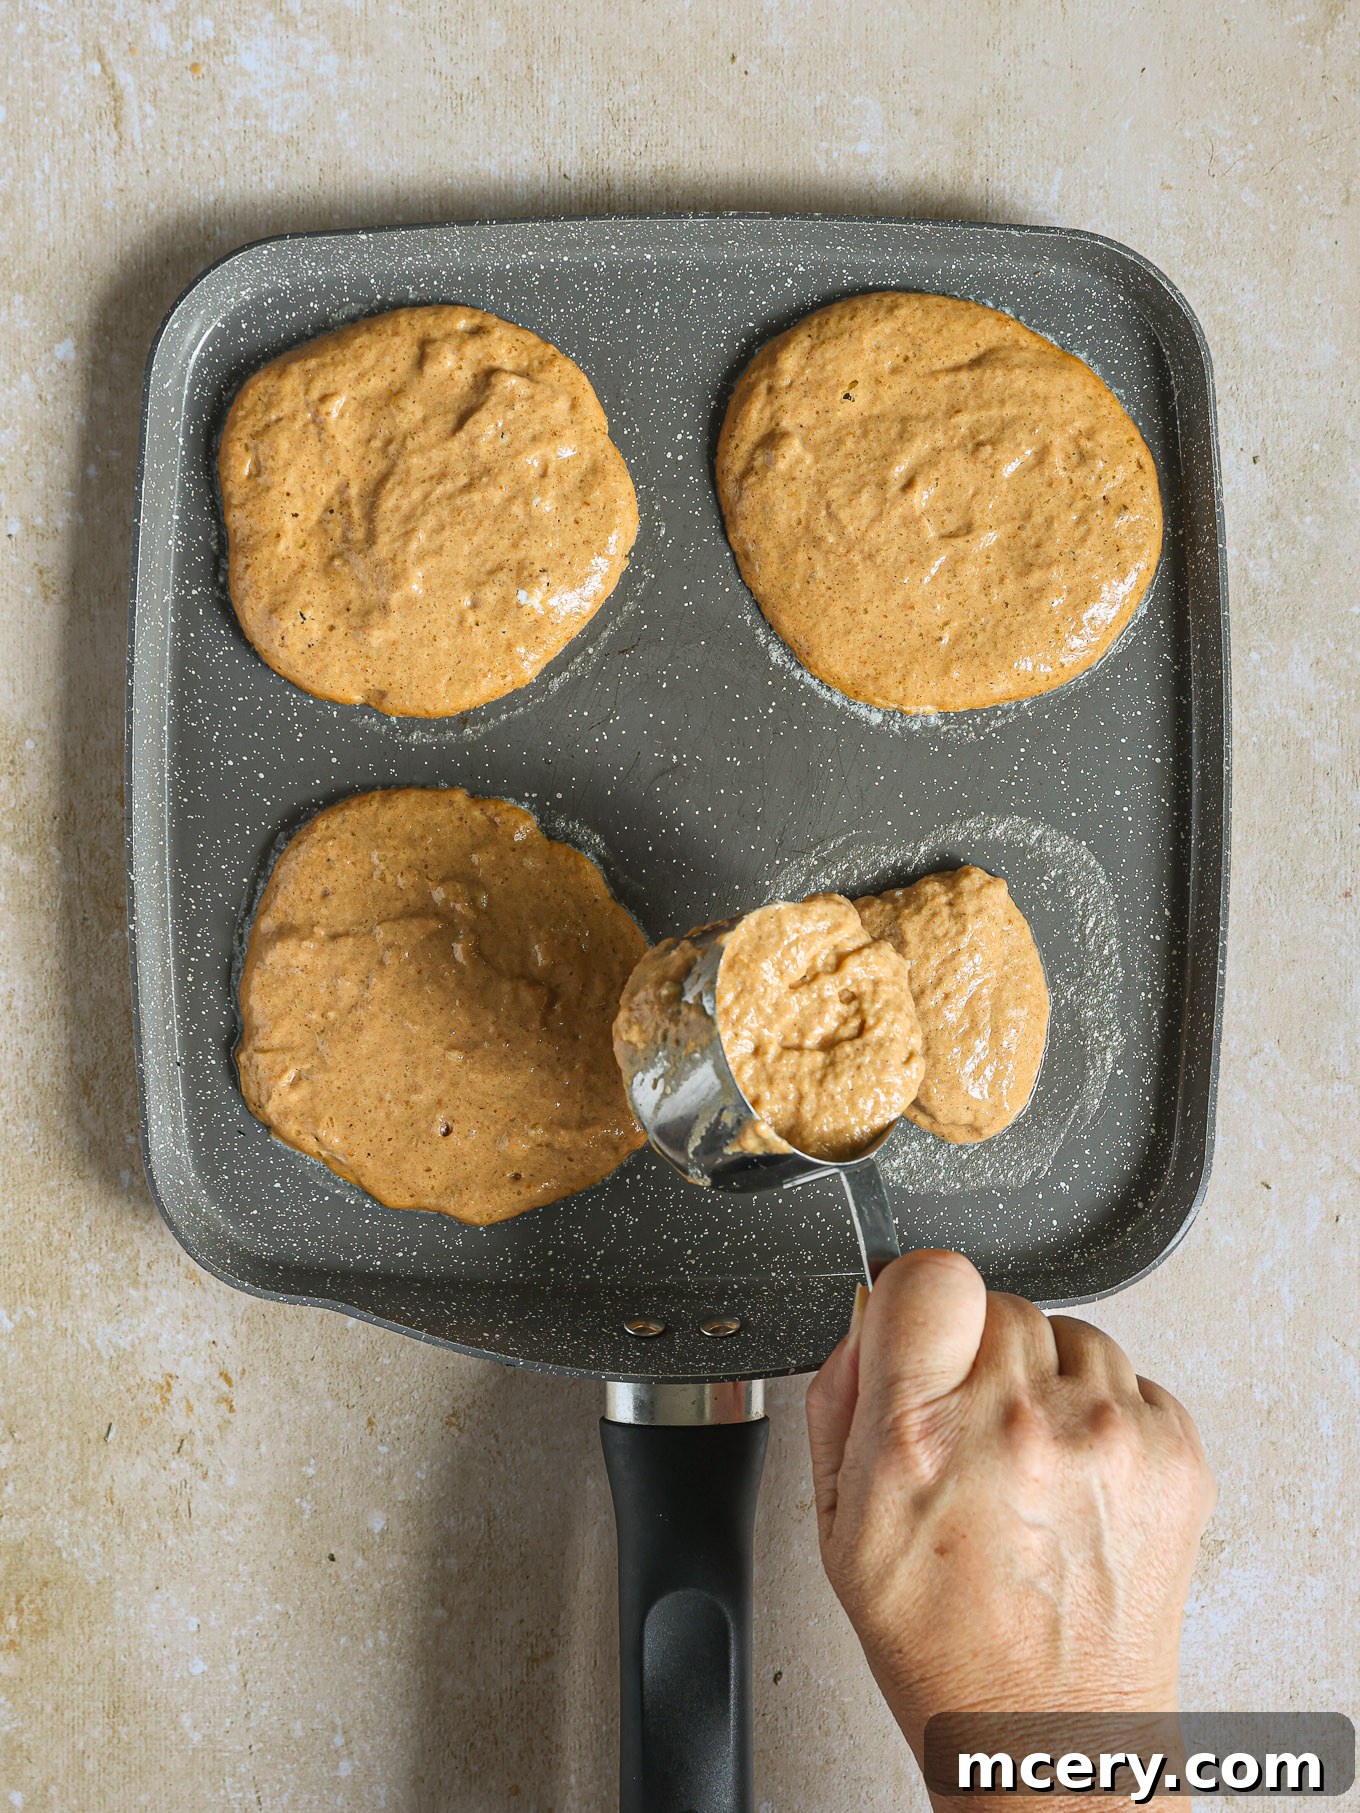
Step 5: Serve and enjoy! Transfer the cooked pancakes to a plate. To keep them warm while you finish cooking the rest of the batch, you can place them on a baking sheet in an oven preheated to 200°F (95°C). Repeat the cooking process with the remaining batter, greasing the skillet as needed for each new pancake. Serve your hot, fluffy pumpkin pancakes immediately with your favorite toppings!
Creative Variations for Your Pumpkin Pancakes
While this pumpkin pancake recipe is absolutely perfect as is, it also serves as a fantastic base for culinary creativity. Feel free to experiment with these delicious variations to customize your breakfast experience:
- Brown Sugar Bliss: For a deeper, more molasses-like sweetness and a hint of caramel, swap out the regular granulated sugar for an equal amount of light or dark brown sugar. This adds another layer of warmth to the pumpkin flavor.
- Fruity Freshness: Introduce a burst of freshness by gently folding in a cup of fresh or frozen blueberries (no need to thaw) or thinly sliced bananas into the batter just before cooking. The fruit will add natural sweetness and a lovely textural contrast.
- Nutty Crunch: For added texture and a delightful earthy flavor, fold in about ½ cup of chopped nuts. Walnuts, pecans, or almonds are excellent choices that complement the pumpkin and spice notes beautifully. Lightly toasting them beforehand can enhance their flavor even further.
- Decadent Chocolate Chips: Transform your pumpkin pancakes into an indulgent treat by folding in ½ to ¾ cup of milk chocolate or dark chocolate chips into the batter. The melting chocolate creates pockets of gooey sweetness in every bite, a fantastic contrast to the spiced pumpkin.
- Gluten-Free Option: To make this recipe suitable for those with gluten sensitivities, simply use a 1:1 all-purpose gluten-free flour blend in place of regular flour. Ensure your chosen blend contains xanthan gum, or add ½ teaspoon per cup of flour for optimal texture.
- Additional Spices: If you love a bolder spice profile, consider adding a pinch of ground ginger, nutmeg, or cloves to the dry ingredients alongside the cinnamon and pumpkin pie spice.
- Citrus Zest: A teaspoon of orange or lemon zest can brighten the flavors and add a subtle, refreshing counterpoint to the rich pumpkin.
Don’t be afraid to mix and match these variations, or invent your own! The possibilities are endless when it comes to customizing your perfect stack of pumpkin pancakes.
Expert Tips for Fluffy Pumpkin Pancakes Every Time
Achieving consistently fluffy, golden-brown pumpkin pancakes isn’t hard when you know a few key secrets. Follow these expert tips for the best results, ensuring your pancakes are perfectly airy and tender:
- Avoid Overmixing the Batter: This is arguably the most critical tip for fluffy pancakes. Once you combine the wet and dry ingredients, stir *just* until no streaks of dry flour remain. A few small lumps are perfectly fine, even desirable! Overmixing develops the gluten in the flour, which will lead to dense, rubbery, and tough pancakes instead of light and airy ones. Stirring gently and briefly keeps the gluten relaxed.
- Rest the Batter: For truly superior texture, allow your pancake batter to rest for at least 5 minutes (and up to 15 minutes) before cooking. This resting period allows the flour to fully hydrate, resulting in a more tender crumb. More importantly, it gives the baking powder and baking soda time to activate, creating more air bubbles and guaranteeing those delightful fluffy pancakes.
- Adjust Consistency as Needed: After the batter rests, it might thicken slightly. If it appears too thick for your liking – think something that doesn’t easily pour – add 1-2 tablespoons of milk at a time, stirring gently, until it reaches your desired pourable, yet still thick, consistency.
- Use a Properly Heated and Greased Pan: Heat your griddle or non-stick skillet over medium heat. It’s ready when a drop of water sizzles and evaporates immediately. Lightly grease the pan with butter or cooking spray before adding the first batch of batter, and remember to re-grease it lightly between each batch to prevent sticking and ensure a beautiful golden-brown crust.
- Portion Evenly: Use a ¼ cup measuring cup to pour batter onto the griddle. Gently spread the batter into a uniform circle, roughly 3 ½ to 4 inches in diameter. Consistent portioning ensures that all pancakes cook evenly and are roughly the same size, which is not only aesthetically pleasing but also helps with even cooking times.
- Look for Bubbles to Flip: Don’t flip too early! Wait until you see numerous bubbles forming on the surface of the pancake and the edges appear set and slightly dry. This indicates that the bottom is cooked through and the pancake is ready for its flip. Flipping too soon can result in undercooked, misshapen pancakes.
- Keep Pancakes Warm: As you cook a whole batch, you might want to keep the earlier pancakes warm. The best way to do this is to transfer them to a baking sheet and place them in a preheated oven at 200°F (95°C) while you finish cooking the rest. This ensures everyone gets to enjoy warm, fresh pancakes together.
- Check Leavening Agents: Always ensure your baking powder and baking soda are fresh and active. Expired leavening agents are a common culprit for flat pancakes. You can test baking soda by mixing a spoonful with a bit of vinegar; if it fizzes vigorously, it’s good. For baking powder, mix a spoonful with hot water; active powder will fizz.
- Room Temperature Ingredients: Whenever possible, use milk and eggs that are at room temperature. This helps them incorporate more smoothly and evenly into the batter, leading to a more consistent and tender texture.
By following these simple yet effective tips, you’ll be well on your way to mastering the art of perfect pumpkin pancakes, delighting everyone with their irresistible taste and texture.
How to Serve Pumpkin Spice Pancakes: Elevate Your Breakfast
These warm, aromatic pumpkin spice pancakes are utterly delicious on their own, but they truly shine when paired with your favorite toppings. Here are some fantastic ideas to elevate your breakfast experience:
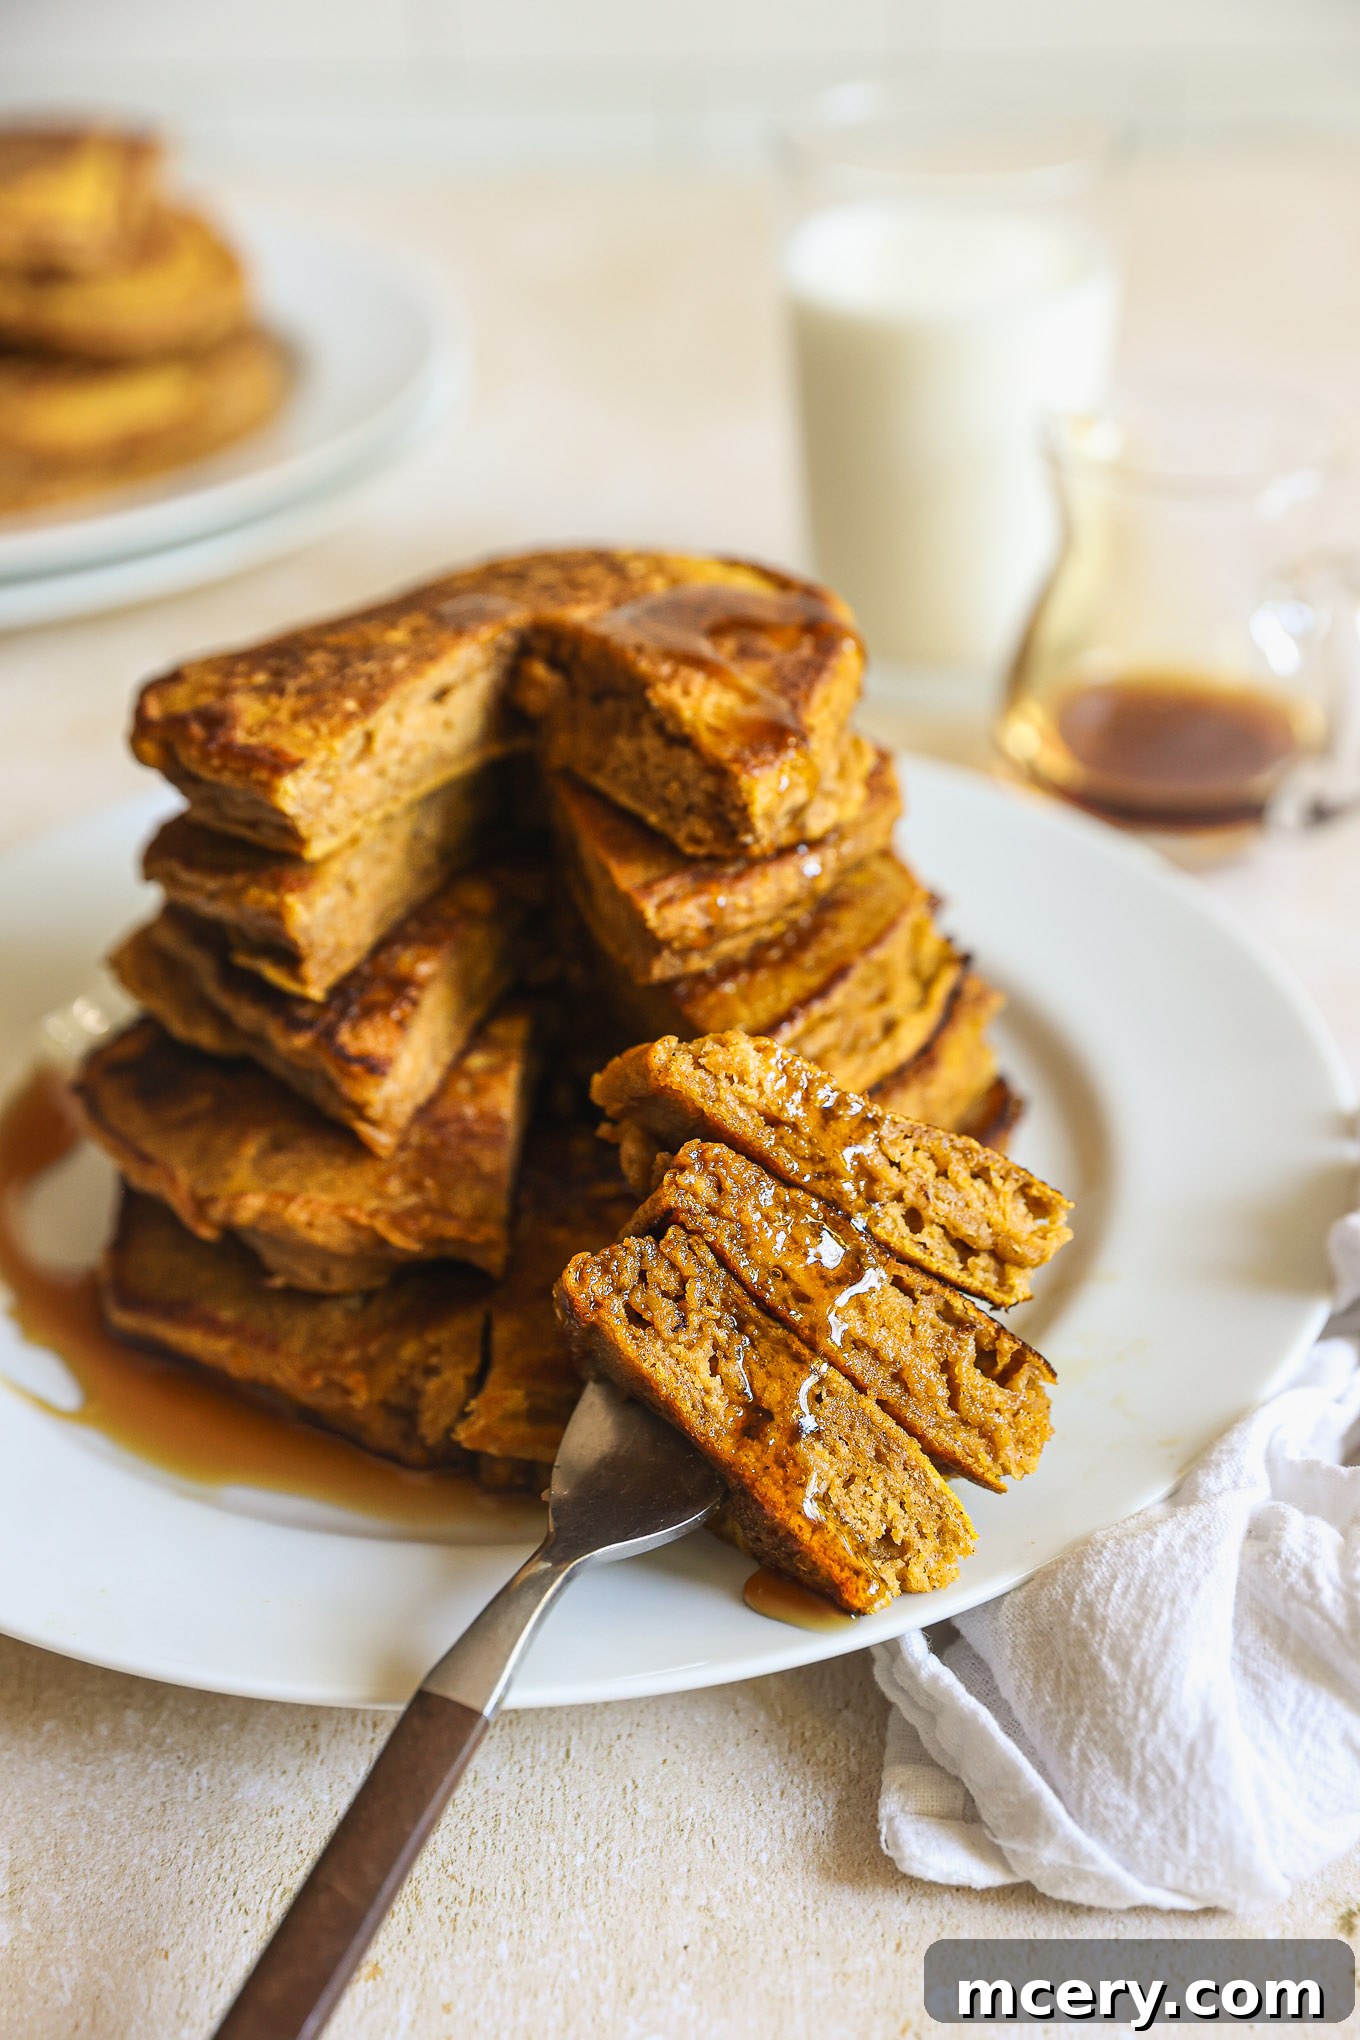
- Classic Maple Syrup: A timeless choice. For an extra touch of warmth, gently heat your maple syrup before drizzling it generously over your stack of pancakes. The rich sweetness perfectly complements the pumpkin and spices.
- Melted Butter: A simple pat of butter melting into the warm pancakes is pure bliss, adding richness and a subtle savory note.
- Dusting of Powdered Sugar: For an elegant and subtly sweet finish, a light dusting of powdered sugar adds a touch of sophistication and enhances the visual appeal.
- Whipped Cream: A generous dollop of freshly whipped cream (or even coconut whipped cream for a dairy-free option) adds a luxurious, creamy texture that contrasts beautifully with the tender pancakes. A sprinkle of cinnamon on top of the cream is a delightful addition.
- Nut Butter: For an extra boost of protein and healthy fats, spread your favorite nut butter, such as almond butter or peanut butter, for a hearty and satisfying breakfast.
- Fresh Fruit: Brighten up your plate with fresh fruit. Sliced bananas, fresh berries (blueberries, raspberries), or caramelized apple slices are wonderful choices that add natural sweetness and a refreshing counterpoint.
- Toasted Chopped Nuts: For added crunch and a nutty aroma, sprinkle toasted walnuts, pecans, or almonds over your pancakes. The toasting process brings out their rich flavors.
- Caramel Sauce or Chocolate Sauce: For a more decadent treat, a drizzle of warm caramel or chocolate sauce can turn these pancakes into a dessert-like indulgence.
- Spiced Apple Butter: A dollop of homemade or store-bought apple butter can add another layer of fall-inspired fruitiness and spice.
Don’t be shy about mixing and matching these toppings to create your ultimate pumpkin pancake masterpiece!
Storing and Reheating Pumpkin Pancakes
Making a big batch of these pumpkin pancakes is a fantastic idea, especially since they store and reheat so wonderfully. This makes them perfect for quick, delicious breakfasts throughout the week. To ensure they stay fresh and delicious, follow these storage tips:
- Cool Completely Before Storing: This is a crucial step! Always allow your cooked pancakes to cool completely to room temperature before storing them. Storing warm pancakes in an airtight container will trap moisture, causing them to become soggy and potentially spoil faster.
- Refrigeration:
- How to Store: Once cooled, stack the pancakes with parchment paper between each one to prevent them from sticking together. Place them in an airtight container or a large, sealable bag.
- Duration: Stored properly, your pumpkin pancakes will remain fresh in the fridge for up to 3 days.
- Freezing for Long-Term Storage:
- How to Store: For longer storage, it’s best to wrap each individual pancake tightly with plastic wrap before placing them in an airtight freezer-safe container or a heavy-duty freezer bag. This extra step prevents freezer burn and makes it easy to grab just one or two at a time.
- Duration: Leftover pancakes can be frozen for up to 3 months.
- Defrosting: You can defrost them in the microwave for a minute or two, or directly reheat them from frozen using one of the methods below.
- Reheating Your Pancakes:
- Microwave: This is the quickest method. Place 1-2 pancakes on a microwave-safe plate and heat in 30-second increments until warmed through. Be careful not to overheat, as they can become rubbery.
- Skillet (Recommended for Best Texture): For a slightly crispy exterior, reheat pancakes in a dry non-stick skillet over medium heat for 1-2 minutes per side, until warmed and lightly golden.
- Toaster Oven or Conventional Oven: For reheating multiple pancakes at once, preheat your oven to 350°F (175°C). Place pancakes on a baking sheet and warm for about 5-10 minutes, or until heated through. This method helps maintain their fluffiness.
- Toaster: Single pancakes can be popped into a toaster on a low setting for a quick reheat and slight crisping.
- Enjoy Them Cold: Don’t underestimate the joy of a cold pancake! Sometimes, especially on a warm day, a cold pumpkin pancake can be a refreshing treat.
With these storage and reheating tips, you can enjoy the delightful taste of homemade pumpkin pancakes whenever a craving strikes, making your mornings a little bit easier and a lot more delicious!
Pumpkin Pancakes Recipe FAQs
Absolutely! Allowing the batter to rest for at least 5-15 minutes is crucial for achieving tender, fluffy pancakes. This resting period allows the gluten in the flour to relax (preventing tough pancakes) and gives the leavening agents (baking powder and baking soda) time to activate, creating more air bubbles for a lighter, more airy texture.
For classic American-style pancakes, the batter should be on the thicker side. This specific pumpkin pancake batter will be slightly thicker and almost creamy in consistency due to the pumpkin puree and baking powder. A thicker batter helps create taller, fluffier pancakes. If your batter is too thin, your pancakes might spread out too much and be flat.
Yes, definitely! Overmixing pancake batter is one of the most common mistakes. When you overmix, you overdevelop the gluten in the flour. This results in pancakes that are tough, chewy, and flat instead of light and fluffy. Always stir just until the wet and dry ingredients are combined, with a few lumps still visible.
You should let your pancake cook on the first side until numerous bubbles begin to form on the surface and the edges look set and slightly dry. This typically takes 1-2 minutes over medium heat. Once these visual cues are present, it’s time to flip, and then cook for another 30 seconds to 1 minute, or until the other side is golden brown.
No, it’s crucial to use 100% pure pumpkin puree, not pumpkin pie filling. Pumpkin pie filling already contains added sugar, spices, and sometimes other ingredients, which would throw off the balance of sweetness and seasoning in this recipe. Using pie filling would result in an overly sweet and potentially oddly textured pancake.
Several factors can lead to flat pancakes:
- Overmixing the batter: This is the most common cause, developing gluten and making them dense.
- Old or inactive leavening agents: Ensure your baking powder and baking soda are fresh.
- Batter too thin: If the batter is too liquidy, it won’t hold its shape and will spread thin.
- Pan not hot enough: A sufficiently hot pan helps the pancakes rise quickly.
While it’s best to cook pancake batter shortly after mixing for optimal fluffiness (due to active leavening agents), you can prepare the dry ingredients and wet ingredients in separate bowls the night before. Combine them just before cooking. If you must mix the whole batter ahead, store it covered in the fridge for up to 12-24 hours. The pancakes might be slightly less fluffy, but will still be delicious. Add a tiny pinch more baking soda before cooking if you do this, to reactivate some lift.
Discover More Delicious Pancake Recipes
If you embark on the delightful journey of making our Pumpkin Pancakes, we would absolutely love to hear from you! Please consider leaving a star rating and a comment below, letting us know how much you enjoyed the recipe. Your feedback is invaluable and helps us continue to share delicious culinary creations with you!
Print Recipe
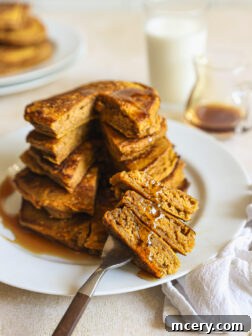
Best Recipe for Fluffy Pumpkin Pancakes
- Author: Katya
- Prep Time: 15 min
- Cook Time: 30 min
- Total Time: 45 minutes
- Yield: 18 pancakes
- Category: Breakfast
- Method: Stovetop
- Cuisine: American
Description
Discover how to make the most delightful Pumpkin Pancakes using simple ingredients. Sweet, warm, and perfectly fluffy, they are an easy breakfast that will make waking up a joy. This comprehensive guide ensures you achieve perfect results every time.
Ingredients
- 2 cups all-purpose flour, spoon & leveled
- ¼ cup cane or granulated sugar
- 4 tsp. baking powder
- ¼ tsp. baking soda
- ½ tsp. salt
- 1 ½ tsp. ground cinnamon
- 1 tsp. pumpkin pie spice
- 1 ¼ cup pumpkin puree
- 1 ½ cups milk
- ¼ cup melted unsalted butter, slightly cooled
- 2 tsp. pure vanilla extract
- 1 large egg
Instructions
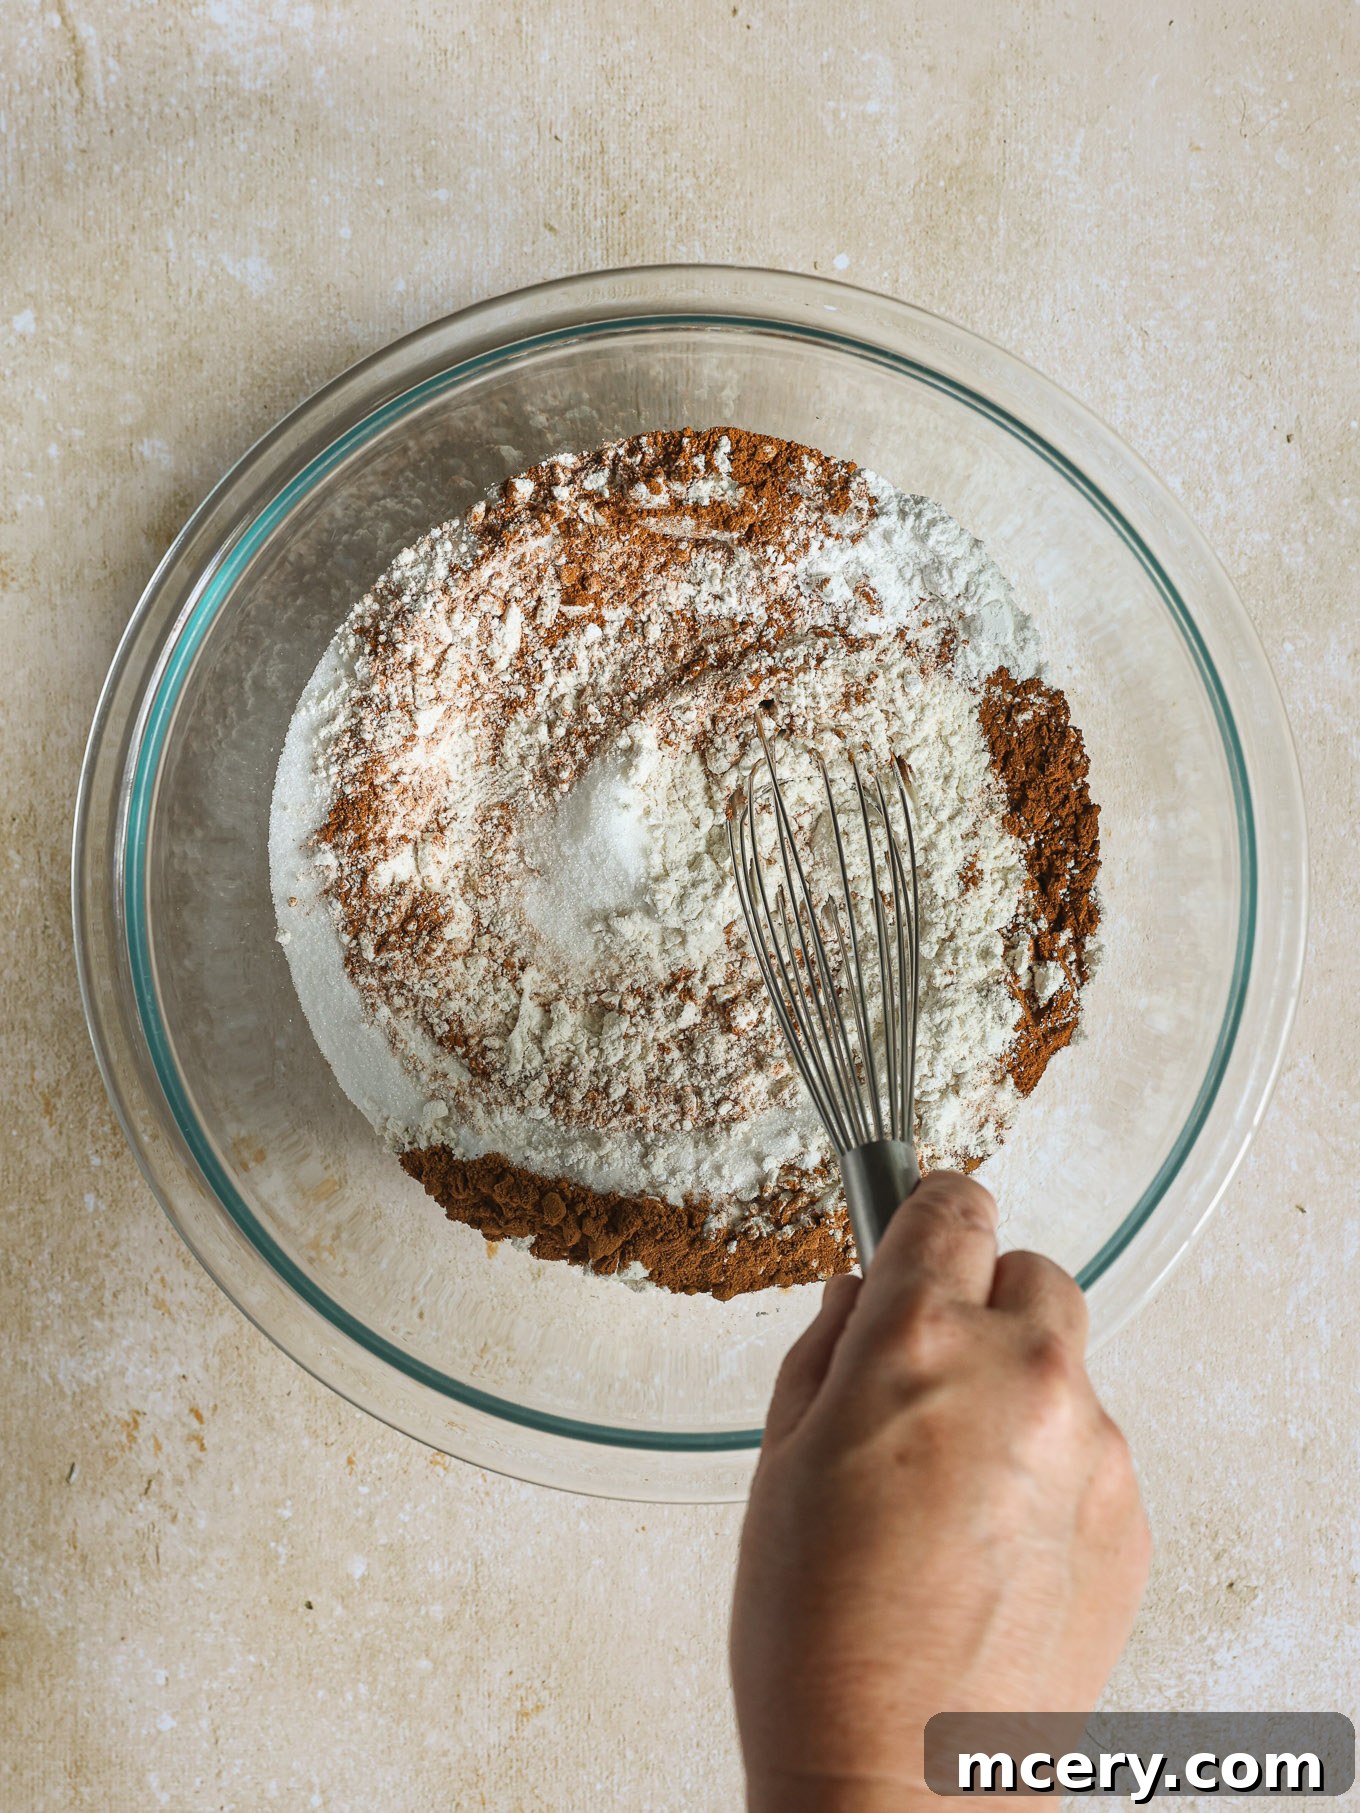
- In a large mixing bowl, whisk together the flour, sugar, baking powder, baking soda, salt, cinnamon, and pumpkin pie spice until well combined.
- In a separate bowl, whisk together the pumpkin puree, milk, melted butter, vanilla, and egg until smooth.
- Add the wet ingredients into the dry ingredients and stir with a wooden spoon or spatula just until combined. Be careful not to overmix; a few lumps are perfectly fine. The batter will be thick and creamy. Set aside to rest for about 5-10 minutes. If the batter feels too thick after resting, add 1-2 tablespoons of milk to reach your desired consistency.
- Heat a non-stick skillet or griddle over medium heat and lightly grease it with butter or cooking spray. Pour ¼ cup of batter onto the skillet for each pancake, gently spreading it out to a 3 ½ to 4-inch circle. Cook until bubbles form on the surface and the edges look set. Flip and cook for another 30 seconds to 1 minute, or until golden brown.
- Transfer cooked pancakes to a plate and keep them warm in a 200°F (95°C) oven while you finish the rest. Repeat with the remaining batter, greasing the skillet as needed between each pancake. Serve hot with your favorite toppings!
Notes
- Pumpkin Puree: Always use 100% pure pumpkin puree, not pumpkin pie filling. Pie filling has added sugar and spices that will alter the flavor profile. If using homemade puree, ensure it’s well-drained to avoid excess moisture.
- Don’t Overmix: The golden rule for fluffy pancakes is to avoid overmixing. Stir only until the ingredients are just combined, leaving some small lumps. This keeps the gluten relaxed and the pancakes light and tender.
- Milk Options: Whole milk provides a rich, tender pancake. Buttermilk is an excellent alternative; its acidity reacts wonderfully with baking soda for extra fluffiness. If using buttermilk, you might need to adjust the quantity slightly as it’s thicker than regular milk. Non-dairy milks like almond or oat milk can also be used.
- Toppings: Elevate your pancakes with warm maple syrup, toasted pecans, fresh berries, or a dollop of whipped cream. A sprinkle of cinnamon sugar or a drizzle of caramel sauce can also add a special touch.
- Make Ahead: For best fluffiness, cook batter immediately. However, you can prepare wet and dry ingredients separately the night before and combine just before cooking.
Nutrition
- Serving Size: 2 pancakes
- Calories: 210
- Sugar: 9 g
- Sodium: 196.4 mg
- Fat: 6.1 g
- Carbohydrates: 34.3 g
- Protein: 5.4 g
- Cholesterol: 35 mg