
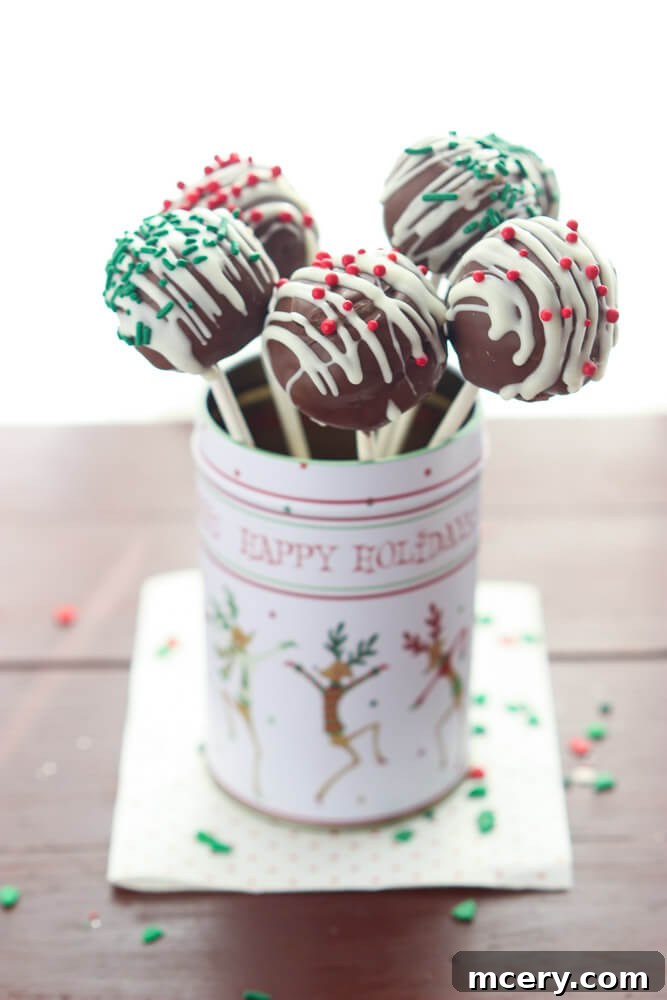
Transform your holiday celebrations with these incredibly easy-to-make homemade Christmas cake pops. Forget about needing special molds or fancy tools; this recipe simplifies the process, allowing anyone to create delightful, bite-sized treats perfect for the festive season. With just a few basic ingredients, a dash of creativity, and our straightforward instructions, you’ll be crafting adorable holiday cake pops that are sure to impress family and friends. Get ready to dive into the joy of festive baking and add a touch of sweet charm to your holiday spread!
Simple Christmas Cake Pops – No Special Pan or Mold Required!
The idea of crafting these charming Christmas cake pops has been a delightful obsession of mine for quite some time. The inspiration first struck after witnessing my sister-in-law create the most adorable, girly cake pops for her 7-year-old’s birthday party. What truly captured my imagination was the ingenious fact that she crafted these cake pops entirely by hand, without the need for any specialized baking pans or dedicated cake pop makers. This revelation was a game-changer for someone like me, who constantly strives to minimize kitchen clutter and maximize efficiency.
While the traditional cake pop maker certainly offers a convenient route, embracing the “no special pan” method opens up a world of accessible baking for everyone. It means you don’t need to invest in single-use gadgets that might sit in your cupboard for most of the year. Instead, you can rely on basic baking essentials you likely already own, making these festive treats more approachable and budget-friendly. This hands-on approach, while perhaps requiring a touch more effort in the initial shaping stage, rewards you with beautiful, homemade cake pops and the satisfaction of creating them from scratch using simple techniques.
The secret to successfully creating these delightful, perfectly formed cake pops lies predominantly in achieving the right consistency for your cake mixture. If the mixture is too soft, your cake balls simply won’t hold their shape, and you’ll find them struggling to stay attached to their sticks. Therefore, it is paramount to adhere closely to the chilling times outlined in the recipe. However, don’t be afraid to trust your instincts and make minor adjustments. You’ll quickly discern if the mixture is too pliable; if your cake balls feel overly sticky or tend to sag and separate from the pop sticks, an extended period in the refrigerator or freezer is your best friend. This extra chilling time allows the butter and condensed milk in the mixture to firm up, creating a sturdy foundation for your festive creations. The goal is a moldable, yet firm, dough-like consistency that’s easy to roll and holds its form beautifully.
What You’ll Need for Holiday Cake Pops: Essential Ingredients & Tools
Crafting the perfect Christmas cake pops requires a thoughtful selection of both ingredients and basic kitchen tools. We’re focusing on simplicity here, ensuring that you likely have most of these items already at hand. For a comprehensive list of quantities, please refer to the detailed recipe card below.
- All-Purpose Flour: This is the fundamental building block of our cake batter, providing structure and texture. If you’re catering to dietary needs, a 1:1 all-purpose gluten-free flour blend can be a suitable substitute, though results may vary slightly.
- Granulated Sugar: Essential for sweetness and moisture, granulated sugar creates that classic cake flavor we all love. Cane sugar can be used as an alternative.
- Baking Soda: Our key leavening agent, baking soda reacts with the buttermilk to create a light and fluffy cake texture, crucial before it’s crumbled into cake pop perfection.
- Eggs: Acting as a binder, eggs are vital for holding the cake batter ingredients together and contributing to the cake’s overall richness and structure.
- Buttermilk: Beyond simply combining ingredients, buttermilk adds a subtle tang and remarkable tenderness to the cake. Its acidity also works with baking soda to help the cake rise beautifully.
- Water (Room Temperature): Helps achieve the ideal batter consistency without thinning it too much or affecting the temperature of other ingredients.
- Vegetable Oil: Contributes significantly to the cake’s moistness and tender crumb, ensuring your cake pops are soft and delightful.
- Unsalted Butter (Room Temperature): Adds a rich, buttery flavor and contributes to the cake’s moistness. Using unsalted butter gives you control over the overall saltiness of the recipe. It’s also crucial for making the binding mixture that transforms cake crumbs into moldable balls.
- Sweetened Condensed Milk: This is the magic ingredient that transforms our cake crumbs into perfectly moist, flavorful, and wonderfully moldable cake balls. It enhances flavor and helps them hold their shape without being overly sticky.
- Chocolate Candy Melts: The colorful coating that makes cake pops so appealing! You can choose white, milk chocolate, or dark chocolate candy melts to suit your preference or holiday theme. These are designed to melt smoothly and set firmly, creating a beautiful shell.
- White Chocolate Chips (and Shortening): Used for decorative drizzles and intricate designs. A touch of shortening helps the white chocolate melt more smoothly and achieve a pourable consistency for decorating.
- Christmas Sprinkles: The ultimate festive touch! Have a variety on hand to create different looks and add sparkle to your holiday cake pops.
Essential Kitchen Tools: You’ll need a standard 9×13 inch cake pan, several medium and large mixing bowls, a reliable hand mixer for creaming butter, two large baking sheets (lined with parchment paper), sturdy cake pop sticks, and a deep, microwave-safe bowl for melting your candy melts. A styrofoam block is also incredibly useful for holding your cake pops upright while they set.
How to Make Christmas Cake Pops: A Step-by-Step Guide
Creating these festive Christmas cake pops is a rewarding process that begins with baking a simple cake and ends with beautifully decorated treats. Follow these detailed steps for a smooth and enjoyable baking experience. Remember, precise chilling is key to success!
- Prepare Your Cake Batter: Begin by preheating your oven to 350°F (175°C). Thoroughly grease a 9×13 inch rectangular cake pan. In a medium-sized bowl, whisk together all the dry ingredients: flour, granulated sugar, and baking soda. Set this aside.
- Combine Wet Ingredients: In a separate large mixing bowl, combine the eggs, buttermilk, room temperature water, and vegetable oil. Mix these wet ingredients together with a wooden spoon until they are well combined and smooth.
- Mix and Bake the Cake: Gradually add the dry flour mixture into the wet ingredients, whisking continuously until a smooth cake batter forms. Be careful not to overmix, as this can lead to a tough cake. Pour the batter evenly into your prepared 9×13 cake pan. Bake for approximately 20-25 minutes, or until a toothpick inserted into the center of the cake comes out perfectly clean. Allow the cake to cool completely in the pan, or transfer it to a wire rack to expedite the cooling process. A fully cooled cake is crucial for the next steps.
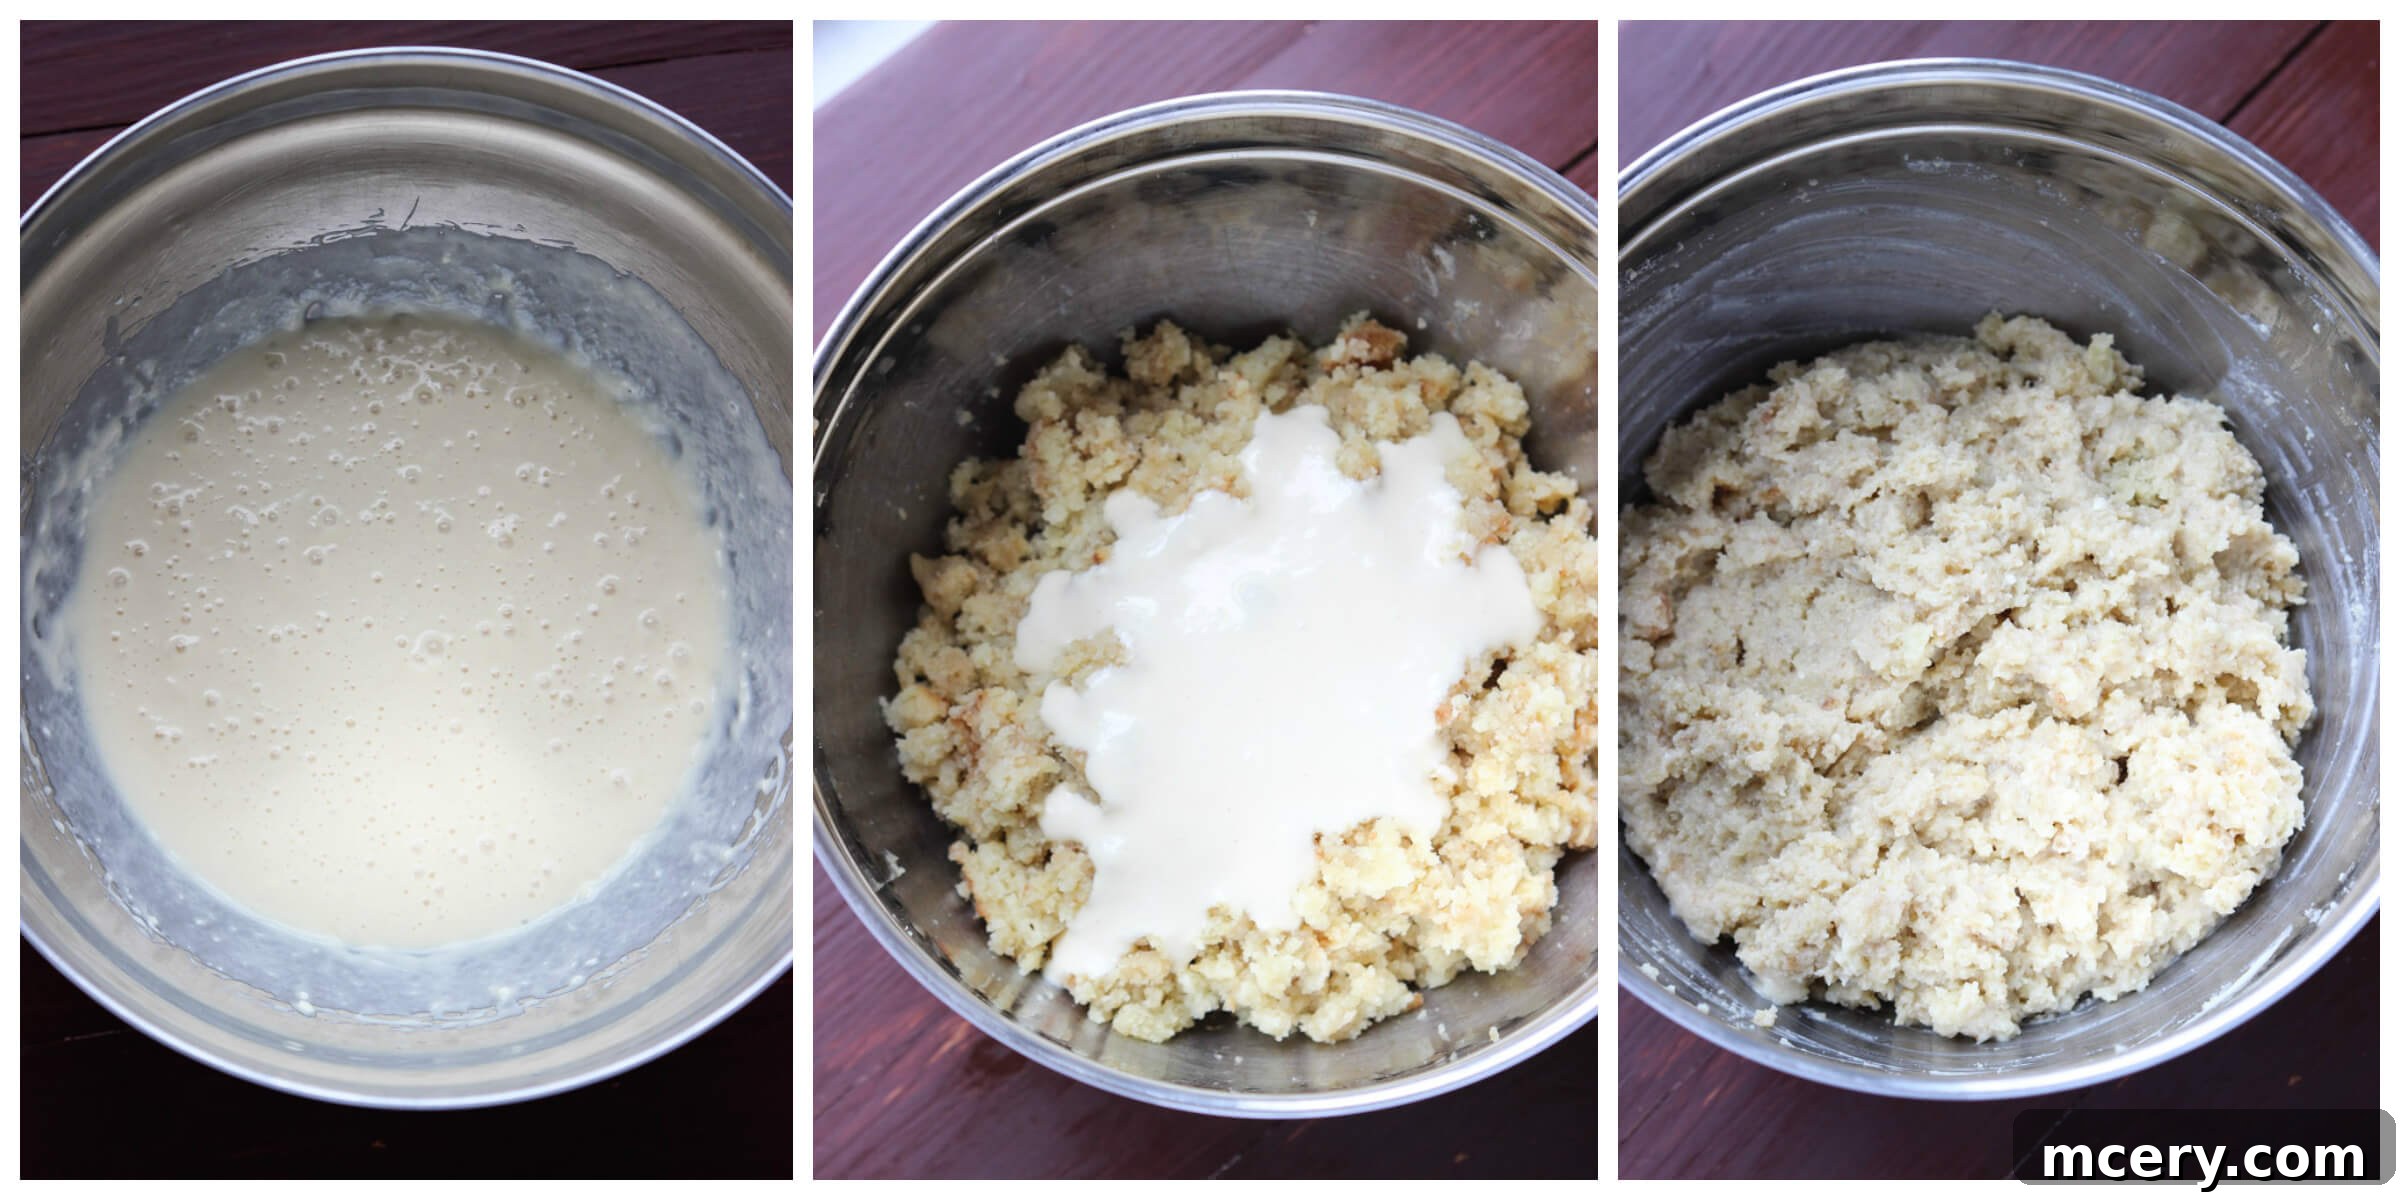
- Prepare the Binding Mixture: While the cake cools, prepare the delicious binding mixture. In a medium bowl, use a hand mixer to cream the softened unsalted butter on medium speed until it’s light and fluffy. Gradually add the entire can of sweetened condensed milk and continue to beat until the mixture is smooth and well combined. This creamy concoction is what will give your cake pops their incredible texture and help them hold together.
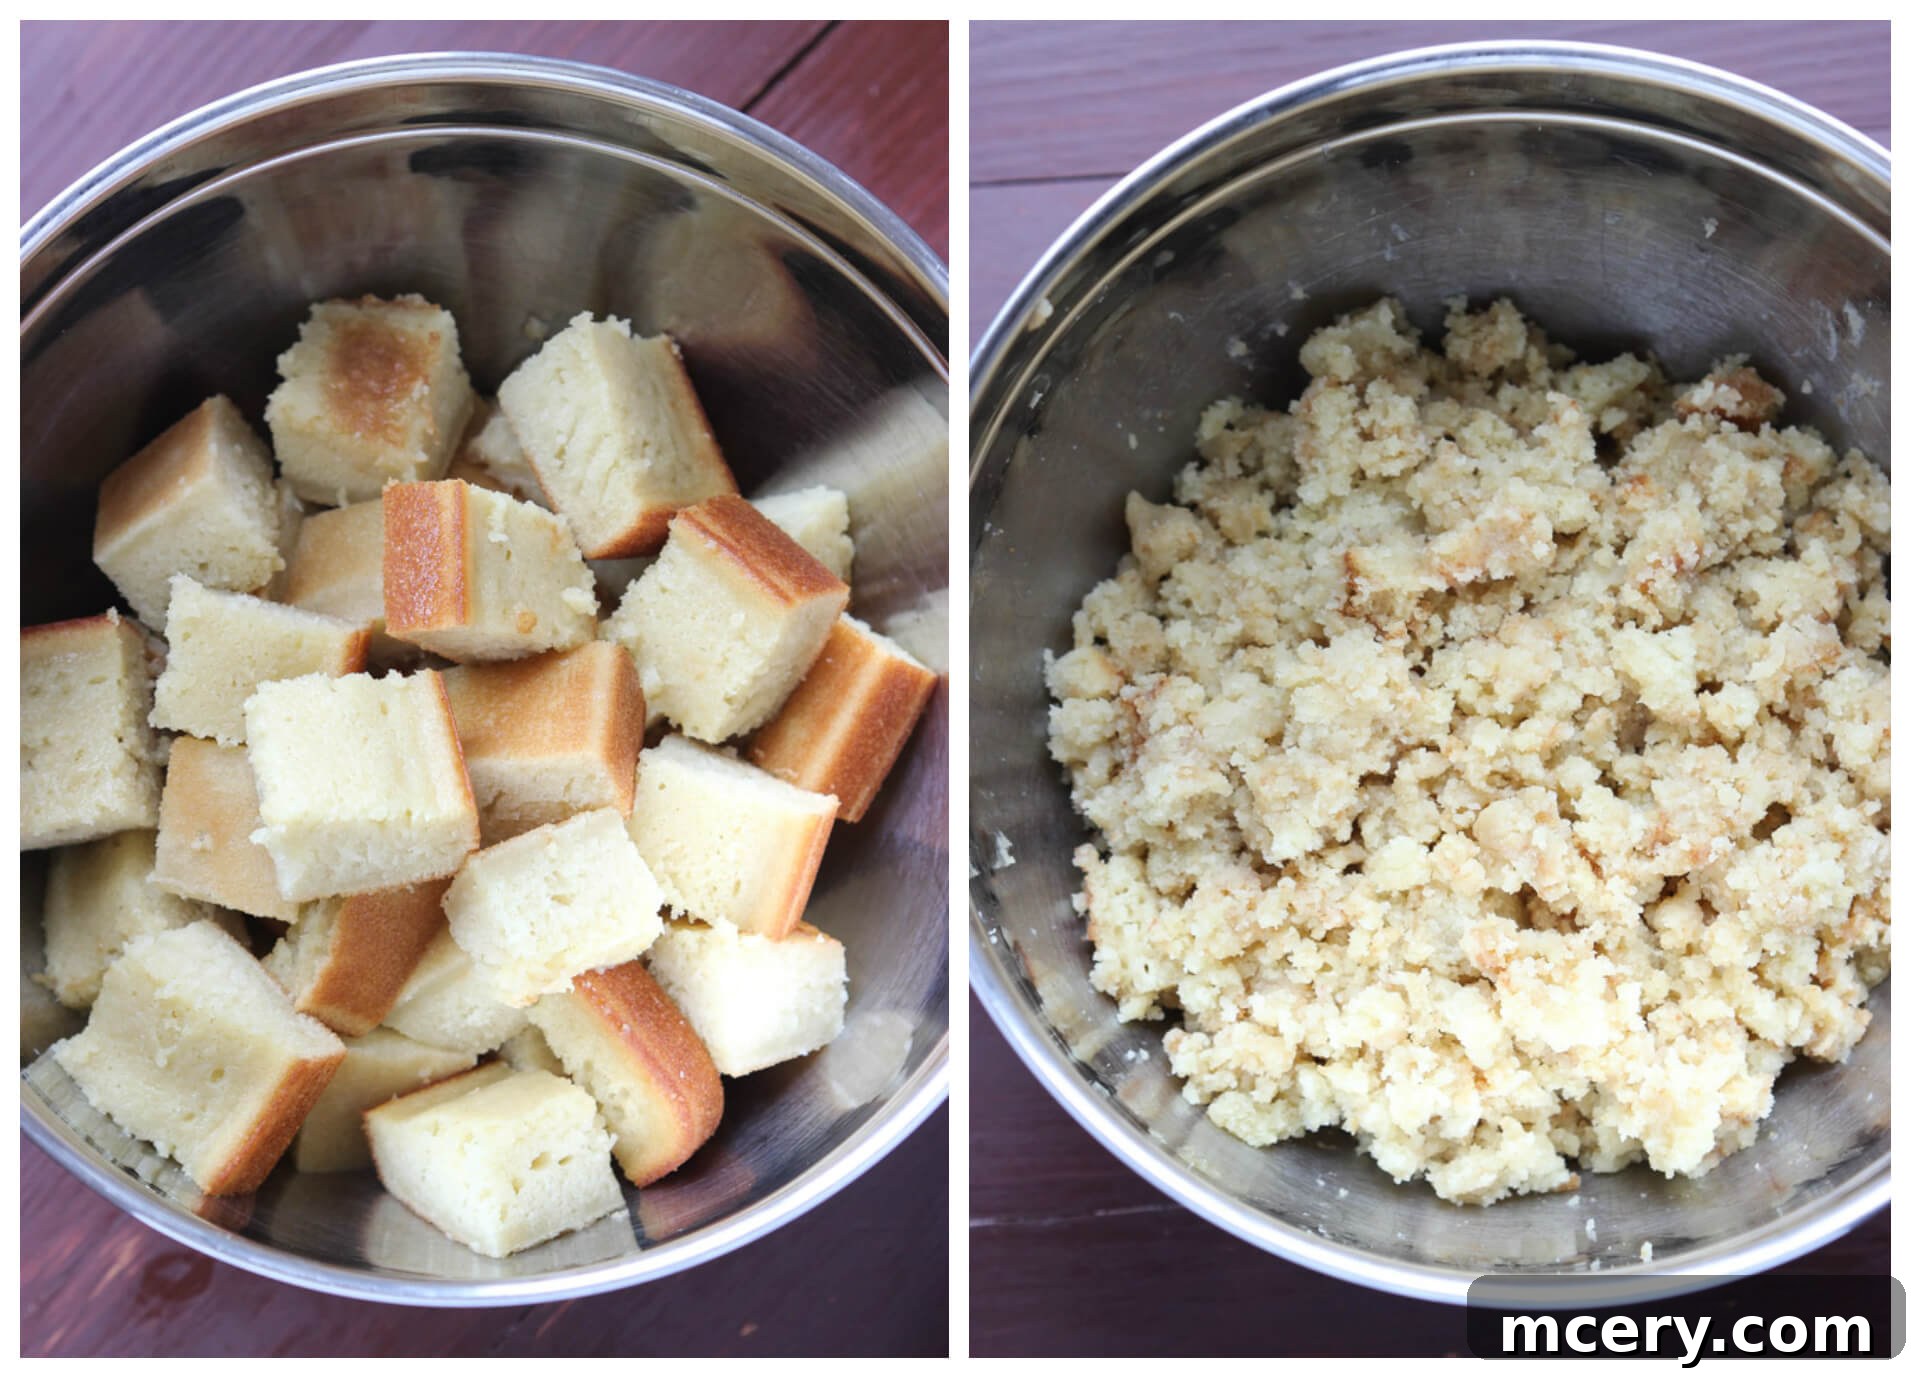
- Crumble the Cooled Cake: Once your cake is completely cool, cut it into small, manageable pieces directly in the pan. Transfer these cake pieces to a large mixing bowl. Now, it’s time to get your hands a little messy! Use your fingers to break down the cake pieces, crumbling them into fine, uniform crumbs. The goal is to achieve a consistent, crumbly texture without large chunks. The cake will be naturally moist, which is perfect.
- Form the Cake Pop Mixture: Add the prepared sweetened condensed milk and butter mixture to the cake crumbs. Using your hands or a sturdy spatula, thoroughly mix everything together until completely combined. You’re looking for a dough-like consistency that is moist, sticky, but firm enough to roll. Cover the bowl tightly with plastic wrap and transfer it to the refrigerator to chill for at least 1 hour. This chilling time is vital for firming up the mixture, making it much easier to roll into balls.
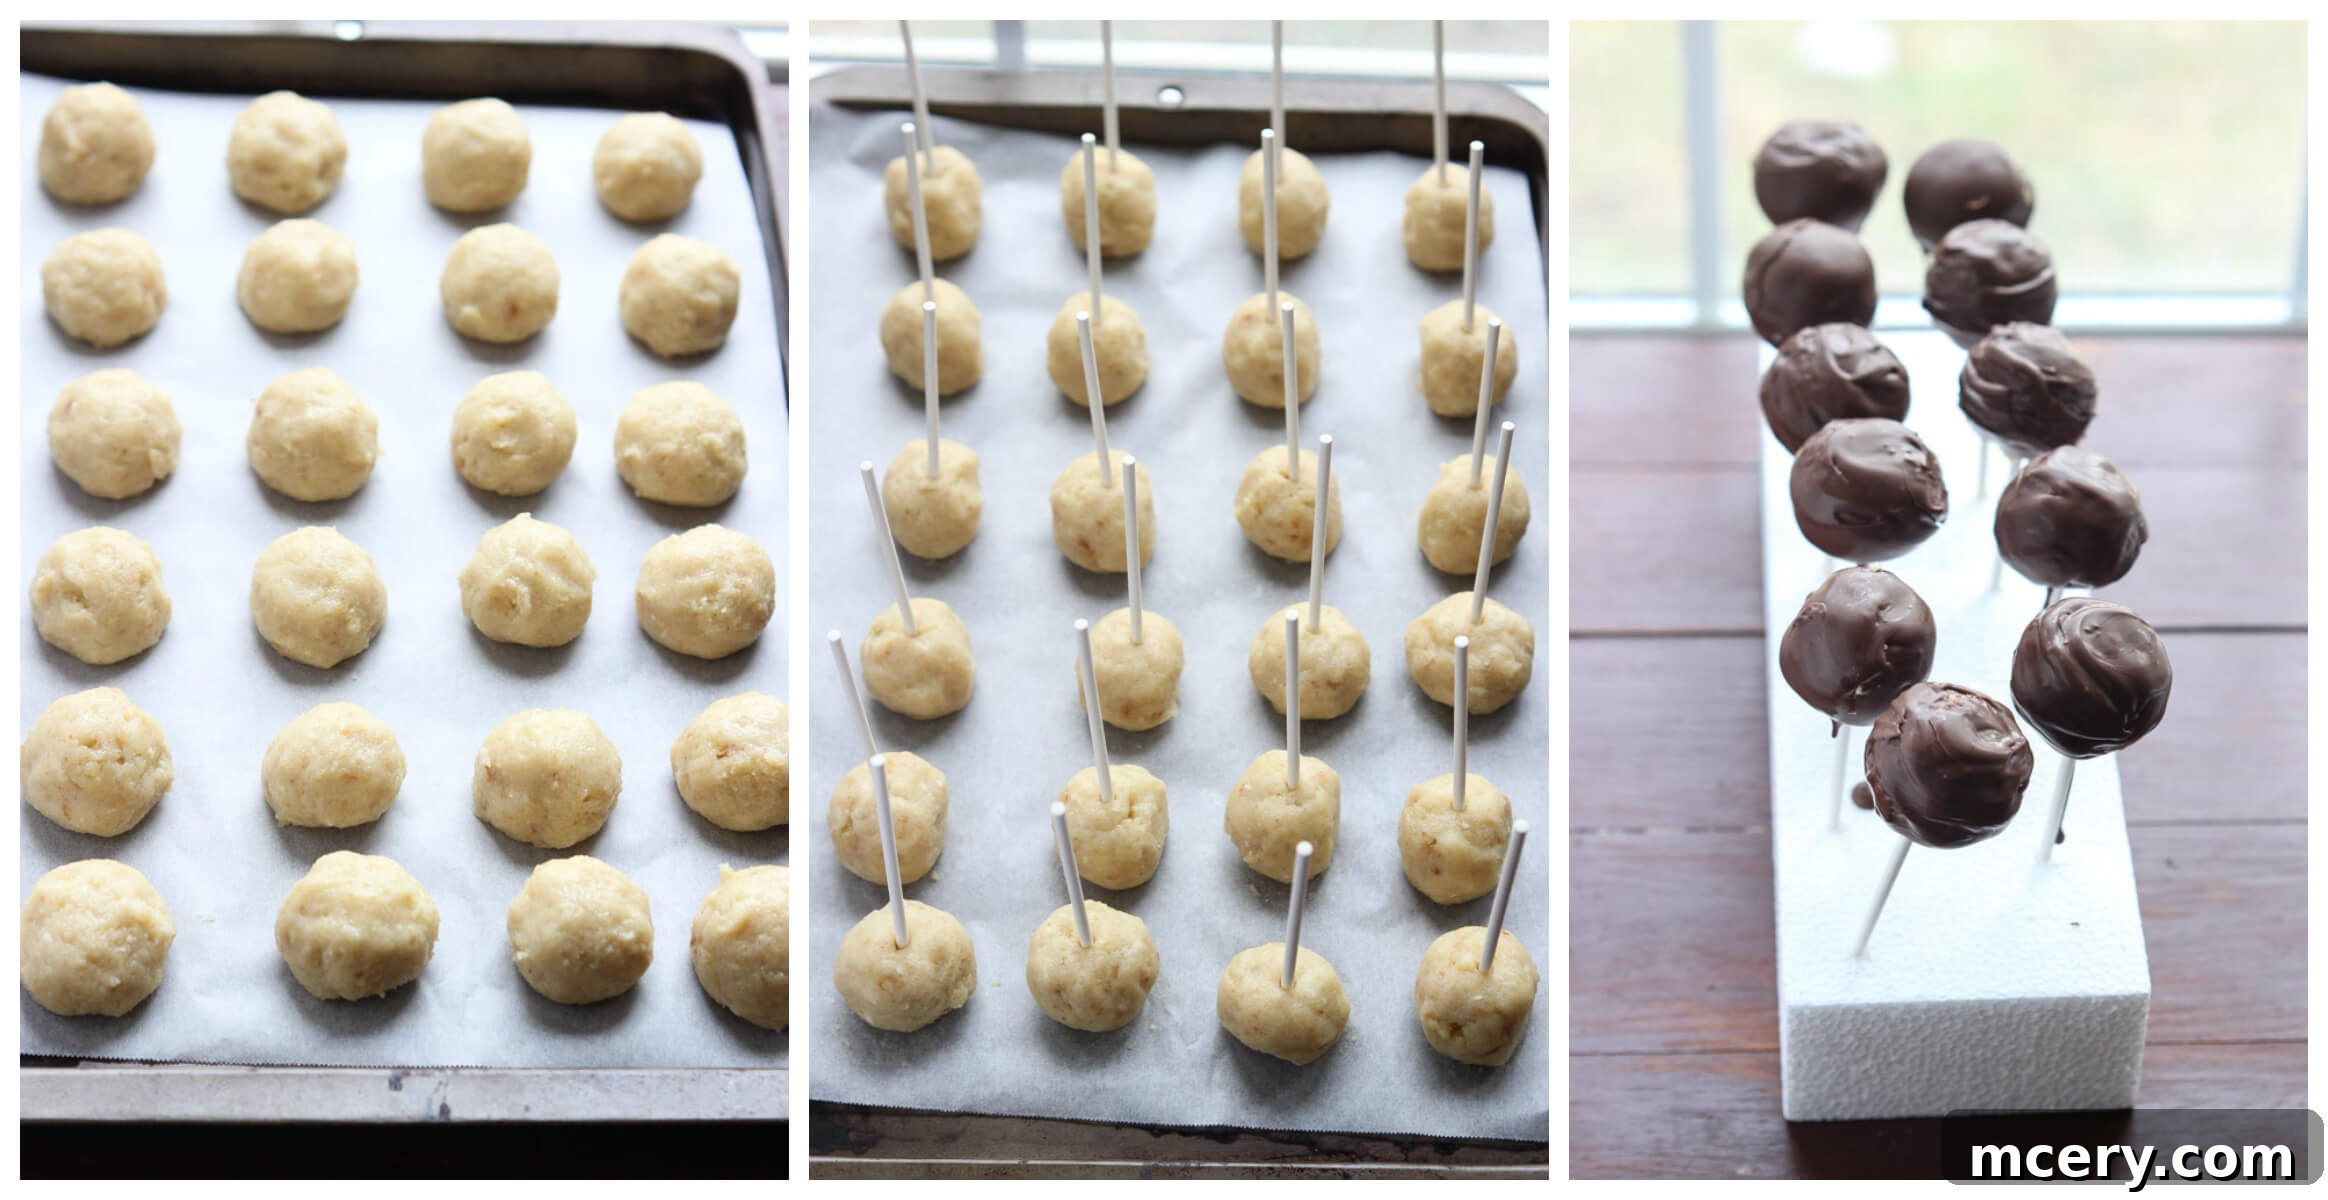
- Shape and Chill Cake Balls: Line two large baking sheets with parchment paper. Using your hands or a small cookie scoop, portion the chilled cake mixture into equal-sized balls, approximately 1 to 1.5 inches in diameter. Roll them smoothly between your palms to create perfectly round shapes. Place these cake balls in a single layer on the prepared baking sheets. Once all balls are formed, return them to the refrigerator to chill for another 2 hours. This second chilling period ensures they are firm enough to easily insert the sticks without crumbling.
- Insert Pop Sticks and Freeze: Take your chilled cake balls from the refrigerator. Carefully insert a cake pop stick halfway into each cake ball. It’s important not to poke the stick all the way through to the opposite end, as this can cause the cake pop to break. The stick should be firmly embedded. Once all sticks are in place, transfer the baking sheets to the freezer for at least 30 minutes. This final freezing step is crucial; it helps the cake pops firm up even more, ensuring they won’t fall apart when dipped in warm chocolate.
- Melt Chocolate and Dip: In a deep, microwave-safe bowl, microwave half of your chocolate candy melts. Heat in 30-second intervals, stirring well after each interval, until the chocolate is smooth and fully melted (this usually takes about 1.5 minutes total). Working with smaller batches of melted chocolate is much easier for dipping, so melt the remaining candy melts as needed.
- Coat and Decorate: Dip each frozen cake pop into the melted chocolate, rotating gently to coat it evenly. Allow any excess chocolate to drip back into the bowl. Immediately after dipping, insert the coated cake pop into a styrofoam block to hold it upright while the chocolate sets. Repeat this process with the remaining cake pops.
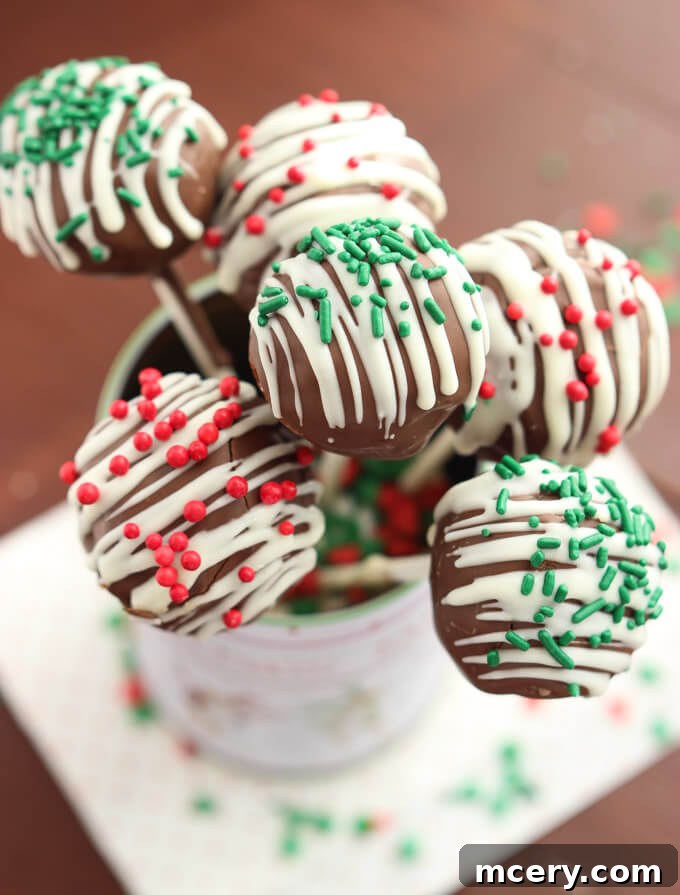
- Drizzle and Sprinkle: To decorate, melt the white chocolate chips with a teaspoon of shortening in a separate microwave-safe bowl, heating in 30-second intervals until smooth. Transfer the melted white chocolate to a small ziplock bag, snip off a tiny corner, and drizzle it artfully over the chocolate-coated cake pops. While the drizzle is still wet, immediately cover with your chosen Christmas sprinkles. Allow the cake pops to stand at room temperature until the chocolate and drizzle are completely set.
- Enjoy: Once fully set and firm, carefully remove the cake pops from the styrofoam block and enjoy your festive, homemade Christmas treats!
Unleash Your Creativity: Festive Christmas Cake Pop Decoration Ideas
While we love keeping our cake pop decorations elegantly simple, a beautiful drizzle of melted white chocolate chips mixed with a touch of shortening, there’s absolutely no limit to how creative you can get! Christmas is the perfect time to let your imagination run wild with colors, textures, and festive themes. Here are some fantastic ideas to elevate your homemade Christmas cake pops:
- Classic Festive Sprinkles: The easiest way to add instant cheer! Use a variety of red, green, silver, and gold sprinkles, nonpareils, or edible glitter for a dazzling effect. Apply them immediately after dipping in chocolate while the coating is still wet.
- Chocolate Shavings or Curls: For a sophisticated touch, sprinkle fine chocolate shavings or delicate chocolate curls over your still-wet coating. Dark chocolate on white cake pops, or vice-versa, creates a striking contrast.
- Coconut Flakes: A dusting of shredded coconut can create a snowy, winter wonderland effect, especially on white chocolate-coated cake pops.
- Chopped Nuts: Finely chopped pecans, walnuts, or almonds add a lovely crunch and a nutty flavor that complements many cake bases.
- Crushed Candy Cane Pieces: For a burst of minty freshness and vibrant red and white color, crush candy canes and sprinkle them generously. This is a quintessential Christmas flavor!
- Edible Glitter or Dust: A little edible glitter in gold, silver, or iridescent white can make your cake pops truly sparkle under the holiday lights.
Beyond simple toppings, you can transform your cake pops into adorable characters or festive objects:
- Rudolph the Red-Nosed Reindeer: Dip cake pops in milk chocolate candy melts. Use mini pretzels for antlers, small candy eyes, and a red M&M or a red candy pearl for Rudolph’s iconic nose. You can even pipe a small smile with dark chocolate!
- Cheerful Snowmen: Coat your cake pops in white chocolate candy melts. Use edible marker pens for dot eyes and an orange sprinkle for a carrot nose. Small black sprinkles can be used for button details, and a thin licorice string or edible fondant can become a scarf.
- Mini Christmas Trees: Dip cake pops in green candy melts. Before it sets, add tiny star sprinkles for ornaments, a yellow star sprinkle on top, and a brown M&M for the tree trunk at the base. Alternatively, pipe green frosting in a swirling pattern to create a tree shape.
- Sparkling Ornaments: Get creative with different colored candy melts (red, green, blue, silver). After dipping, use contrasting colored frosting or piping gel to create intricate designs like swirls, stripes, or dots, mimicking classic tree ornaments. Add a small edible silver ball on top to simulate the ornament hanger.
- Santa Hats: Dip the bottom part of a cake pop in red candy melts, then dip the top into white candy melts for the brim, and add a small white mini marshmallow or white candy pearl at the very top for the pom-pom.
- Gingerbread Men/Women: Use tan or light brown candy melts for the base. Pipe on white frosting details for icing and buttons, and use small candy eyes.
The key is to work quickly once your cake pops are dipped, as the chocolate sets relatively fast. Have all your decorations prepped and ready before you start dipping for the best results. Enjoy the process of bringing these delightful edible crafts to life!
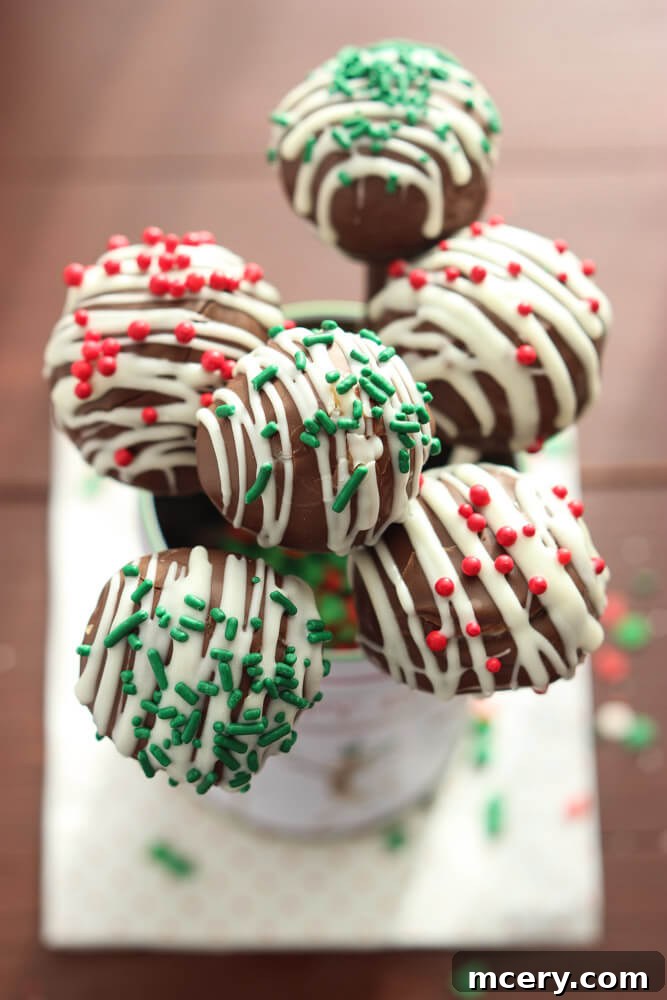
Christmas Cake Pop Gifting & Presentation Ideas
These festive cake pops are almost too charming to eat, making them an absolutely perfect choice for holiday parties and, especially, for thoughtful homemade gifts! A handmade gift carries a special warmth and personal touch that mass-produced items often lack. Here are some wonderful ways to package and present your delicious Christmas cake pops to truly make an impact:
- Individual Cellophane Bags: The simplest and most classic presentation. Wrap each cake pop individually in a clear cellophane bag, twisting the bottom and securing it with a festive ribbon. Add a small, personalized name tag or a handwritten holiday greeting to each one for an extra special touch. This also helps keep them fresh!
- Edible Bouquets: Create a stunning centerpiece or a grand gift by arranging a bouquet of cake pops. Use a small decorative pot or vase filled with a piece of floral foam or styrofoam. Insert the cake pop sticks into the foam, varying heights for visual interest. Surround the base with tissue paper, festive crinkle paper, or even fresh sprigs of holly or pine (ensuring they don’t touch the cake pops).
- “Ornaments” on a Styrofoam Tree: For a truly unique and edible display, create a “cake pop Christmas tree.” Purchase a cone-shaped styrofoam form (available at craft stores). Wrap the form in foil or green tissue paper. Then, insert your decorated cake pops directly into the styrofoam, arranging them like ornaments. This makes an incredible showstopper for a holiday party!
- Mug Stuffers: A cozy and decadent gift idea! Find a charming holiday mug and carefully nestle a few cake pops inside. To make it even more delightful, add a packet of gourmet hot chocolate mix, a few mini marshmallows, or even a small tea bag. Wrap the mug in cellophane and tie it with a bow. This creates a complete, comforting treat package.
- Gift Boxes or Tins: For a more formal presentation, arrange multiple cake pops in a decorative gift box or tin. Use cupcake liners or small paper cups to hold each cake pop upright and prevent them from touching. Layer with tissue paper and perhaps a handwritten recipe card if you wish to share your baking secret!
- Advent Calendar Treat: If you’re feeling ambitious, use them as daily treats in a homemade advent calendar for a loved one. Each day reveals a new, delicious surprise!
No matter how you choose to package and present them, these homemade Christmas cake pops are always a cherished and appreciated gift. They’re a testament to your effort and thoughtfulness, bringing a little bit of homemade magic to everyone who receives them during the most wonderful time of the year.
How to Store Holiday Cake Pops for Optimal Freshness
Proper storage is essential to keep your delicious holiday cake pops fresh, moist, and delightful for as long as possible. Fortunately, these festive treats are quite forgiving and can be stored in a few different ways, making them perfect for preparing ahead of time or enjoying over several days.
- Refrigerator Storage: Once your cake pops are fully set (meaning the chocolate coating is firm), you can wrap individual cake pops tightly in cellophane. Alternatively, transfer them to an airtight container, placing them in a single layer or separating layers with parchment paper to prevent sticking. Stored in the refrigerator, these cake pops will maintain their freshness and flavor for up to 2 weeks. This makes them an excellent make-ahead treat for holiday gatherings!
- Freezer Storage: For longer-term storage, finished and decorated cake pops can be frozen. Wrap each cake pop individually in plastic wrap, then place them in an airtight freezer-safe container or a heavy-duty freezer bag. They will stay fresh and delicious in the freezer for up to 6 weeks. When you’re ready to enjoy them, simply transfer the frozen cake pops to the refrigerator overnight to thaw gradually. They will taste as good as freshly made!
- Room Temperature (Short Term): If your home is cool (below 70°F or 21°C) and not humid, cake pops can sometimes be left at room temperature for up to 2-3 days, especially if they are completely coated in chocolate. However, for best quality and to extend freshness, refrigeration is always recommended due to the butter and condensed milk in the cake mixture.
Always ensure the cake pops are completely set before wrapping or storing to prevent smudging or sticking. By following these simple storage tips, you can enjoy your homemade Christmas cake pops throughout the holiday season, or have them ready to share at a moment’s notice.
More Delightful Holiday Treats to Explore
We hope you enjoy making and sharing these delightful homemade Christmas cake pops! If you try our recipe, please consider leaving a star rating and a comment below to let us know how your festive treats turned out. Your feedback is greatly appreciated!
Christmas Cake Pops Recipe
- Author: Katya
- Prep Time: 2 hours 30 mins
- Cook Time: 25 mins
- Total Time: 2 hours 55 mins
- Yield: 50–55 cake pops
- Category: Dessert
- Method: Baked
- Cuisine: American
Print Recipe
Description
Festive Christmas cake pops made entirely without a special pan or mold – perfect for holiday gifting and celebrations!
Ingredients
- 2 cups all-purpose flour
- 2 cups granulated sugar
- 1 tsp. baking soda
- 3 eggs
- 1 cup buttermilk
- 1 cup water, room temperature
- ⅔ cup vegetable oil
- ½ cup unsalted butter, at room temperature
- 1 (14 oz.) can sweetened condensed milk
- 1 (16 oz). bag chocolate candy melts
- ½ cup white chocolate chips (you may require little less or more depending on design)
- 1 tsp. shortening
- Christmas sprinkles
- Special tools: cake pop sticks, 4-12X4 styrofoam blocks
Instructions
- Preheat the oven to 350°F (175°C).
- Butter a 9×13 inch rectangular cake pan.
- In a medium bowl, combine the flour, sugar, and baking soda; set aside.
- In a large bowl, mix the eggs, buttermilk, water, and vegetable oil with a wooden spoon until combined. Gradually whisk in the flour mixture.
- Transfer the cake batter to the prepared cake pan and bake for 20-25 minutes or until a toothpick inserted in the middle comes out clean. Cool the cake in the pan on a wire rack.
- In a medium bowl, cream the butter with a hand-held mixer on medium speed until smooth. Add the condensed milk and beat to combine.
- Cut the cooled cake into small pieces (while it is still in the pan). Transfer the cake pieces to a large mixing bowl and, using your hands, crumble the cake pieces into small, uniform crumbs. Note: the cake will be moist and sticky.
- Add the condensed milk and butter mixture to the cake crumbs and mix thoroughly to combine. Cover the bowl with plastic wrap and chill in the refrigerator for 1 hour.
- Line two large baking sheets with parchment paper. Using your hands or a small cookie batter scoop, make 1 to 1.5 inch balls out of the cake mixture and place them on the prepared cookie sheet in a single layer. Chill the cake balls in the refrigerator for 2 hours.
- Insert the pop sticks halfway into the cake balls. Note: Ensure you do not poke through the opposite end of the cake ball, or your cake pops may not hold. Chill in the freezer for 30 minutes.
- In a deep microwave-safe bowl, microwave half of the candy melts for about 1.5 minutes or until smooth, stirring every 30 seconds. Note: Working with batches of melted chocolate is much easier than melting the whole bag at once. You can melt the remaining chocolate as needed.
- Dip each chilled cake pop into the melted chocolate, coating it evenly and allowing extra chocolate to drip back into the bowl. Insert the coated cake pops into the styrofoam block to set. Repeat with the remaining cake pops.
- To decorate: melt the white chocolate chips with shortening in a microwave-safe bowl until smooth, stirring every 30 seconds (about 1.5 minutes total).
- Place the melted white chocolate into a small ziplock bag with the tip cut off and drizzle it over the chocolate-coated cake pops. Immediately cover with decorative Christmas sprinkles. Let stand at room temperature until fully set.
- Remove from the styrofoam block and enjoy your festive creations!
Notes
- (1) If you find that your cake pops are too soft or that the stick is not staying firmly in place, simply pop them back into the refrigerator or freezer for a bit longer to firm up.
- (2) To make delicious chocolate cake pops, add ¾ cup of unsweetened cocoa powder to the dry cake batter ingredients in Step One.
- (3) Please note that the “Total Time” listed in the recipe card does not include the essential chilling times required for the cake mixture and formed cake pops, which can add several hours to the overall preparation.
Nutrition Facts
- Serving Size: 1 cake pop
- Calories: 110
- Sugar: 9.7 g
- Sodium: 37.7 mg
- Fat: 5.9 g
- Carbohydrates: 13.5 g
- Protein: 1.2 g
- Cholesterol: 17.2 mg
We truly hope you enjoy creating these enchanting Christmas cake pops! They are a testament to the fact that you don’t need elaborate tools to craft something truly magical and delicious for the holidays. From simple ingredients to joyful decoration, these homemade treats are perfect for spreading cheer, delighting guests, and giving as heartfelt gifts. Happy baking and happy holidays!