

Discover the ultimate comfort food with our authentic homemade potato perogies recipe, packed with a savory filling of creamy mashed potatoes, crispy bacon, and fresh dill. Learn how to craft these delightful Polish dumplings from scratch and enjoy them topped with sweet caramelized onions or a dollop of tangy sour cream. Perfect for family meals, holiday gatherings, or simply a cozy night in, these perogies are a labor of love that promises a truly satisfying culinary experience.

What Exactly Are Potato Perogies? A Dive into Eastern European Comfort Food
Potato perogies, often spelled pierogi, are a beloved culinary staple deeply rooted in Eastern European culture, particularly prominent in Polish cuisine. These delightful dumplings consist of a simple, tender dough wrapper encasing a flavorful filling. While fillings vary widely, our recipe focuses on a classic, irresistible combination of fluffy mashed potatoes, savory sautéed onions, and crispy bacon, all enhanced by the aromatic freshness of dill.
Often considered the ultimate comfort food, perogies are more than just a dish; they represent tradition, family gatherings, and heartwarming meals. The homemade dough is carefully kneaded, rolled thin, and then cut into circles. Each circle is lovingly filled, folded into its iconic half-moon shape, and sealed before being gently simmered in boiling water until perfectly cooked. Once drained, they are typically tossed with a rich butter sauce, fried onions, or, as in our preferred method, served alongside sweet caramelized onions and a generous dollop of cool sour cream. They make an excellent main course for lunch or dinner and are even a fantastic, kid-friendly option!
One of the many advantages of homemade perogies is their make-ahead potential. You can prepare a large batch and freeze them, ensuring a delicious, ready-to-cook meal is always within reach for those busy weeknights or unexpected cravings.
Why Make Homemade Perogies from Scratch?
While store-bought perogies offer convenience, there’s an undeniable magic and superior quality that comes from crafting them yourself. Homemade perogies boast a freshness and depth of flavor that pre-packaged versions simply can’t match. The dough is tender and elastic, the filling is rich and perfectly seasoned, and you have complete control over every ingredient. This recipe simplifies the process, making it accessible for home cooks eager to experience the authentic taste and rewarding satisfaction of creating this classic dish from scratch.
Essential Ingredients for Your Perfect Perogies
Creating these scrumptious potato perogies requires a handful of simple, readily available ingredients. Each component plays a crucial role in building the layers of flavor and texture that make this dish so special.
For the Dough:
- All-Purpose Flour: The foundation of our tender dough. All-purpose flour provides the right structure and elasticity. For a slight variation, you can experiment with a combination of all-purpose and whole wheat flour for a nuttier flavor and added fiber.
- Kosher Salt: Essential for seasoning the dough itself, enhancing the overall flavor profile of the perogies. You can also use fine sea salt.
- Cold Water: Key to achieving a pliable yet firm dough. Cold water helps prevent the gluten from developing too quickly, resulting in a tender, less chewy dough that is easier to work with.
For the Flavorful Filling:
- Russet Potatoes: These starchy potatoes are ideal for mashing, producing a light, fluffy, and creamy filling without becoming gummy. While russets are preferred, Yukon Gold or even sweet potatoes can be used for different flavor profiles.
- Onion: Sweet onions, finely chopped and sautéed, add a wonderful depth of savory-sweet flavor to the potato filling. They become soft and aromatic, complementing the other ingredients beautifully.
- Bacon: Crispy, chopped bacon brings an irresistible smokiness and salty crunch to the filling. Its rendered fat is also utilized to sauté the onions, infusing even more flavor.
- Fresh Dill: For that authentic, vibrant Eastern European flavor, fresh dill is a must. Its bright, slightly anise-like notes elevate the richness of the potatoes and bacon. Dried dill can be used in a pinch, but fresh is always superior for this recipe.
For Serving:
- Caramelized Onions: A non-negotiable topping for many perogy enthusiasts. Slow-cooked until deeply golden and sweet, caramelized onions add a complex, umami-rich counterpoint to the perogies.
- Sour Cream: A dollop of cool, tangy sour cream provides a refreshing balance to the rich, savory perogies, making each bite incredibly satisfying.
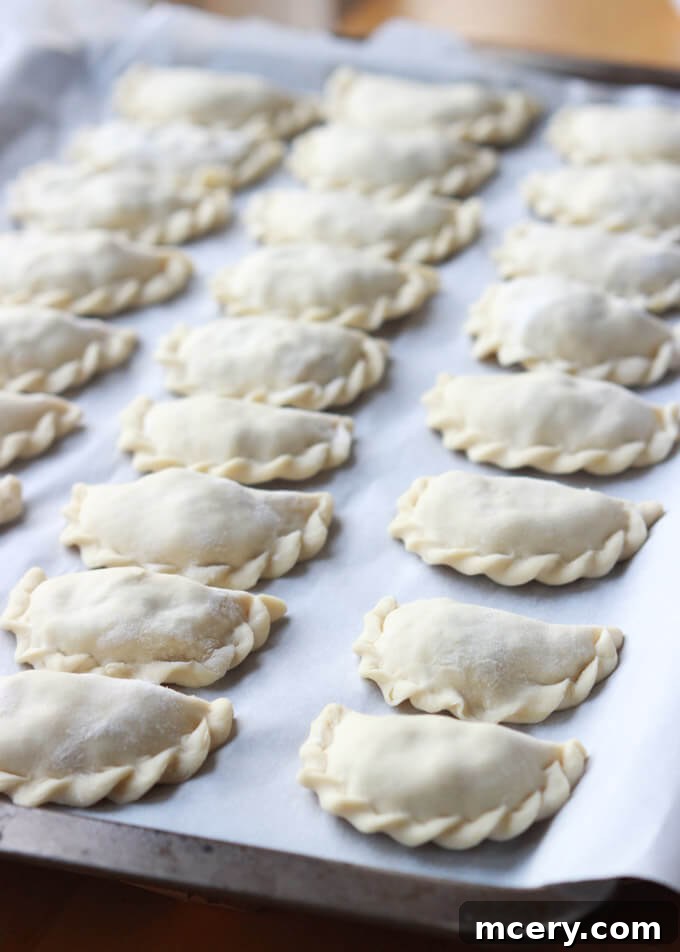
Step-by-Step Guide: Crafting Your Delicious Potato Perogies
Making homemade perogies might seem daunting at first, but with these clear and straightforward instructions, you’ll be a perogy master in no time. Follow these steps for perfect results!
Preparing the Dough
- In a spacious mixing bowl, combine the all-purpose flour and kosher salt. Gradually add the cold water, mixing with a wooden spoon until a shaggy dough forms.
- Turn the dough out onto a clean surface and knead it with your hands for about 5-7 minutes, or until it becomes smooth, elastic, and no longer sticky. Alternatively, use a stand mixer with a dough hook on medium speed for 4-5 minutes.
- Form the dough into a ball, cover it tightly with plastic wrap, and refrigerate for at least 30 minutes. This resting period allows the gluten to relax, making the dough easier to roll and shape.
Crafting the Flavorful Filling
- Peel and cube the russet potatoes. Place them in a large pot, cover with cold water, and add a generous pinch of salt. Bring to a boil and cook until the potatoes are fork-tender, about 15-20 minutes.
- Drain the potatoes thoroughly and return them to the empty pot. Mash them until smooth, ensuring no large lumps remain. Set aside.
- In a large skillet, cook the chopped bacon over medium heat until crispy. Remove the bacon with a slotted spoon and set aside, leaving the rendered fat in the skillet.
- Add the chopped onion to the same skillet with the bacon fat. Sauté over medium heat until the onions are softened and beautifully golden brown, about 8-10 minutes.
- Combine the mashed potatoes, cooked bacon, sautéed onions (including the flavorful pan drippings), and fresh chopped dill in a large bowl. Mix thoroughly until all ingredients are well incorporated. Season generously with salt and black pepper to taste. The filling should be savory and well-balanced.
Assembling Your Perogies
- Divide the chilled dough into two equal portions. Keep one portion covered while you work with the other.
- On a lightly floured surface, roll out the first dough ball to about ¼ inch thickness. Use a 3-inch round cookie cutter or the rim of a drinking glass to cut out circles. Gather and re-roll any scraps to make more circles.
- Place approximately one tablespoon of the potato and bacon filling into the center of each dough circle. Be careful not to overfill, as this can make sealing difficult.
- Fold each circle in half to create a half-moon shape. Press the edges firmly to seal. For a decorative and secure seal, you can crimp the edges with a fork.
- Place the assembled perogies in a single layer on a parchment-lined baking sheet. Repeat the process with the second dough ball. At this stage, you can either cook them immediately or freeze them for later.
Cooking Your Homemade Perogies
- Bring a large pot of salted water to a rolling boil.
- Carefully drop a batch of perogies into the boiling water, making sure not to overcrowd the pot. Cook for about 3-5 minutes for fresh perogies, or 5-7 minutes for frozen perogies. They are cooked through when they float to the surface.
- Remove the cooked perogies from the water using a slotted spoon and drain any excess water.
- Serve immediately with your desired toppings, such as caramelized onions and sour cream.
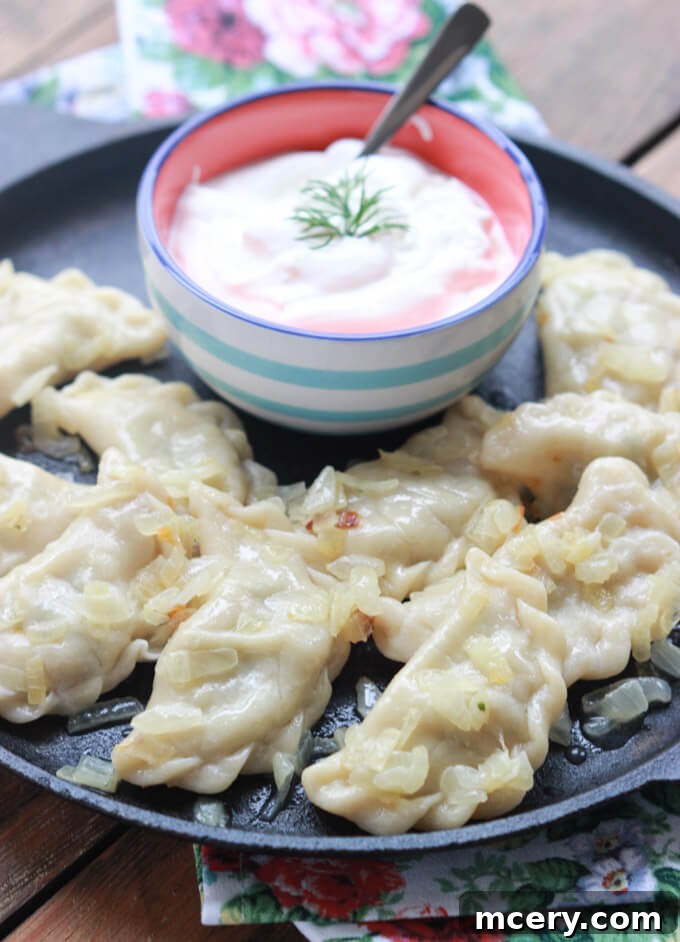
Expert Tips for Perogy Perfection
Achieving perfectly tender and flavorful perogies is easy with these insider tips:
- Work in Batches: Divide your dough in half (or even thirds) and work with one portion at a time. This keeps the rest of the dough from drying out and makes it much more manageable to roll and cut.
- Optimal Dough Thickness: Roll the dough to about ¼ inch thick. If it’s too thin, it might tear when filled or cooked. Too thick, and the perogy will be too doughy.
- Consistent Circles: A cookie cutter or the top edge of a glass will help you create uniform circles, leading to evenly sized and cooked perogies.
- Secure Sealing: After folding the dough into a half-moon shape, press the edges firmly to seal. You can use your fingers or the tines of a fork to create a decorative crimped edge and ensure the filling stays inside during cooking.
- Don’t Overfill: While it’s tempting to pack in as much filling as possible, too much can make sealing difficult and may cause the perogy to burst during boiling. About a tablespoon is usually perfect for a 3-inch circle.
- Flour Your Surface: Always keep your work surface and rolling pin lightly floured to prevent the dough from sticking. Also, lightly flour the baking sheet where you place the finished perogies to prevent them from sticking together.
- Avoid Overcooking: Perogies cook quickly. Once they float to the top of the boiling water, they are usually done. Overcooking can make them tough or mushy.
- Cool the Filling: Ensure your potato filling has cooled slightly before assembling the perogies. Hot filling can make the dough soft and difficult to handle.
Exciting Variations and Customizations for Your Perogies
This classic potato and bacon perogy recipe is incredibly versatile. Feel free to experiment with these variations to suit your personal taste or dietary preferences:
- Utilize Leftover Mashed Potatoes: An excellent way to reduce food waste and save time! If you have leftover mashed potatoes, they can be directly incorporated into the filling. Just ensure they are well-seasoned.
- Cheesy Potato Perogies: For an extra layer of richness, mix in some shredded cheddar, mozzarella, or a blend of your favorite cheeses into the mashed potato filling.
- Vegetarian Delight: Omit the bacon for a delicious vegetarian option. Enhance the filling with sautéed mushrooms, caramelized onions, or even some spinach. For a more traditional vegetarian Polish filling, consider sauerkraut and mushroom perogies.
- Sweet Potato Perogies: Swap russet potatoes for sweet potatoes for a naturally sweeter, earthy filling. These pair wonderfully with sage butter.
- Different Proteins: Instead of bacon, you could use crumbled sausage, ground beef, or finely chopped smoked ham for a different savory profile.
- Pan-Fried Perogies: After boiling, for an extra crispy texture, you can pan-fry the perogies in a little butter until golden brown on both sides. This method adds a delicious crust.
- Baked Perogies: For a healthier alternative, lightly brush boiled perogies with olive oil or melted butter and bake them in the oven until golden and slightly crispy.
- Sweet Perogies (Vareniki): While this recipe is savory, the same dough can be used for sweet perogies (often called Vareniki in Ukrainian cuisine). Fill them with fresh or frozen fruits like cherries, blueberries, or sweetened farmer’s cheese. Serve sweet perogies with a dollop of sour cream or a sprinkle of sugar.
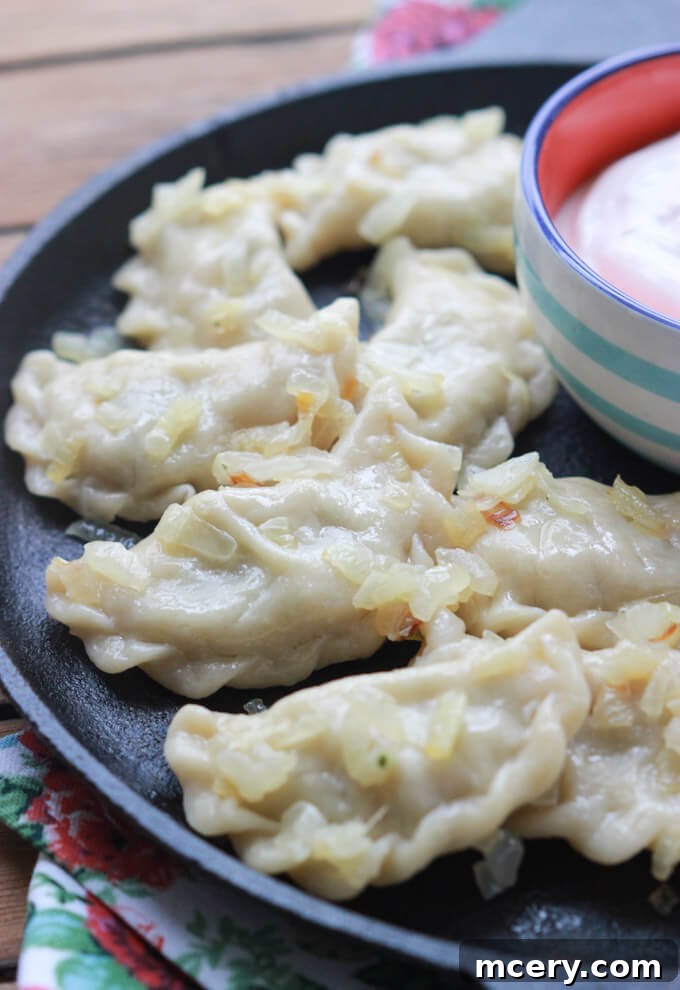
Mastering Caramelized Onions: A Key Accompaniment
Caramelized onions are more than just a topping; they are a flavor bomb that elevates perogies from delicious to extraordinary. The slow cooking process transforms humble onions into a sweet, savory, and incredibly rich condiment. Here’s how to make them:
- In a heavy-bottomed skillet (cast iron or stainless steel works best), melt two tablespoons of butter over medium-low heat.
- Add one large or two medium chopped onions to the pan. Ensure the onions are cut into uniform pieces for even cooking.
- Cook the onions slowly, stirring occasionally, for 25-40 minutes. The key is low heat and patience. You want the onions to soften, release their sugars, and gradually turn a deep golden-brown color, not burn.
- If you notice a lot of browned bits sticking to the bottom of the pan, don’t scrape them off forcefully. Instead, deglaze the pan with a splash of balsamic vinegar or a tablespoon of water or broth. This will help release the flavorful fond, which you can then incorporate into the onions.
- The caramelized onions are ready when they are deeply colored, very soft, and have a rich, sweet aroma.
How to Serve Your Homemade Perogies
These homemade perogies are the epitome of comfort food and can be enjoyed for any meal of the day. They are incredibly versatile and pair well with a variety of toppings and side dishes:
- Classic Toppings: The most popular way to serve perogies is with a generous spoon of sweet caramelized onions and a dollop of cool, tangy sour cream.
- Simple Butter & Herbs: Toss freshly boiled perogies with melted butter and a sprinkle of fresh chopped chives or green onions for a simpler, yet equally delicious, presentation.
- Crispy Additions: For extra texture, try pan-frying some additional bacon bits or fried onions to sprinkle over the top.
- Main Course Pairings: Perogies can be a hearty main dish on their own, but they also complement lighter sides beautifully. Consider pairing them with a fresh green salad, grilled vegetables like zucchini with mozzarella, caprese stuffed portobello mushrooms, or a light vegetable orzo salad.
- Hearty Sides: For a more substantial meal, serve them alongside roasted chicken, pork loin, or a hearty kielbasa sausage.
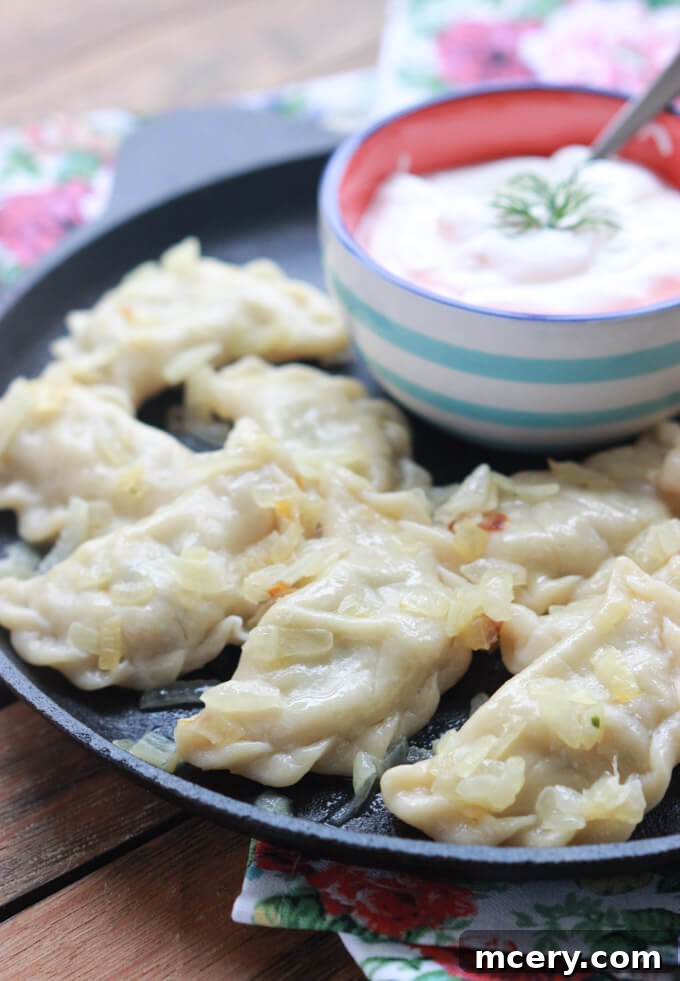
Storing and Freezing Your Homemade Perogies
One of the best things about making perogies from scratch is the ability to prepare them in advance and enjoy them later. Here’s how to store and freeze your delicious creations:
- Refrigerating Cooked Perogies: If you have leftover cooked perogies, allow them to cool completely. Store them in an airtight container in the refrigerator for up to 3-5 days.
- Reheating Cooked Perogies: To reheat, you can place them on a plate in the microwave for 30 seconds to one minute, pan-fry them in a little butter until golden brown, or gently re-boil them for about a minute.
- Freezing Uncooked Perogies: This is an excellent way to prep ahead! Place the freshly assembled, uncooked perogies in a single layer on a parchment-lined baking sheet, ensuring they do not touch each other. Transfer the tray to the freezer for at least 30 minutes, or until the perogies are firm. Once frozen solid, transfer them to an airtight freezer bag or container. They can be stored in the freezer for up to 3 months.
- Cooking Frozen Uncooked Perogies: When you’re ready to cook, simply drop the frozen perogies directly into a pot of boiling water. Cook for about 5-7 minutes, or until they float to the surface and are tender throughout. No need to thaw!
- Freezing Cooked Perogies: Cooked perogies can also be frozen. After boiling, allow them to cool completely, then place them in a single layer on a baking sheet and freeze until firm. Once frozen, transfer to a freezer-safe bag or container for up to 2-3 months. Reheat by pan-frying or gently boiling.
Frequently Asked Questions (FAQs)
Why are my perogies not cooked all the way through?
Perogies require a few minutes of simmering in boiling water to cook the dough through. If yours are still chewy or doughy after removing them, they likely need another minute or two back in the water. Ensure your water is at a rolling boil and that you’re not overcrowding the pot, which can lower the water temperature.
Can I make this dish sweet instead of savory?
Absolutely! The dough recipe is versatile and can easily accommodate sweet fillings. Instead of the potato, bacon, and onion mixture, you can fill your perogies with sweetened farmer’s cheese, fresh berries (like cherries or blueberries), or a fruit preserve. Sweet perogies make a delightful dessert or a unique breakfast/snack.
Do I need to refrigerate the dough before making the perogies?
Yes, refrigerating the dough for at least 30 minutes is highly recommended. This allows the gluten to relax, making the dough less elastic and much easier to roll out thinly without shrinking back. It also slightly firms up the dough, making it more manageable for filling and shaping.
Can I use store-bought dough for perogies?
While homemade dough offers the best texture and flavor, you can use store-bought wonton wrappers or even pie crust dough as a shortcut. However, be aware that the texture and taste will differ from traditional perogy dough.
What if my dough is too sticky or too dry?
If your dough is too sticky, add a little more flour, a tablespoon at a time, until it reaches a manageable consistency. If it’s too dry and crumbly, add a tiny bit of cold water, a teaspoon at a time, until it comes together. Always knead thoroughly after each addition to incorporate.
Potato Perogies Recipe Summary
Author: Katya
Prep Time: 1 hour 45 minutes
Cook Time: 5 minutes
Total Time: 1 hour 50 minutes
Yield: Approximately 60 perogies
Category: Main Dish
Method: Boiled
Cuisine: Polish
Print Recipe
Ingredients
Dough
- 4 cups all-purpose flour
- ½ tsp. kosher salt
- 1 ½ cups cold water
Filling
- 4 medium russet potatoes, peeled and cubed
- 1 medium onion, chopped
- 10 bacon strips, chopped
- ½ cup chopped fresh dill
To Serve
- Caramelized onions
- Sour cream
Instructions
Dough
- In a large bowl, sift together the flour and salt. Add water and mix with a wooden spoon. Then, using your hands, knead the dough until it all comes together and the flour is thoroughly incorporated and smooth. (This step does not take long; it’s just a matter of combining all the ingredients together with your hands and forming a dough ball).
- Cover the dough and refrigerate for 30 minutes.
Filling
- Cook the potatoes in salted water until fork tender. Drain and mash; set aside.
- In a large skillet, cook the bacon over medium heat. When it just starts to brown, add the chopped onion; continue cooking until the onion is slightly caramelized and the bacon is fully cooked.
- Add the onion and bacon mixture to the mashed potatoes, including the pan grease. Add the chopped dill and mix until all the ingredients are combined. Season with salt and pepper to taste.
To Make the Perogies
- Divide the dough into two balls. On a floured surface, roll out the first ball of dough to ¼ inch thickness. Keep the other ball of dough covered. Cut out 3-inch circles using a drinking glass or round cookie cutter.
- Spoon the potato filling into the center (about 1 tablespoon). Fold the circles into half-circles, and press to seal the edges. You can leave them as is or create a scalloped edge. Proceed with the second dough ball.
- Place the perogies on a parchment-lined cookie sheet and freeze overnight; transfer the frozen perogies to a ziploc bag and store in the freezer for up to 3 months.
- To cook the perogies: bring a large pot of water to a boil; add the perogies and cook for about 5 minutes for frozen and about 3 minutes for fresh. They are done when they float to the top. Drain and serve with caramelized onions and sour cream.
Notes on Caramelized Onions:
- To make caramelized onions, melt 2 tablespoons butter in a heavy-bottom skillet, such as cast-iron or stainless steel. Add chopped medium onion to the pan. Cook over medium-low heat until deep golden in color. If there’s a lot of buildup on the bottom of the pan, deglaze with a splash of balsamic vinegar.
Nutrition Information (Approximate per 5 perogies)
- Calories: 309
- Sugar: 1.2 g
- Sodium: 212.3 mg
- Fat: 9.7 g
- Carbohydrates: 45.8 g
- Protein: 8.9 g
- Cholesterol: 15.4 mg
Did you make this recipe?
We’d love to see your delicious creations! Tag @littlebrokenblog on Instagram and use the hashtag #littlebrokenblog to share your homemade potato perogies with our community.