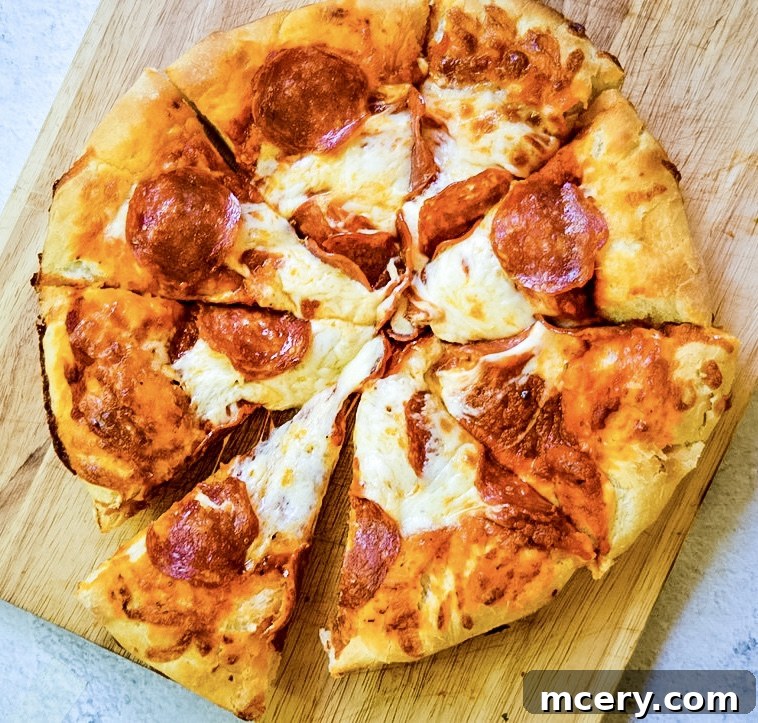
Tired of costly takeaways and less-than-perfect delivery pizzas? It’s time to elevate your home cooking and master the art of homemade pizza. This incredibly easy beginner pizza dough recipe is your secret weapon for creating a restaurant-quality pizza right in your own kitchen. Imagine a crust that’s wonderfully soft and chewy on the inside, yet boasts perfectly crisp edges and a beautiful golden finish every single time. Get ready to impress yourself and your loved ones with the ultimate homemade pizza experience!
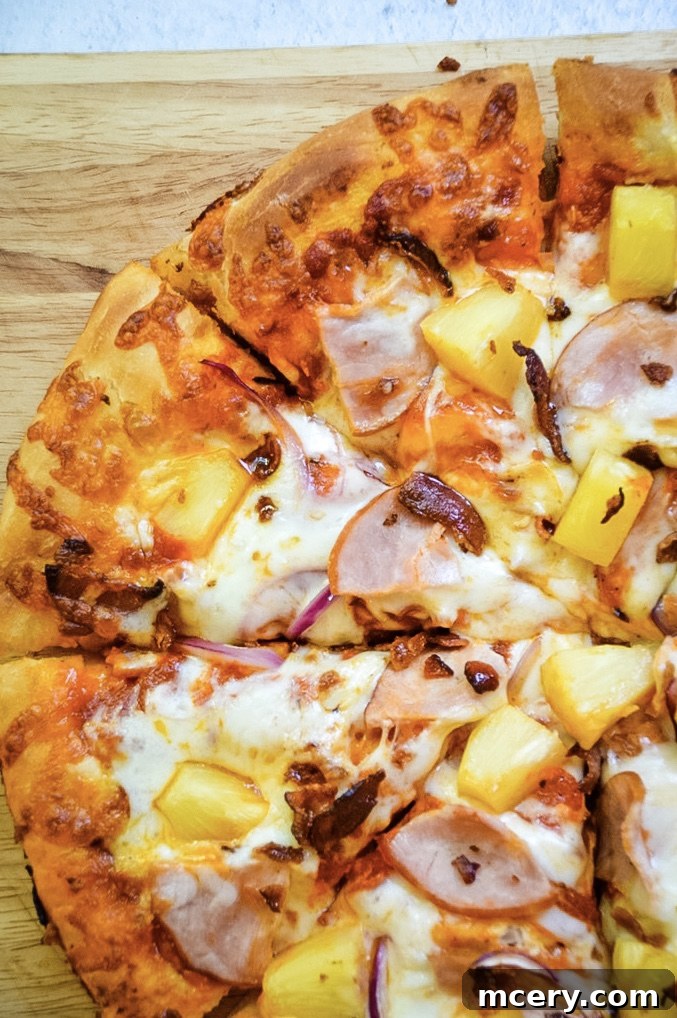
Embarking on the journey of bread making might seem a little daunting at first. Perhaps you have ambitious projects like sourdough bread on your culinary bucket list, a goal that might have lingered there for months (we’ve all been there!). But fear not, because mastering homemade pizza dough is a fantastic “baby step” that yields incredibly satisfying results. After perfecting this easy beginner pizza dough recipe through countless batches, it’s finally time to share this game-changer with you. This recipe truly lives up to its name – it’s designed to be straightforward, foolproof, and accessible to everyone, regardless of your baking experience. The best part? You won’t even need a bulky stand mixer. Your trusty food processor will do most of the work, making the process quick and effortless. And if you don’t own a food processor, don’t worry! You can absolutely achieve fantastic results using just your hands and a sturdy wooden spoon in a large mixing bowl.
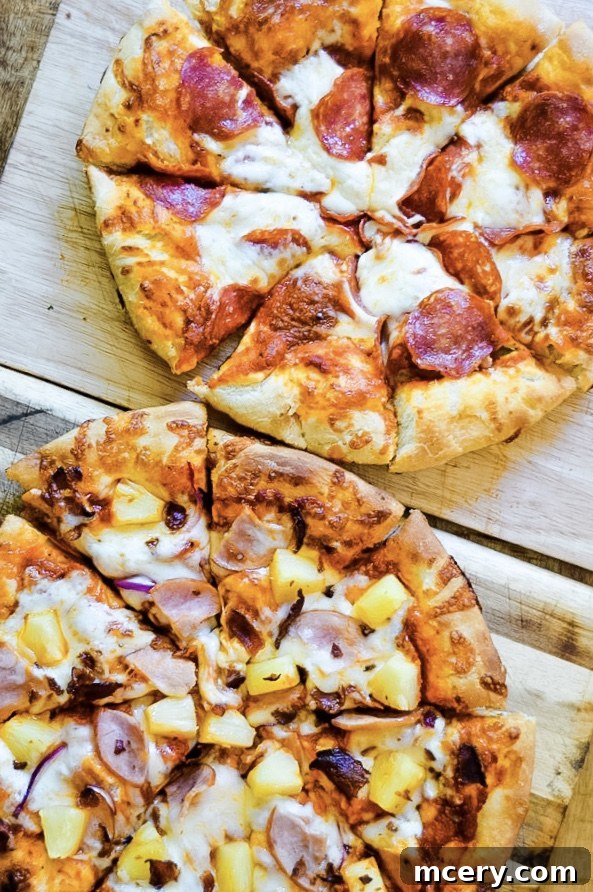
While buying store-bought pizza dough offers convenience, nothing truly compares to the superior taste, perfect texture, and undeniable satisfaction you get from a freshly made, homemade pizza crust. The aroma of yeast-risen dough baking in your oven, the control you have over the ingredients, and the customizable nature of every pizza make the extra effort incredibly worthwhile. Say goodbye to mediocre crusts and hello to a culinary adventure that will change your pizza nights forever!

Mastering Homemade Pizza: An Easy Beginner’s Guide to Delicious Dough
Making incredible pizza at home starts with an outstanding dough. This easy beginner pizza dough recipe is specifically crafted to guide you through the process, ensuring a light, airy, and flavorful crust that forms the perfect foundation for all your favorite toppings. The key to successful pizza dough lies in allowing sufficient time for it to rise – a process that typically takes anywhere from 25 to 45 minutes, depending on the warmth of your kitchen environment. A warmer climate will naturally encourage faster rising. To embark on your pizza-making journey, gather a few essential tools and simple ingredients:
Why Choose Homemade Pizza Dough? The Ultimate Pizza Experience
There’s a unique satisfaction that comes with creating something delicious from scratch, and homemade pizza dough is no exception. Beyond the sheer joy of baking, opting for homemade crust offers numerous advantages. Firstly, you have complete control over the ingredients, allowing you to choose high-quality flour, olive oil, and fresh yeast, free from preservatives often found in store-bought alternatives. This translates directly into a superior flavor profile and a noticeably better texture – light, chewy, and perfectly crispy where it counts. Secondly, it’s often more cost-effective to make your dough from basic pantry staples than to purchase pre-made versions repeatedly. Finally, making pizza dough can be a fun, engaging activity for the whole family, transforming a simple meal into a delightful culinary project. The aroma of fresh dough baking is an unparalleled treat!
Essential Ingredients for Your Perfect Pizza Dough
The beauty of this beginner pizza dough recipe lies in its simplicity. You only need a handful of common pantry staples to create a truly spectacular crust. Let’s break down the role of each ingredient:
- All-Purpose Flour: The foundation of our dough, providing structure and texture. While bread flour can also be used for a chewier crust, all-purpose flour works beautifully for a beginner-friendly approach.
- Olive Oil: Adds richness, flavor, and helps to tenderize the dough, contributing to a soft interior and slightly crispy exterior.
- Salt: Crucial for enhancing the flavor of the dough and also plays a role in regulating yeast activity.
- Cane Sugar: Feeds the yeast, helping it activate and produce carbon dioxide, which gives the dough its airy texture. It also contributes to the beautiful golden-brown color of the crust.
- Instant Yeast: A convenient type of yeast that can be added directly to dry ingredients or hydrated in warm water, as we’ll do here. It’s reliable and fast-acting, making it ideal for beginners.
- Lukewarm Water: The perfect temperature (around 105-115°F or 40-46°C) to activate the yeast without killing it. Water hydrates the flour, forming gluten, which is essential for dough elasticity.
Tools for a Smooth Pizza-Making Process
While a food processor streamlines the dough-making process considerably, you don’t need fancy equipment to make fantastic pizza at home. Here’s what you’ll need:
- Food Processor: Our recommended tool for quickly combining ingredients and kneading the dough with minimal effort. Look for one with a dough blade attachment if available, though the standard blade works fine.
- Large Mixing Bowl: Essential for proofing the dough and suitable for hand-mixing if you don’t have a food processor.
- Small Bowl: For activating the yeast.
- Plastic Wrap: To cover the dough while it rises, creating a warm, humid environment.
- Rolling Pin: For shaping the dough into a disc. Your hands can also work wonders!
- 12-inch Cast-Iron Skillet or Pizza Pan: For baking your pizza. A cast-iron skillet provides excellent heat distribution and a wonderfully crispy bottom crust.
- Fork: For lightly piercing the dough to prevent large bubbles.
- Measuring Cups and Spoons: For accurate ingredient proportions.
Step-by-Step: Crafting Your Easy Beginner Pizza Dough
Follow these simple instructions to create the perfect foundation for your homemade pizza:
- Combine Dry Ingredients: In the bowl of your food processor, add the all-purpose flour, olive oil, and salt. Pulse for 30-45 seconds until these ingredients are thoroughly combined and resemble coarse crumbs. This preliminary step ensures an even distribution of flavor throughout the dough.
- Activate the Yeast: In a separate small bowl, combine your cane sugar with 1 cup of warm water. Stir gently until the sugar completely dissolves. This creates a food source for the yeast. Now, sprinkle the instant yeast over the water mixture. Let this sit undisturbed for about 5-7 minutes. You’ll know the yeast is active and healthy when a foamy layer appears on top, indicating it’s ready to work its magic.
- Form the Dough: Turn your food processor back on. With the motor running, slowly and steadily pour the activated yeast mixture through the feeding tube into the flour mixture. Continue to process until a cohesive ball of dough forms, which typically takes up to 1 minute. The dough should gather together and pull away from the sides of the bowl.
- Hand-Mixing Alternative: If you don’t have a food processor, don’t fret! In a large mixing bowl, combine the flour, olive oil, and salt. Stir the yeast mixture into the flour mixture until a shaggy dough forms. Then, turn it out onto a floured surface and proceed to knead by hand.
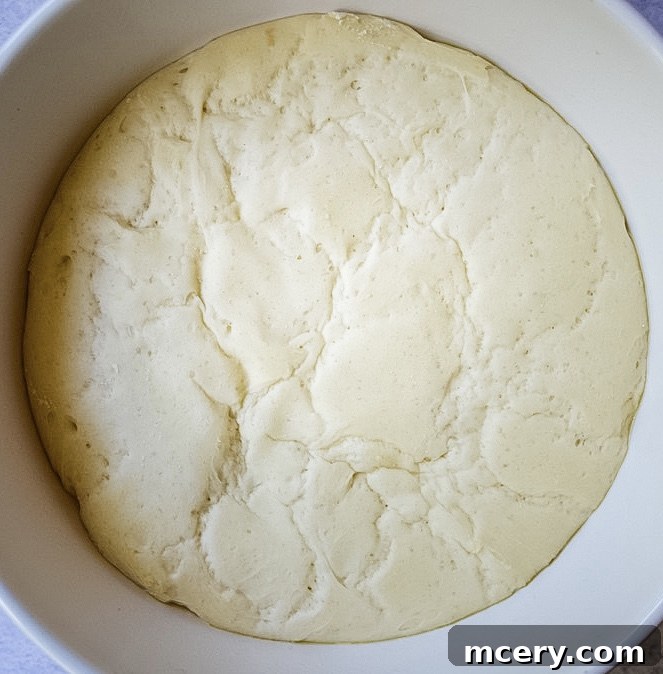
- Kneading and First Rise: Transfer the dough from the food processor to a clean, lightly floured surface. The dough might be a bit sticky at this stage, which is perfectly normal. Knead the dough for 5-7 minutes until it becomes smooth, elastic, and less sticky. Lightly oil a large, clean bowl. Place the kneaded dough into the oiled bowl, turning it once to ensure it’s coated on all sides. This prevents it from sticking. Cover the bowl tightly with plastic wrap and set it aside in a warm place in your kitchen. Allow the dough to rise for approximately 45 minutes, or until it has visibly doubled in size. This first rise, known as bulk fermentation, develops the dough’s flavor and texture.

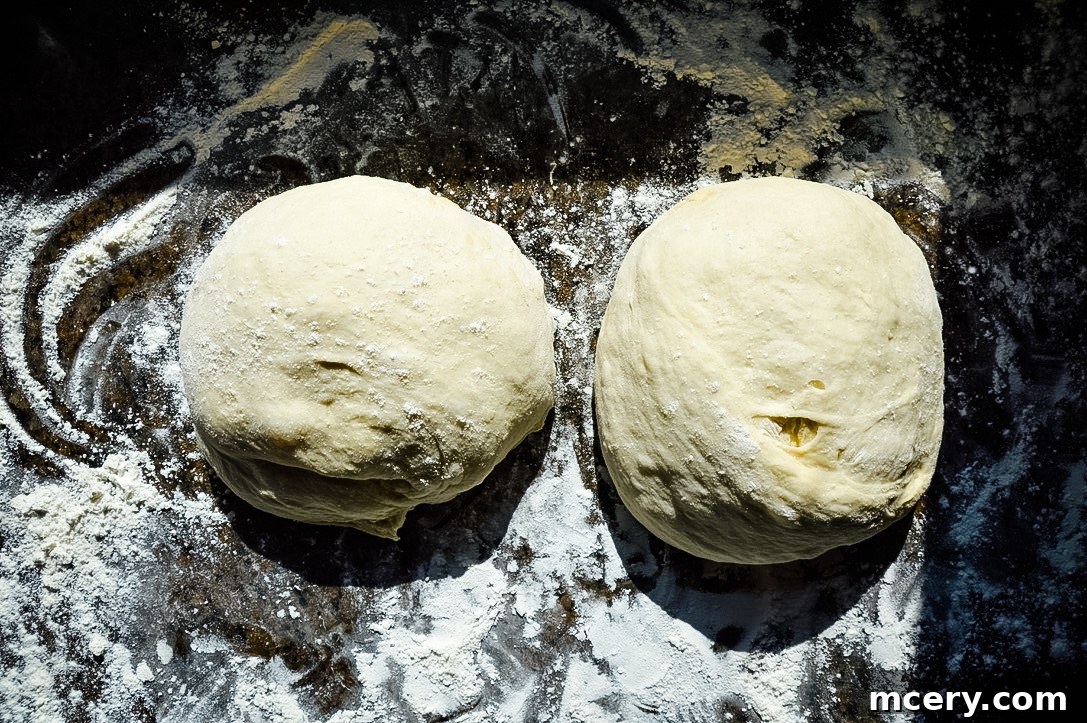
- Punch Down and Divide: Once the dough has doubled in size, gently punch it down with your fist to release the trapped air bubbles. This step redistributes the yeast and evens out the dough’s temperature.
- Shape and Prepare for Baking: On a clean, floured surface, divide your dough. For a thicker, more substantial pizza crust, divide the dough into two equal parts. If you prefer a thinner, crispier crust, divide it into three even portions. If you’re only making one pizza immediately, tightly wrap any remaining dough in plastic wrap and freeze it for later use – it thaws beautifully!
- Preheat Your Oven: For optimal results, preheat your oven to a blazing 425 degrees F (220 degrees C). A hot oven is crucial for a quick bake and a crispy crust.
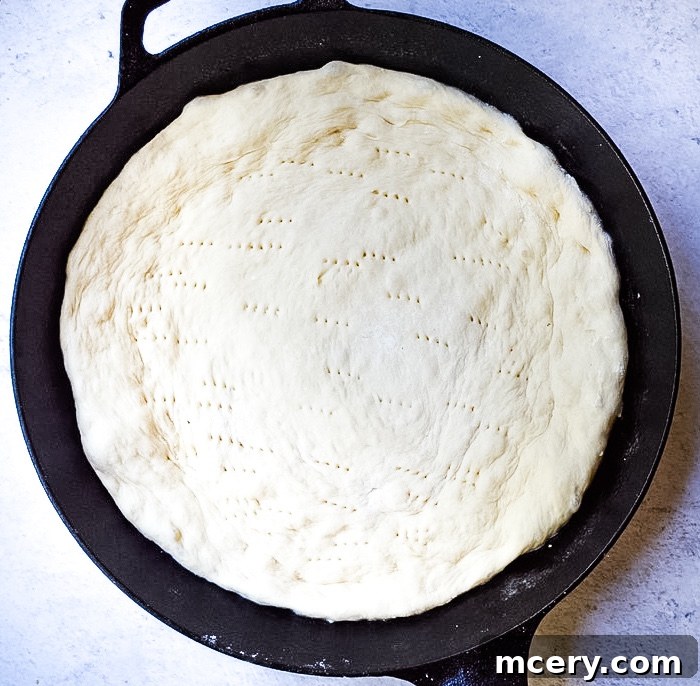
- Form the Pizza Base: Working with one portion of dough at a time on a floured surface, use a rolling pin or simply your hands to stretch and shape the dough into a 12-inch disc. Transfer this disc to a lightly oiled 12-inch cast-iron skillet or a dedicated 12-inch pizza pan. Gently stretch and flatten the dough to ensure it perfectly fits the circular pan. To create that classic pizza look and prevent toppings from spilling, form a slight rim on the edges by gently lifting the dough and folding it over to create a raised lip.
- Prepare for Toppings: With a fork, lightly poke holes all around the dough, specifically avoiding the raised rim. These small perforations help prevent large air bubbles from forming and creating an uneven crust during baking. Now, generously spread your favorite pizza sauce over the dough, making sure to leave a 1/4-inch border along the edges for the crust.
- Add Your Favorite Toppings: This is where your creativity shines! Arrange your desired toppings evenly over the pizza sauce. Remember, while it’s tempting to pile on everything, avoid overloading the pizza, as too many toppings can lead to a soggy crust and uneven baking.
- Bake to Perfection: Place your pizza in the preheated oven and bake for 13-15 minutes. Keep an eye on it – you’re looking for a crust that’s beautifully golden brown and crispy, and cheese that is melted, bubbly, and slightly browned in spots. Once baked, carefully remove the pizza from the oven and allow it to cool for a minute or two before slicing and serving. Enjoy your homemade culinary masterpiece!
Tips for the Perfect Homemade Pizza
Achieving a Crispy Crust Every Time
The quest for the perfect crispy pizza crust is a common one, and there are a few simple tricks to ensure success. First and foremost, a very hot oven is essential. Preheat your oven to 425°F (220°C) and let it come to temperature for at least 20-30 minutes before baking. If you have a pizza stone or steel, preheat it inside the oven; this will give your crust an incredible crispness from the bottom up. Sprinkling a thin layer of cornmeal on your pizza pan or peel before transferring the dough helps prevent sticking and adds a wonderful crunch to the base. For those using a cast-iron skillet, its superior heat retention naturally contributes to an exceptional crispy edge without the need for additional cornmeal.
Mastering Your Toppings
While the dough is the canvas, the toppings are the artwork. Think about balance: don’t overload your pizza, as excessive moisture from toppings can make your crust soggy. Apply sauce evenly but not too thickly. Layer cheese first for a protective barrier, then add your meats and vegetables. Pre-cooking certain watery vegetables like mushrooms or onions can prevent them from releasing too much moisture during baking. Consider contrasting flavors and textures for a truly dynamic pizza experience.
Storage and Freezing for Future Pizza Nights
One of the great advantages of this recipe is its flexibility. If you’ve divided your dough and only plan to make one pizza, the remaining dough can be easily stored for future use. Tightly wrap each individual dough ball in plastic wrap, ensuring no air can get in, then place it in an airtight freezer bag. It will keep well in the freezer for up to 1-2 months. When you’re ready to use it, transfer the frozen dough to the refrigerator the night before, or allow it to thaw at room temperature for 1-2 hours until pliable. Once thawed, let it come to room temperature for about 30 minutes before shaping for the best results. You can also par-bake a plain crust for a few minutes, cool it, and then freeze it for an even faster pizza assembly!
Flavorful Variations and Serving Ideas
Once you’ve mastered the basic dough, the possibilities for customization are endless. Experiment with different cheese blends beyond classic mozzarella, or try a white pizza with a garlic-infused olive oil base instead of tomato sauce. Add fresh herbs like basil, oregano, or rosemary directly to the dough for an aromatic twist. This versatile dough is not just for traditional pizzas; consider turning it into savory calzones, strombolis, or even small individual pizza bites for appetizers. Pair your freshly baked homemade pizza with a crisp green salad, some garlic knots, or a glass of your favorite wine for a truly delightful meal that rivals any restaurant.
Looking for more easy recipes to expand your culinary repertoire? Also try these delicious options:
- Pizza Pinwheels with Homemade Dough
- Cauliflower Pizza Crust
- Easy Italian Turkey Meatballs
- Lemon Sausage & Kale Pasta + Video
Easy Beginner Pizza Dough {Made in Food Processor}

It’s time to skip the pizza delivery and make this easy beginner pizza dough. The crust is soft with crisp edges and bakes up so perfectly.
45 minutes
15 minutes
1 hour
Ingredients
For the Easy Pizza Dough
- 2 1/4 cups all-purpose flour (plus more for dusting)
- 1 tablespoon olive oil (plus more for oiling the bowl)
- 1/4 teaspoon salt
- 1 tablespoon cane sugar
- 2 teaspoons instant yeast
- 1 cup lukewarm water (approximately 105-115°F / 40-46°C)
Instructions
- Combine Dry Ingredients: In the bowl of a food processor, add the flour, 1 tbsp olive oil, and salt. Pulse for 30-45 seconds until the ingredients are well combined.
- Activate Yeast: In a small bowl, combine cane sugar with 1 cup warm water. Stir until the sugar dissolves. Sprinkle the instant yeast over the water mixture and let it sit for 5-7 minutes until a foamy layer appears on top.
- Form Dough: Turn your food processor back on. With the motor running, slowly pour the yeast mixture through the feeding tube. Continue to process until a cohesive dough ball forms, which may take up to 1 minute. If you do not have a food processor, combine all ingredients in a large mixing bowl and mix by hand with a wooden spoon until a shaggy dough forms, then knead on a floured surface.
- Knead and Rise: Flour a clean surface and transfer the dough onto it (it will be sticky). Knead the dough until it becomes smooth and elastic, about 5-7 minutes. Lightly oil a large bowl, add the dough, and turn to coat. Cover with plastic wrap and set aside in a warm place for about 45 minutes, or until it has doubled in size.
- Punch Down: Once risen, gently punch down the dough to release the air bubbles.
- Divide Dough: Roll the dough out briefly on a clean floured surface, then form into a ball. For a thicker crust pizza, divide the dough into 2 equal parts. For a thinner crust, divide it into 3 even parts. If only making 1 pizza, wrap the other dough tightly and freeze for later.
- Preheat Oven: Preheat your oven to 425 degrees F (220 degrees C).
- Shape Crust: Working on a floured surface, roll the dough out with a rolling pin or stretch it by hand into a 12-inch disc. Transfer it to a lightly oiled 12-inch cast-iron skillet or a 12-inch pizza pan. Stretch and flatten the disc to fit the pan. Create a rim on the edges by gently lifting them up and folding over to create a lip.
- Prepare for Toppings: With a fork, lightly poke holes around the surface of the dough, avoiding the rim. Spread your pizza sauce, leaving a 1/4-inch border along the edges.
- Add Toppings: Arrange your toppings of choice evenly over the sauce.
- Bake: Bake for 13-15 minutes, or until the crust is golden brown and crispy, and the cheese is melted and bubbly. Enjoy your homemade pizza!
Notes
Sprinkling cornmeal on a pizza pan is a great way to ensure the crust gets extra crispy on the bottom and edges. However, if you use a preheated cast-iron skillet, the edges often come out perfectly crispy without the need for additional cornmeal.