
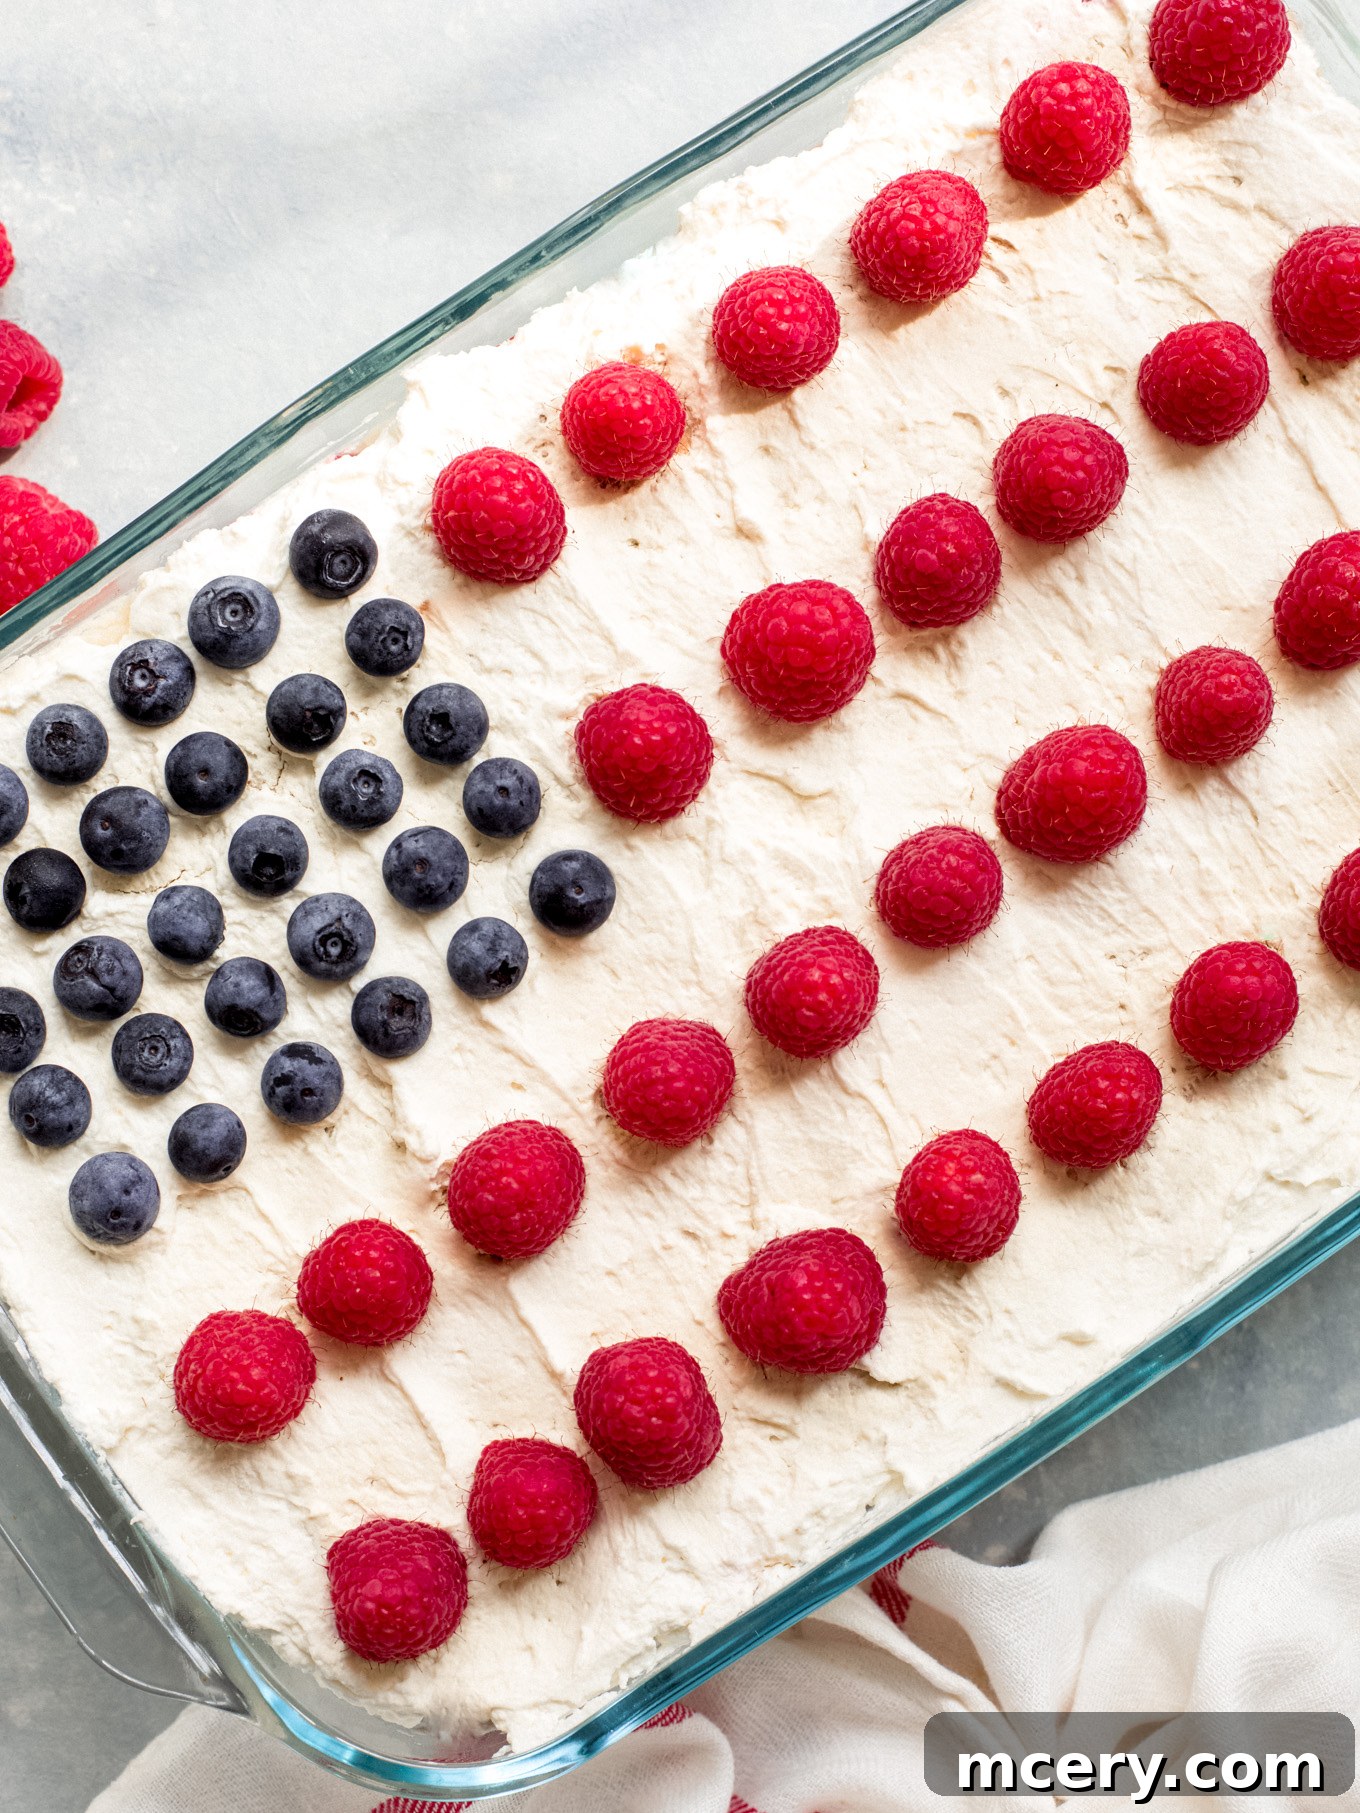
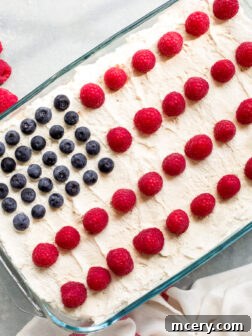
Get ready to elevate your summer celebrations with the ultimate dessert sensation: a vibrant, no-bake Icebox Cake! Perfect for the 4th of July or any warm-weather gathering, this delightful treat layers fresh, juicy berries with crisp graham crackers and a luscious, creamy filling. Crowned with an artistic arrangement of fruit resembling the American flag, it’s not just a dessert, but a patriotic spectacle that’s as easy to assemble as it is impressive to behold. Forget the oven and dive into this refreshing, make-ahead marvel that promises to be the star of your next party.
Why This No-Bake Icebox Cake Will Be Your New Summer Favorite
Our no-bake Icebox Cake isn’t just a recipe; it’s a testament to effortless elegance and irresistible flavor. Crafted with layers of sweet strawberries, tangy blueberries, and vibrant raspberries, harmoniously combined with tenderized graham crackers and a rich, creamy filling, this dessert offers an authentic taste of Americana. It’s more than just a cake; it’s a refreshing culinary experience, perfectly designed for the dog days of summer.
What truly sets this recipe apart is its incredible simplicity and convenience. Imagine creating a spectacular dessert without ever turning on your oven! This makes it an ideal choice for scorching summer days when you want to keep your kitchen cool. Just a few easy assembly steps, a night in the refrigerator, and voilà – you have a decadent, show-stopping cake. The magic happens overnight as the graham crackers slowly absorb the moisture from the luscious cream, transforming into a tender, cake-like texture that melts in your mouth. This makes it the ultimate make-ahead dessert, allowing you to focus on enjoying your guests and the festivities rather than being stuck in the kitchen.
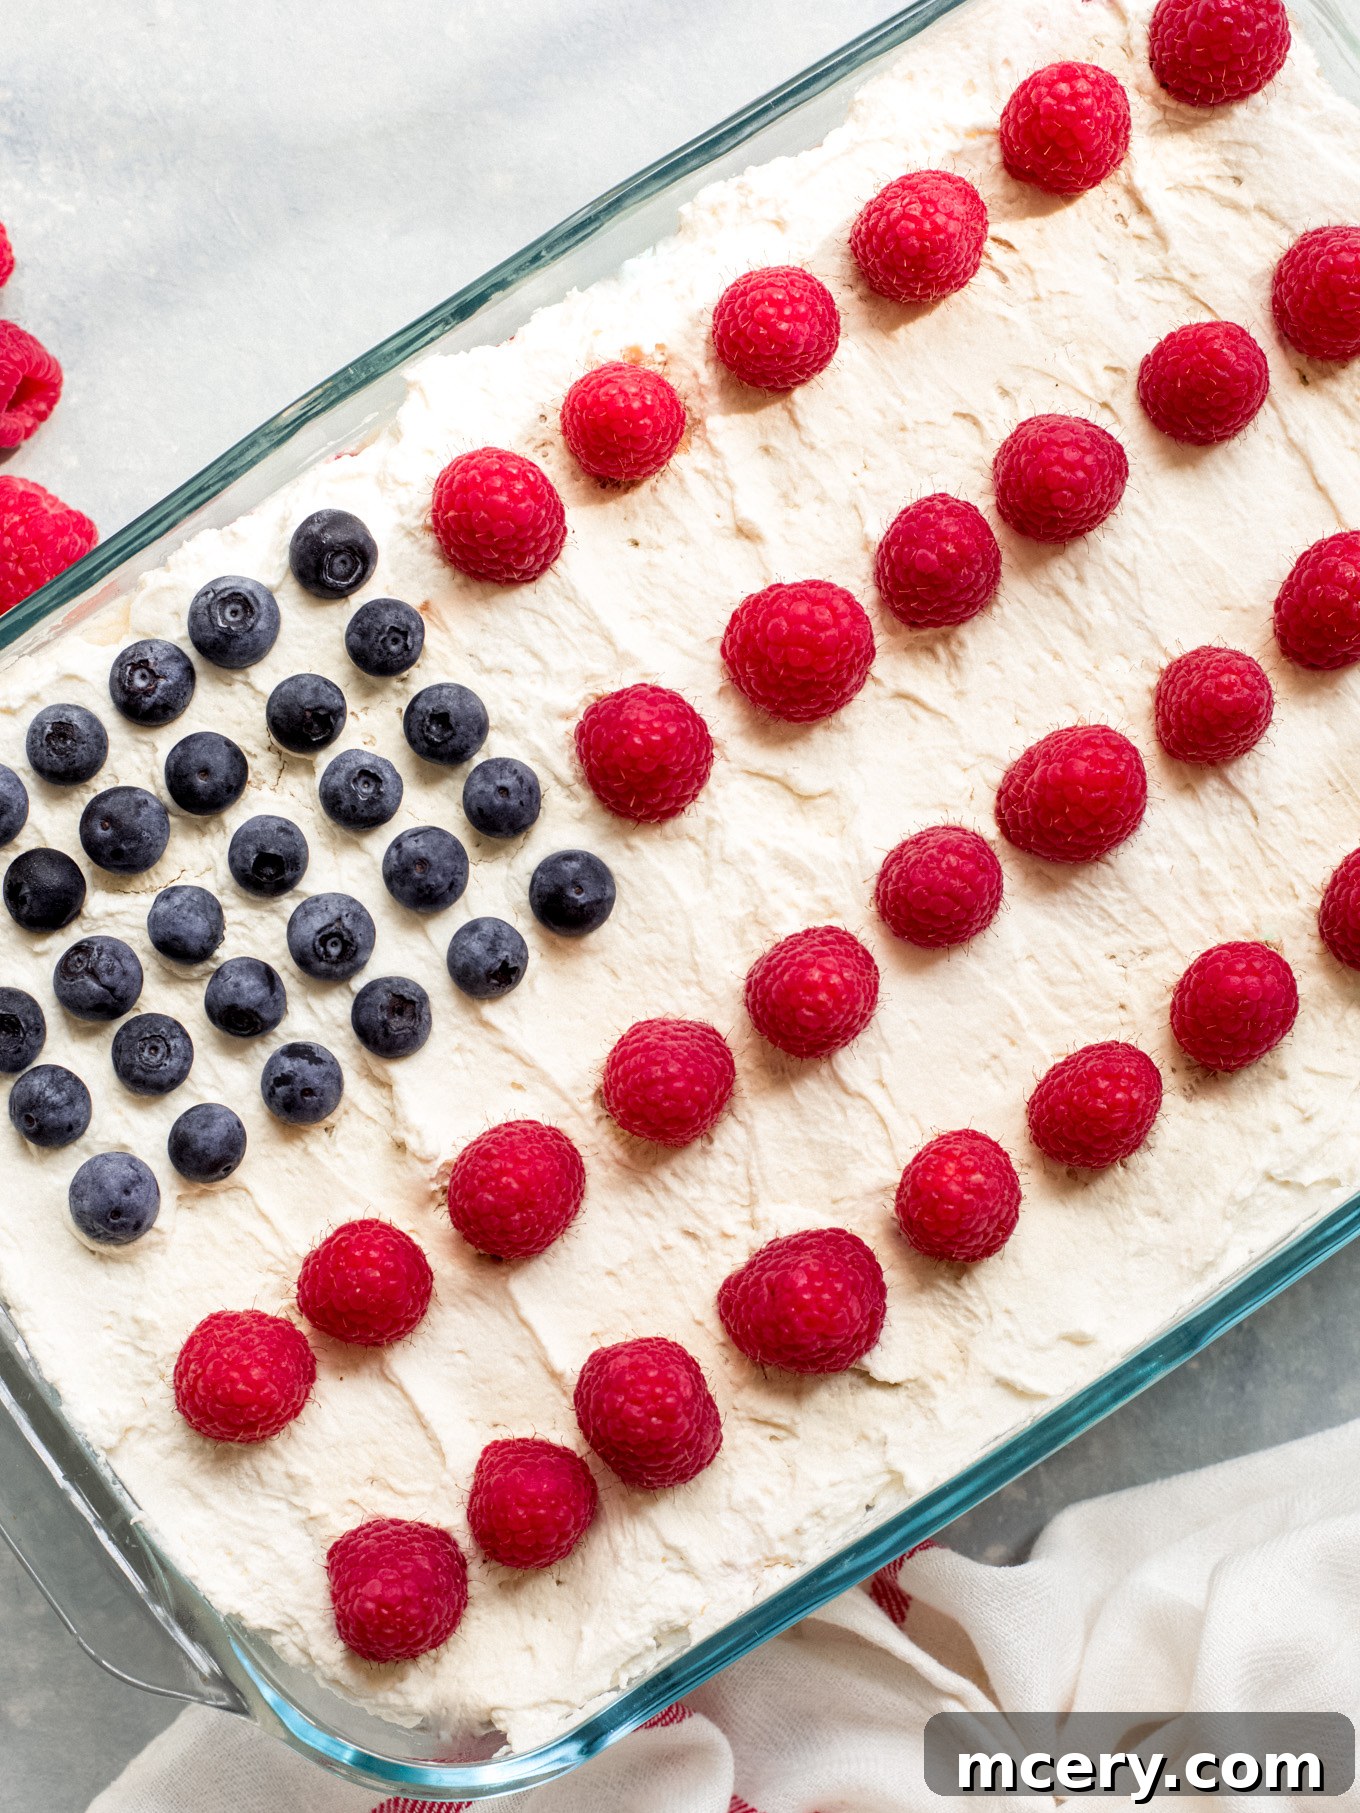
Beyond its ease and delightful taste, this Icebox Cake offers unparalleled visual appeal. The artful arrangement of berries on top, meticulously designed to resemble the American flag, instantly makes it a captivating centerpiece for your 4th of July celebration, Memorial Day picnic, or any patriotic event. Pair it with complementary dishes like our zesty lemon orzo salad and juicy jalapeño turkey burgers for a complete and memorable feast. Simply assemble it the evening before, let your refrigerator work its overnight wonders, and wake up to a perfectly chilled, ready-to-serve masterpiece.
A Sweet Journey Through Time: The History of the Classic Icebox Cake
Have you ever wondered about the intriguing name “Icebox Cake”? This beloved no-bake dessert traces its roots back to the bustling 1920s, an era of significant culinary innovation driven by technological advancements. It was during this time that a revolutionary kitchen appliance, aptly named the “icebox,” made its grand debut in American homes. Far from the sophisticated refrigerators we know today, these early iceboxes were essentially insulated cabinets designed to keep food fresh using large blocks of ice.
This new household convenience sparked a wave of creativity, particularly among savvy cookie companies. Recognizing a unique marketing opportunity, they began developing and promoting simple desserts that could be effortlessly prepared and chilled in these new iceboxes. Recipes for these innovative “icebox cakes” were often printed directly on their cookie packaging, turning a simple box of wafers into a gateway to a delightful, modern dessert. This ingenious strategy not only boosted cookie sales but also cemented the icebox cake’s place in American culinary history.
Over a century later, while iceboxes have long since been replaced by their electric counterparts, the charm and practicality of the Icebox Cake endure. Its name, much like the cake itself, has gracefully stood the test of time, serving as a nostalgic nod to its origins while continuing to delight generations with its simple elegance and refreshing taste. It’s a true culinary icon, proving that some classics are simply too good to fade away.
The Essential Ingredients for Your Patriotic Masterpiece
Creating this spectacular Icebox Cake requires a handful of readily available ingredients, ensuring a stress-free trip to your local grocery store. Each component plays a crucial role in building the perfect balance of texture, flavor, and patriotic flair:
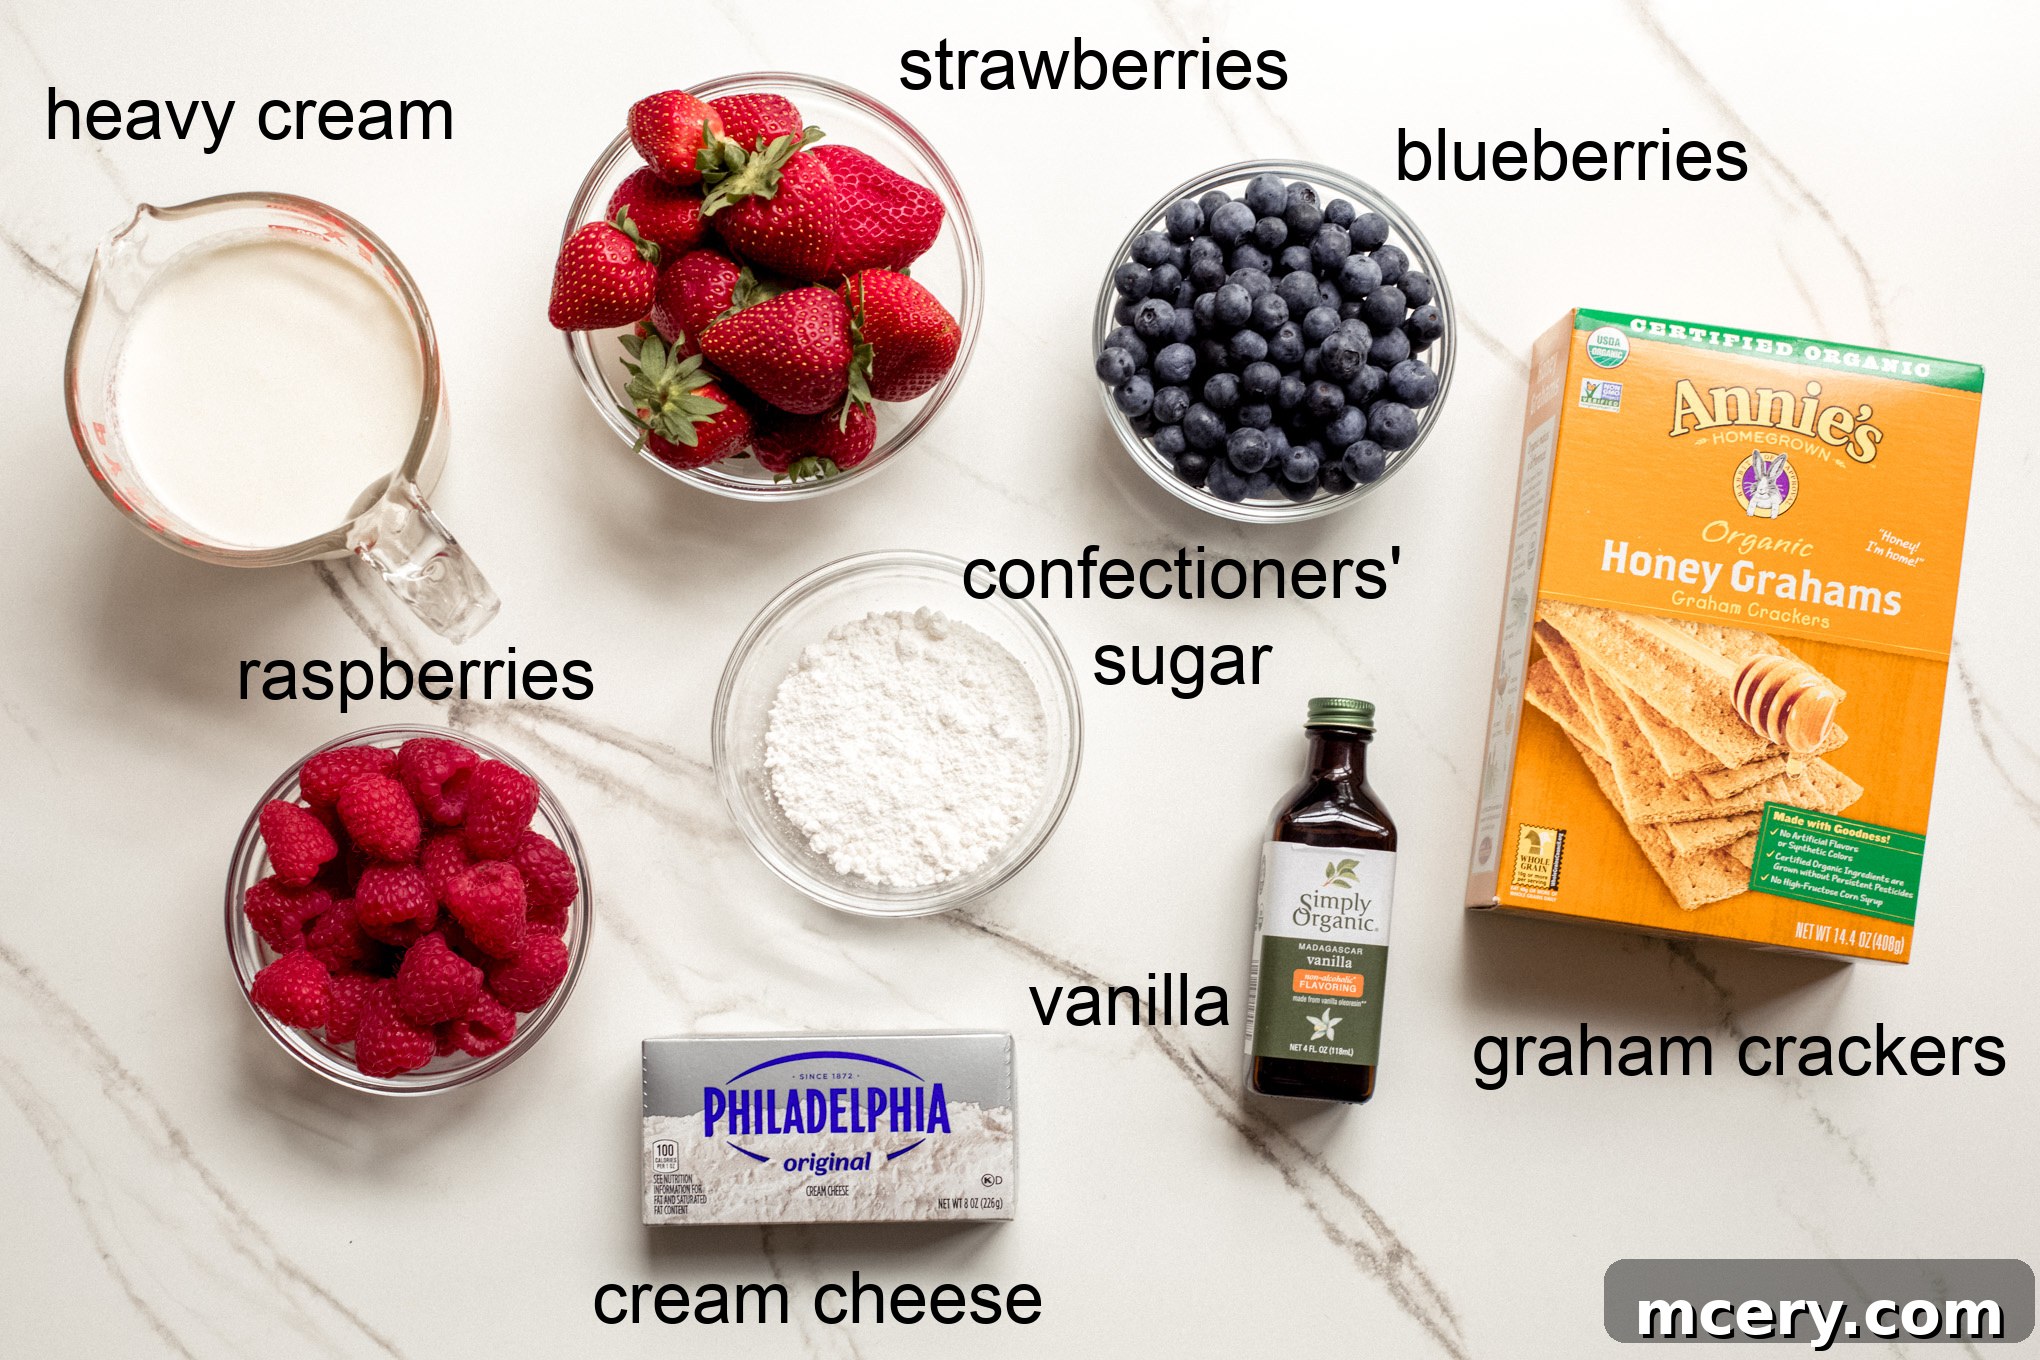
- Cream Cheese: Opt for a full-fat block of cream cheese. Its rich, tangy profile adds depth and a delightful counterpoint to the sweetness of the berries and sugar, creating a wonderfully balanced creamy layer. Ensure it’s softened to room temperature for a lump-free, smooth mixture.
- Heavy Cream: This is the backbone of our cake’s creamy texture. When whipped to stiff peaks, it provides the essential airiness and volume. As the cake chills, this whipped cream slowly tenderizes the graham crackers, transforming them into a soft, cake-like consistency. Always use very cold heavy cream for optimal whipping results.
- Confectioners’ Sugar: Also known as powdered sugar, this fine-textured sweetener blends seamlessly into the cream mixture, ensuring a smooth, velvety consistency without any gritty sugar crystals. It sweetens the cream beautifully, enhancing the overall flavor profile.
- Vanilla Extract: A touch of pure vanilla extract is indispensable. It infuses the whipped cream with a warm, inviting aroma and a subtle depth of flavor that complements the tang of the cream cheese and the sweetness of the berries, tying all the flavors together.
- Graham Crackers: These humble crackers are the structural foundation of our no-bake cake. They are designed to absorb moisture, gradually softening and becoming wonderfully tender, mimicking the texture of a baked cake. Their subtle honey-sweet flavor pairs perfectly with the creamy berry layers.
- Strawberries: These vibrant, juicy berries provide a burst of fresh, sweet flavor and a gorgeous red hue. They are perfect for creating the iconic red stripes in our patriotic flag design or for adding a delightful sweetness throughout the cake. Choose firm, bright red strawberries for the best results.
- Blueberries: Small yet mighty, blueberries bring a delightful pop of tartness that beautifully contrasts with the sweetness of the other ingredients. Their distinct color makes them the ideal choice for crafting the “stars” in our American flag motif, adding both visual appeal and a unique flavor dimension.
- Raspberries: With their deep, complex flavor and slightly tart edge, raspberries add another layer of sophistication to this dessert. They can be used interchangeably with strawberries for the red stripes, offering a slightly different texture and an intense berry aroma. Select plump, firm raspberries.
Refer to the recipe card below for precise quantities.
Unleash Your Creativity: Exciting Icebox Cake Variations
While our Berry American Flag Icebox Cake is a timeless classic, the beauty of an icebox cake lies in its incredible versatility. Don’t feel limited to berries; you can customize this dessert to suit any taste, occasion, or dietary preference. Here are some fantastic variations to inspire your next no-bake creation:
- Decadent Chocolate Icebox Cake: For the ultimate chocoholic, swap out the fruit and embrace rich, dark flavors. Layer creamy instant chocolate pudding with crisp chocolate wafer cookies. You can also add chocolate shavings or a drizzle of chocolate fudge between layers for extra indulgence. This version is pure cocoa bliss!
- Playful Icebox Cake with Oreos: Transform your favorite cookie into a sensational cake! Alternate layers of a sweet cream cheese filling (or even just whipped cream) with crushed or whole Oreo cookies. The cookies will soften beautifully, creating a cake with an irresistible cookies-and-cream texture and flavor that everyone will adore.
- Luxurious Red Velvet Icebox Cake: For a dessert that’s both visually stunning and incredibly delicious, try a Red Velvet Icebox Cake. Use a classic cream cheese frosting-inspired filling and layer it with red velvet cookies or even crumbled pieces of red velvet cake. The striking red and white layers make for an elegant and unique dessert.
- Accessible Gluten-Free Icebox Cake: No one should miss out on this delightful treat! Simply substitute traditional graham crackers or wafers with their gluten-free counterparts. Many brands offer delicious gluten-free graham crackers or chocolate wafers that work perfectly, ensuring everyone can enjoy the fun and flavor of a no-bake icebox cake.
- Tropical Fruit Icebox Cake: Take your tastebuds on a vacation! Layer the cream mixture with thinly sliced mango, pineapple, kiwi, or even passion fruit for a vibrant, exotic twist. Coconut-flavored whipped cream could also be an amazing addition here.
- Banana Pudding Icebox Cake: A Southern classic reimagined! Use vanilla wafers instead of graham crackers and layer with sliced bananas and a rich vanilla pudding or cream cheese mixture. It’s like a deconstructed banana pudding in cake form.
Crafting Your No-Bake Berry Icebox Cake: A Detailed Step-by-Step Guide
Follow these easy-to-understand instructions to assemble your stunning Icebox Cake. This simple dessert comes together quickly, with most of the “work” done by your refrigerator. For a printer-friendly version and precise measurements, please see the full recipe card below.
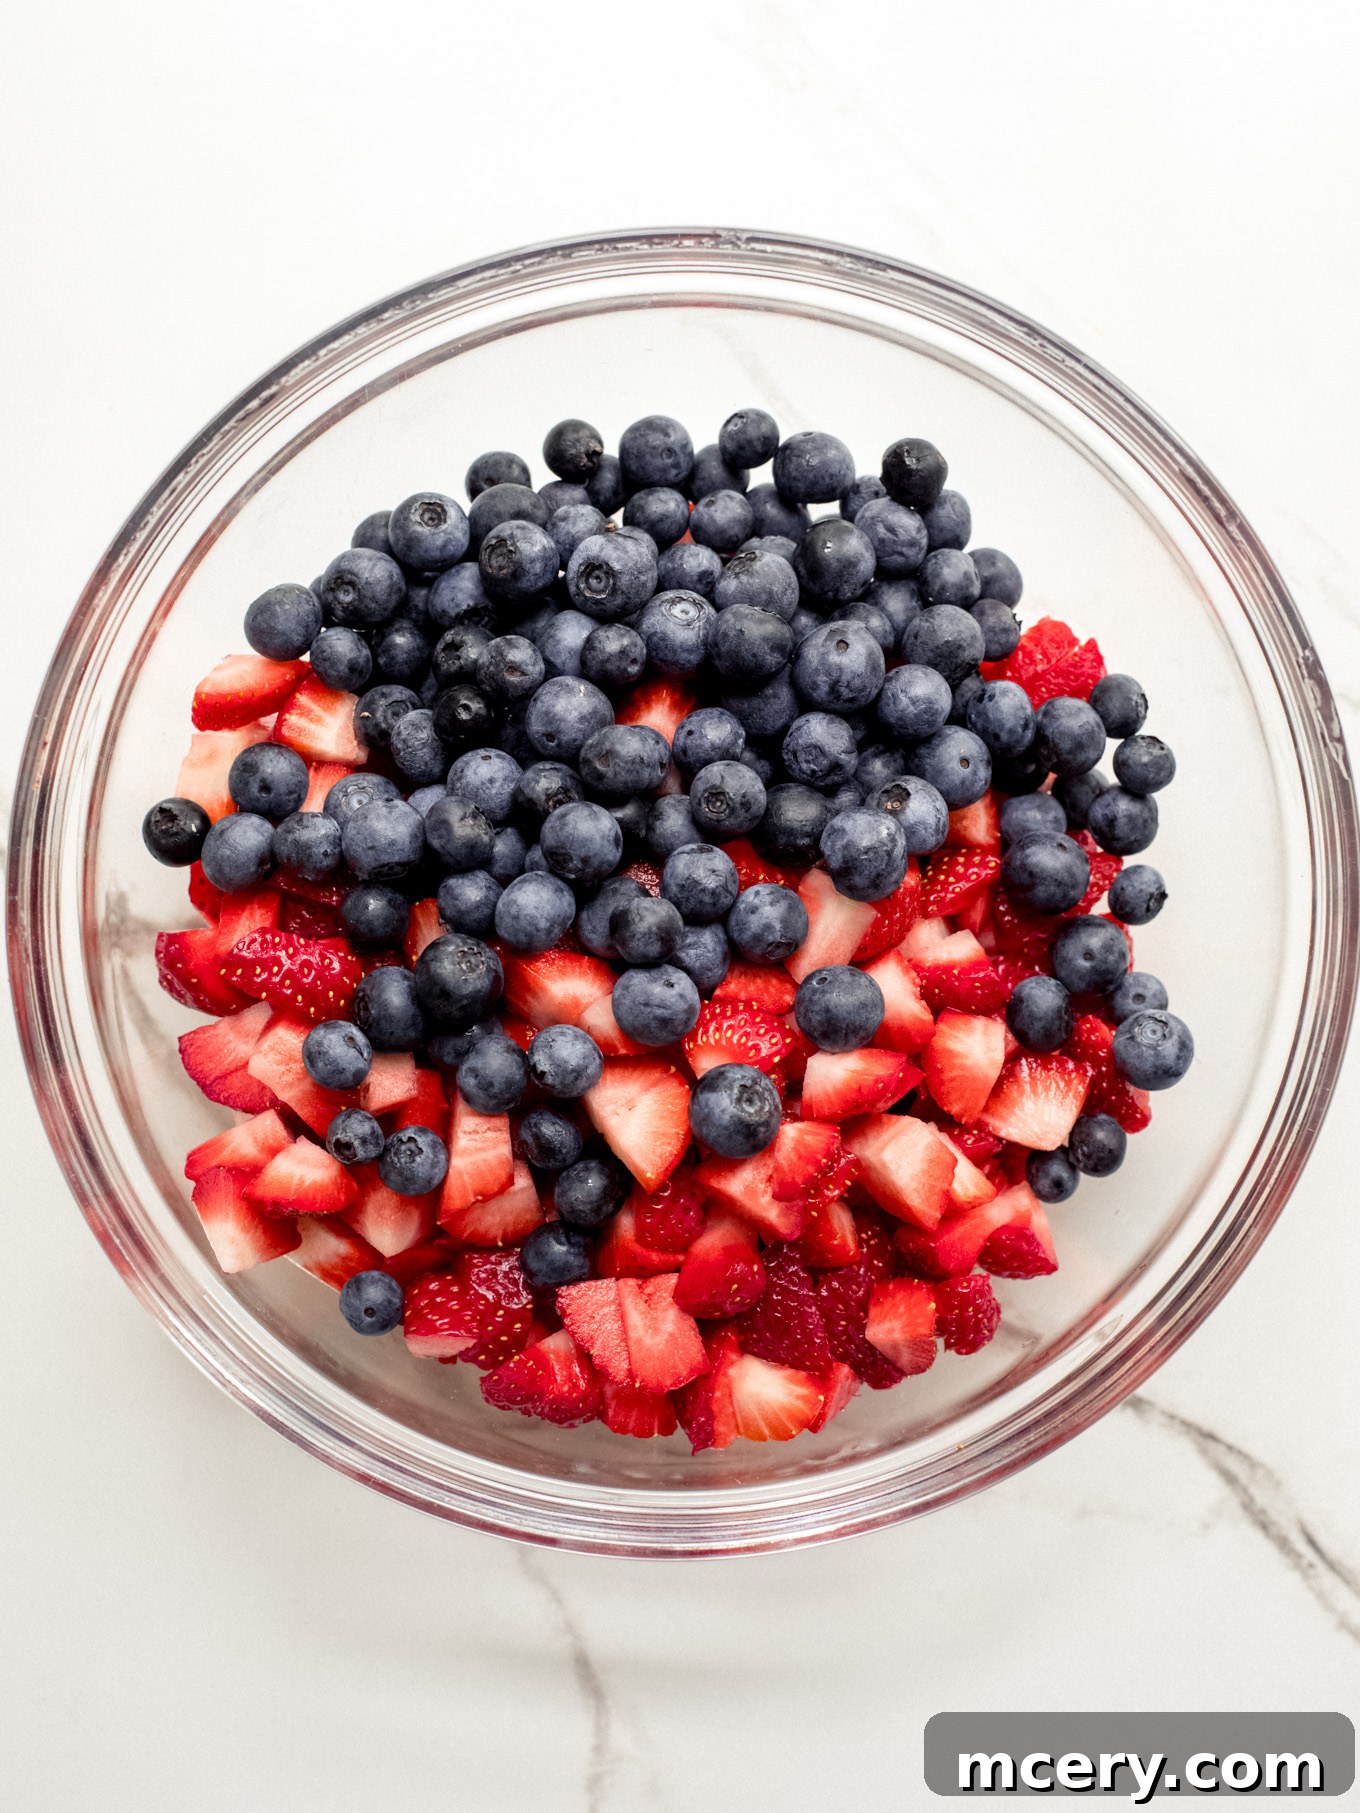
Step 1: Prepare Your Berries. In a spacious mixing bowl, gently combine your freshly chopped strawberries with approximately 1 ½ cups of blueberries. This mixture will form the delightful fruity layers within your cake. Set this colorful medley aside while you prepare the cream.
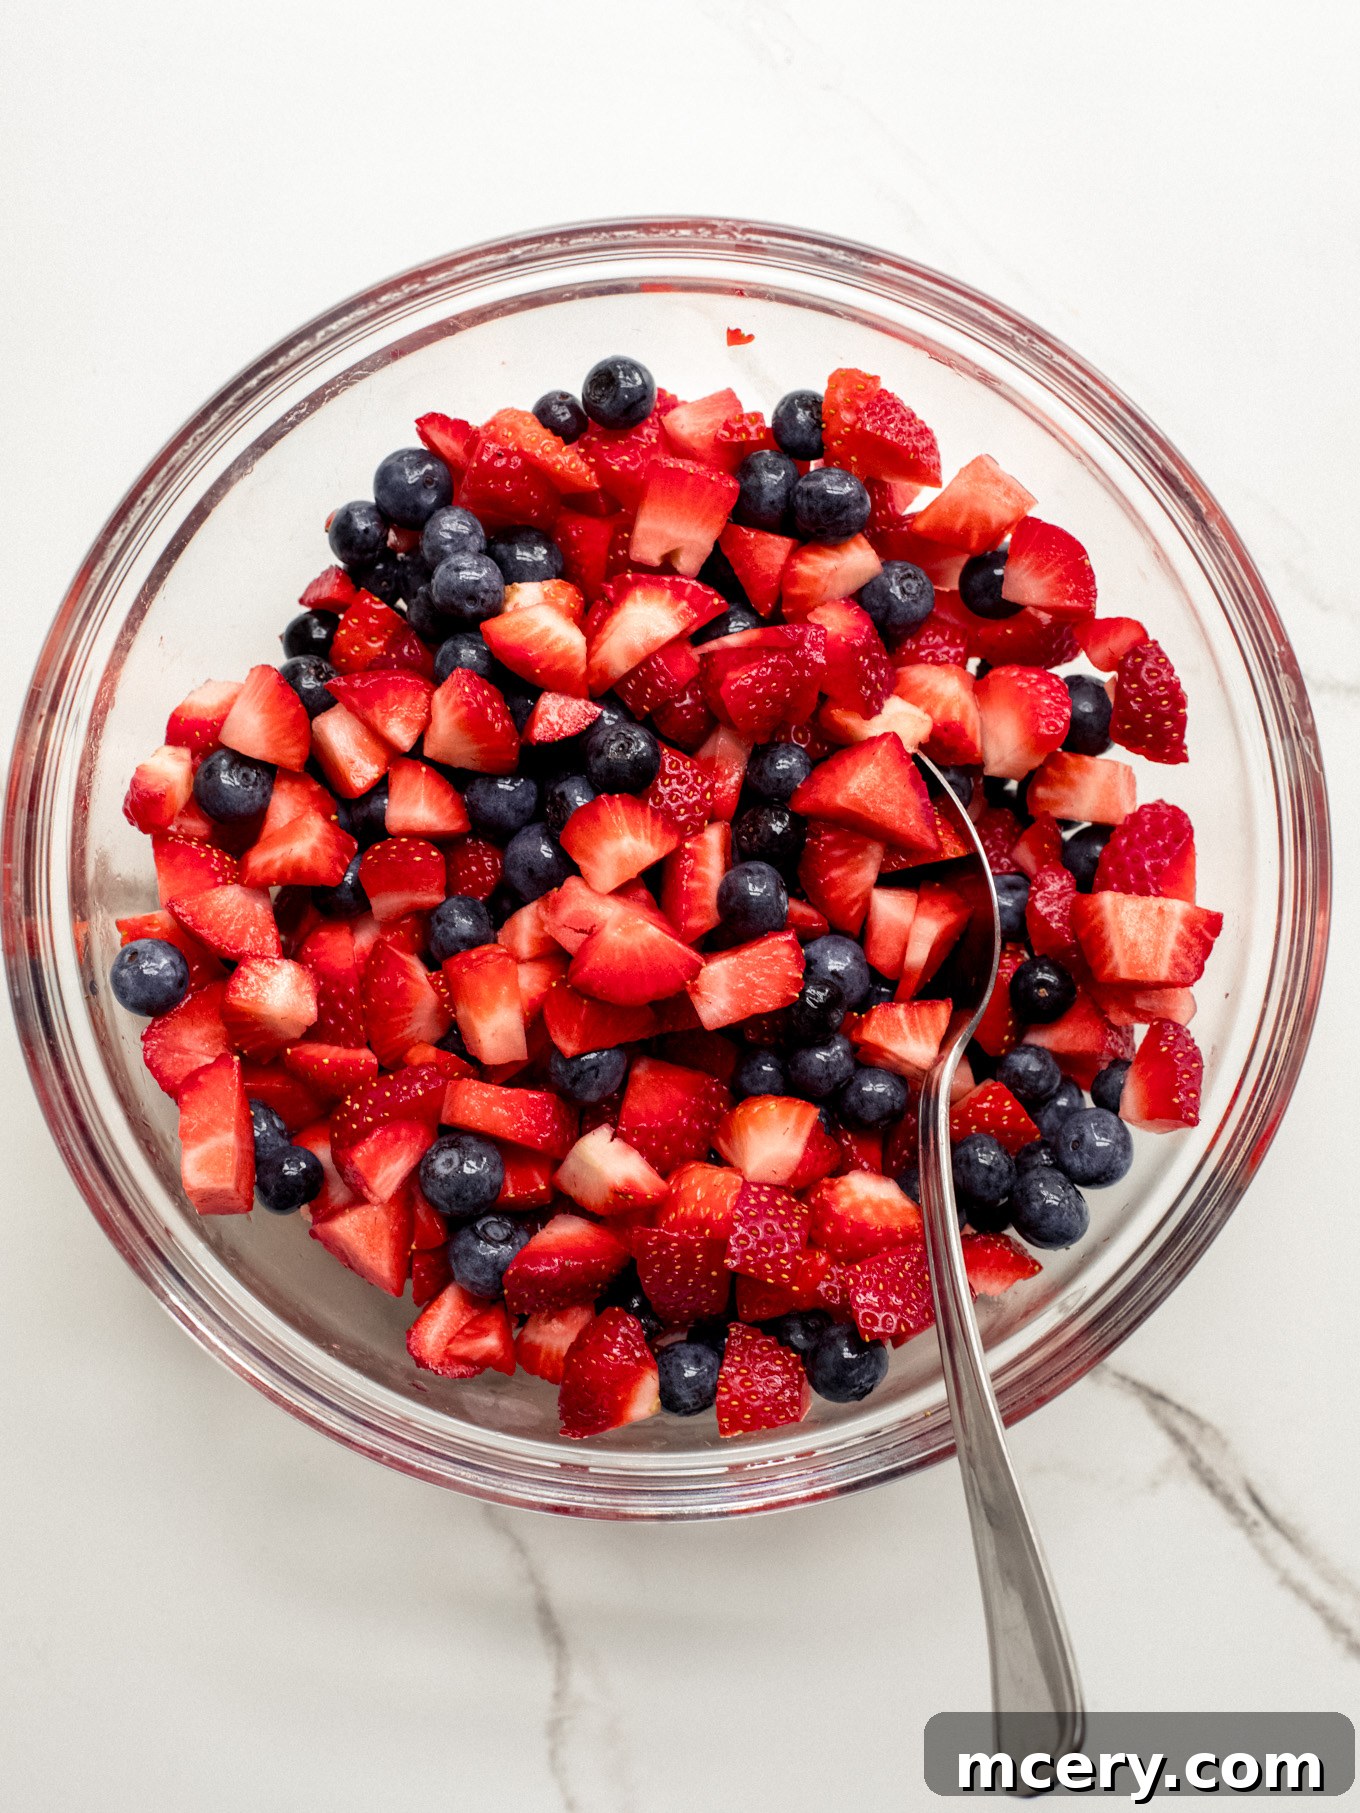
Step 2: Gently Combine Berries. Give the berries a gentle toss to ensure they are evenly distributed. This step helps create consistent flavor in every slice of your cake. Once mixed, ensure they are easily accessible for the layering process.
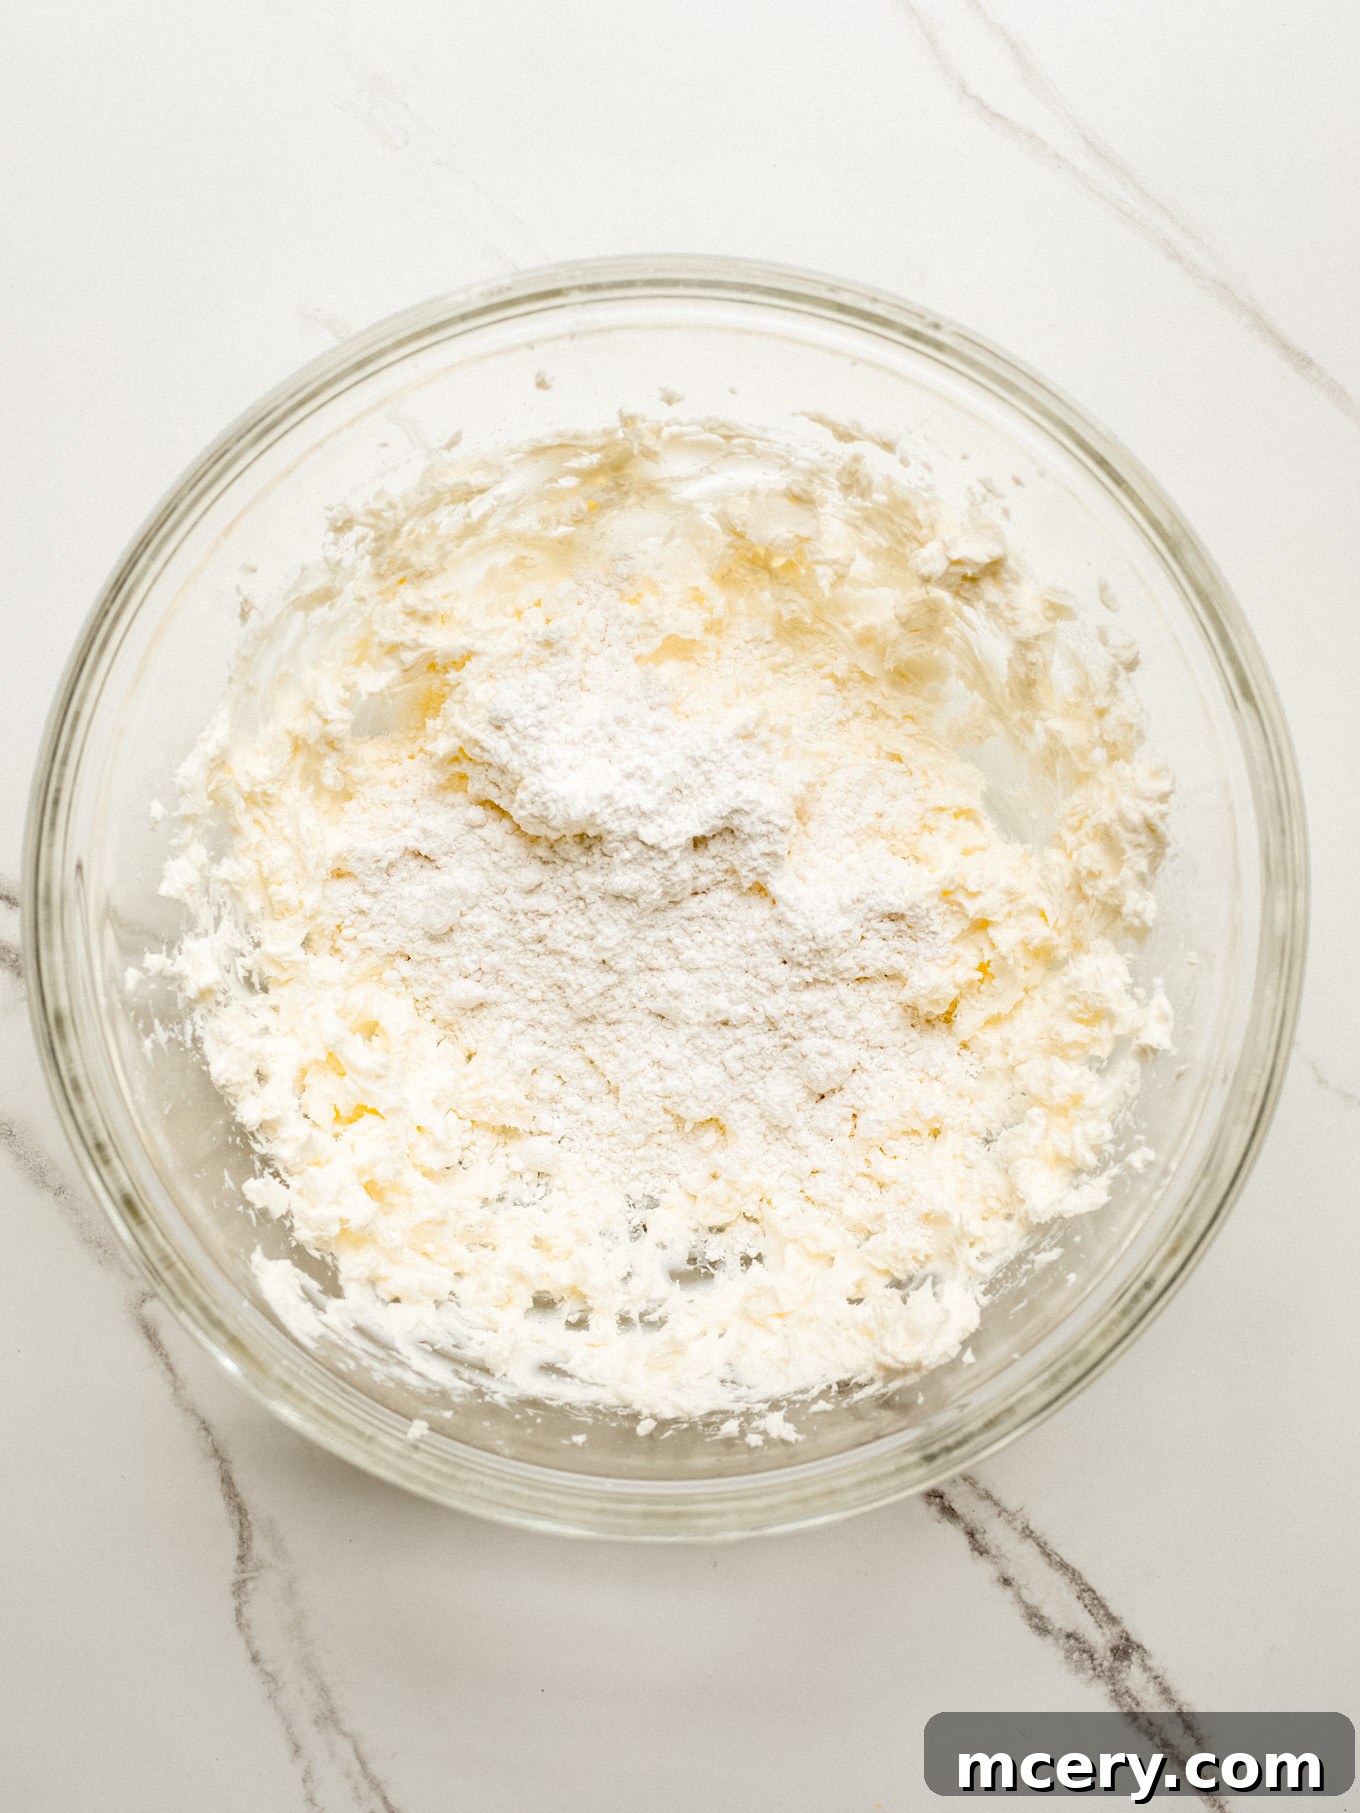
Step 3: Prepare the Cream Cheese Base. In a large mixing bowl, beat the softened cream cheese using a hand mixer on high speed until it becomes wonderfully smooth and free of any lumps. Gradually add the confectioners’ sugar, beating on low speed until it’s just incorporated, then increase to medium-high for about a minute to ensure a fully smooth mixture. Remember to scrape down the sides of the bowl with a rubber spatula as needed.
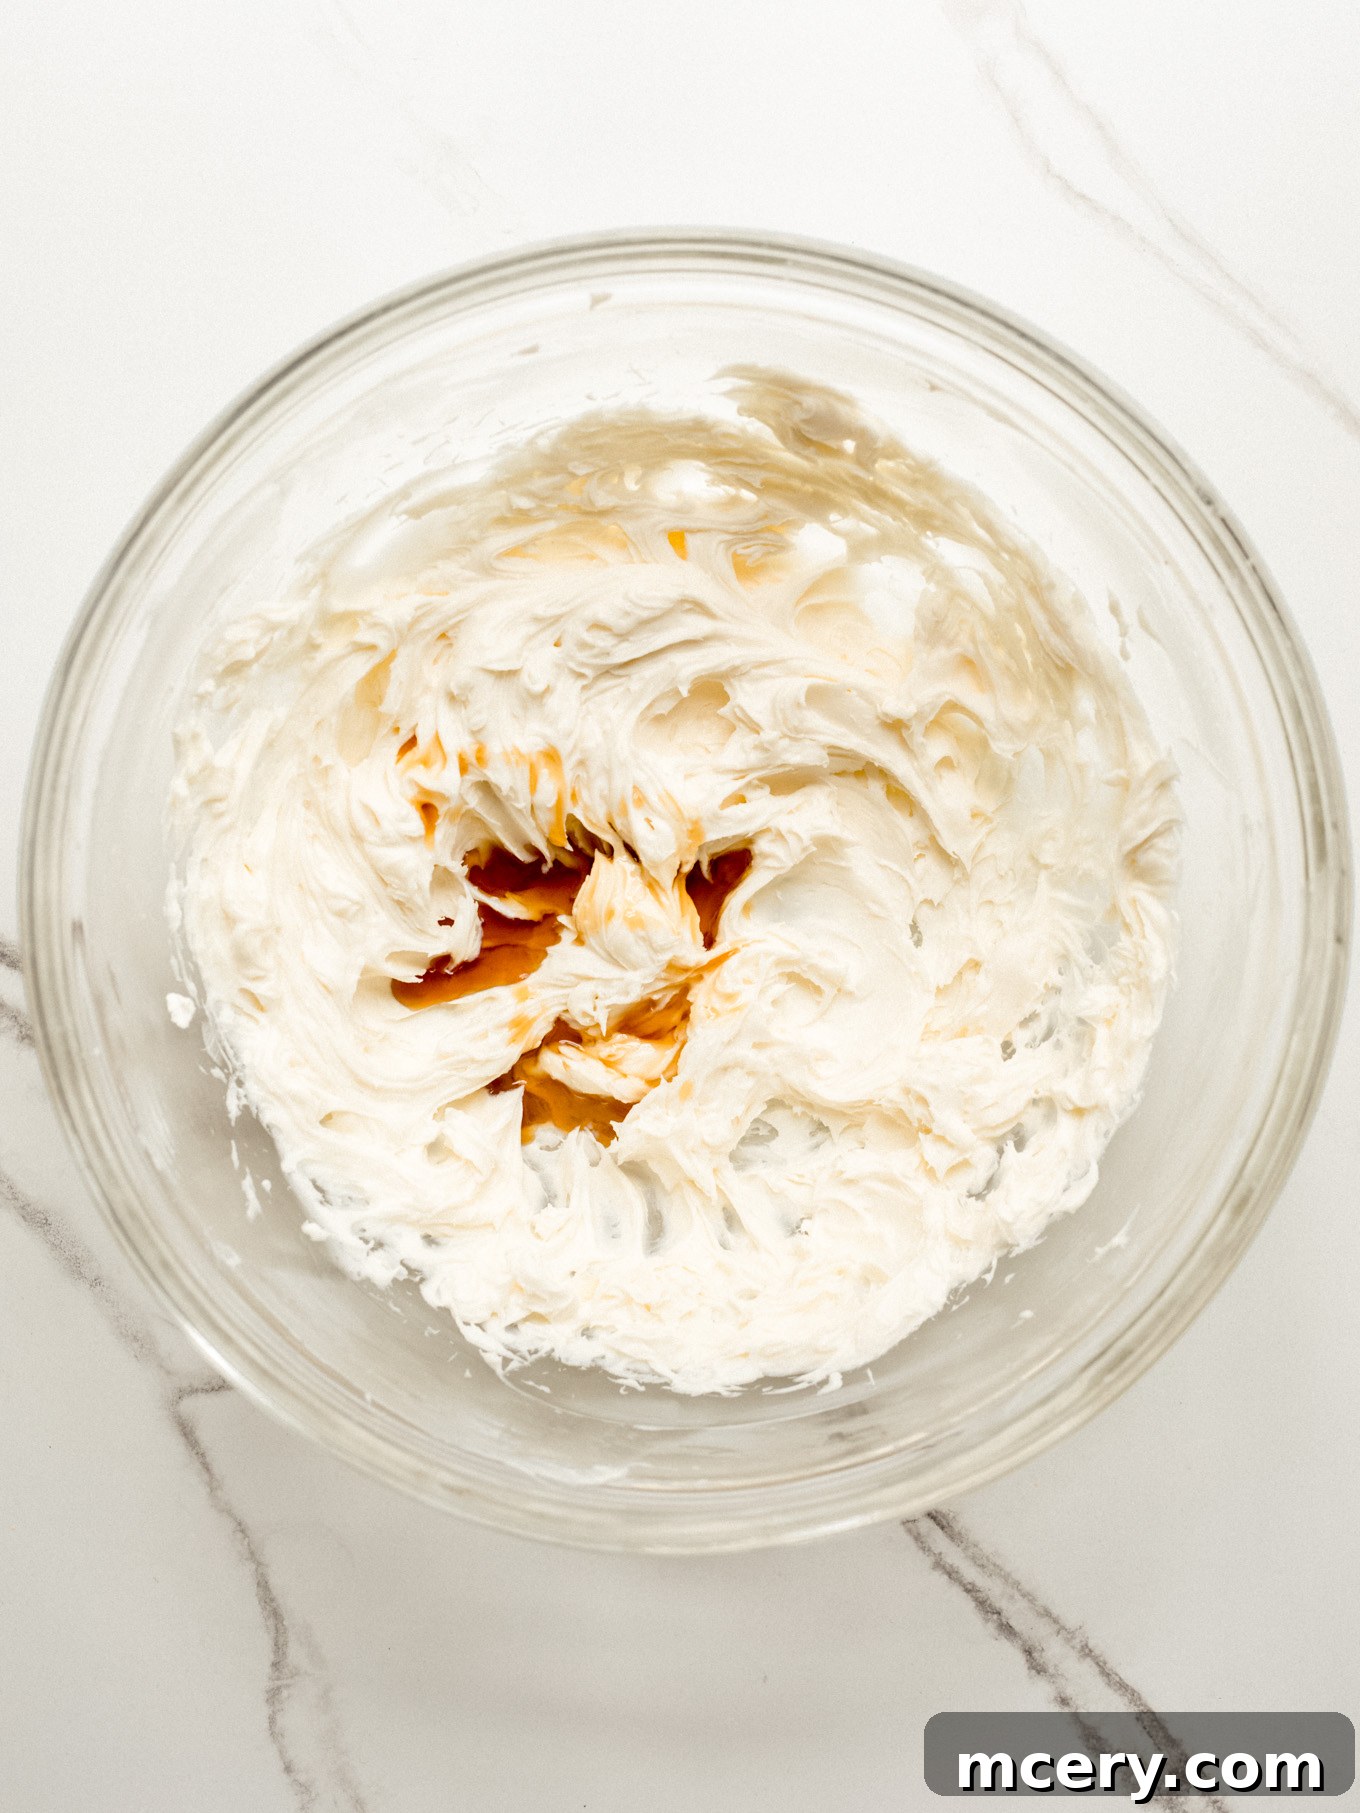
Step 4: Incorporate Vanilla. Pour in the pure vanilla extract into the cream cheese and sugar mixture. Continue to beat on medium speed until the vanilla is thoroughly mixed in, ensuring a delightful aroma and balanced flavor throughout your creamy base.
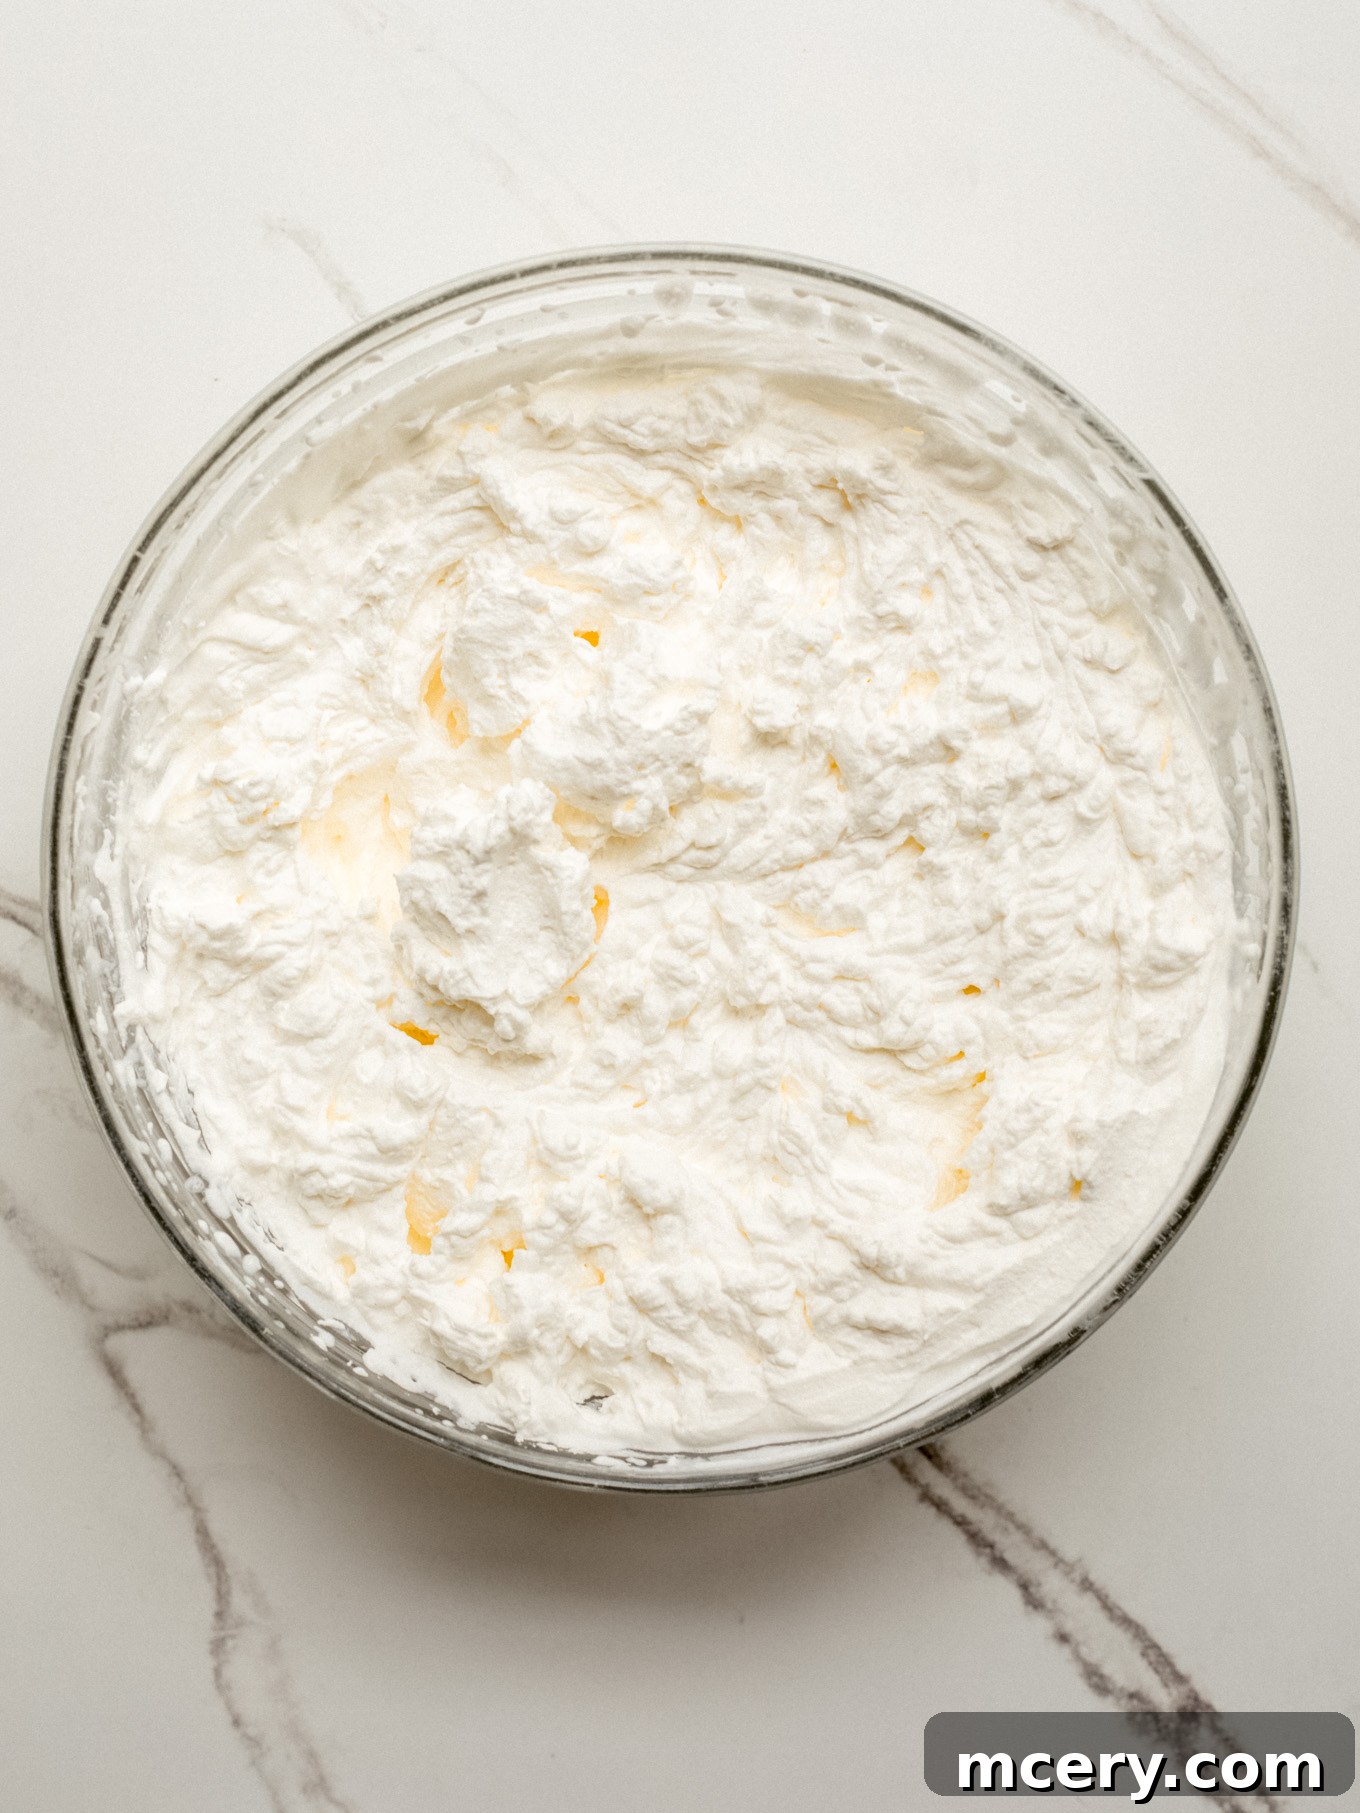
Step 5: Whip the Heavy Cream. In a separate, chilled large mixing bowl, pour the cold heavy cream. Beat on high speed for 3-4 minutes, or until stiff peaks gracefully form. Be careful not to overbeat, as this can turn the cream into butter. You want a fluffy, stable whipped cream.
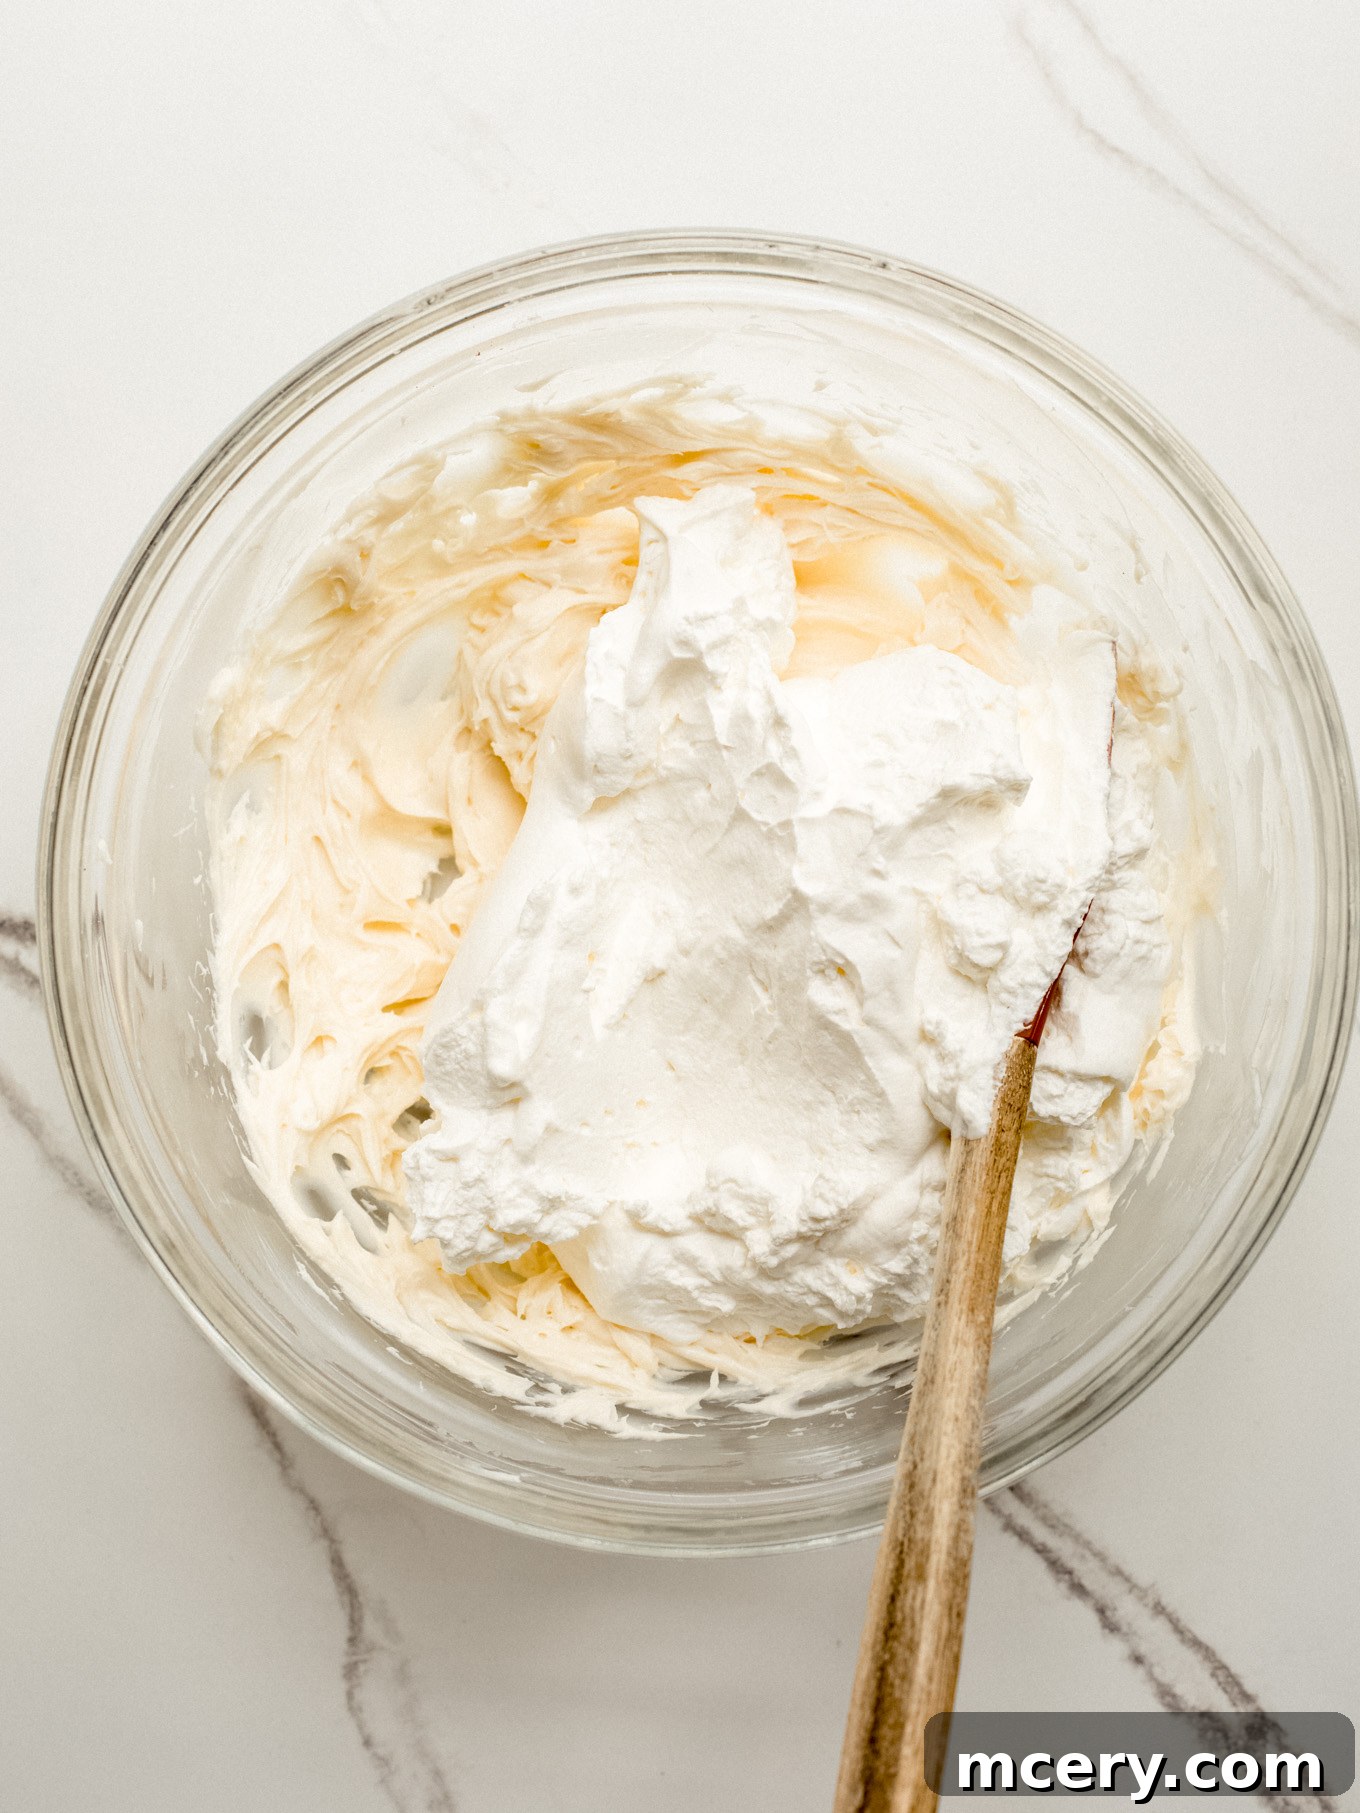
Step 6: Fold in Whipped Cream. Using a rubber spatula, carefully and gently fold the prepared whipped cream into the cream cheese mixture. The goal is to incorporate it without deflating the air, ensuring a light and airy consistency for your cake’s filling. Fold until just combined.
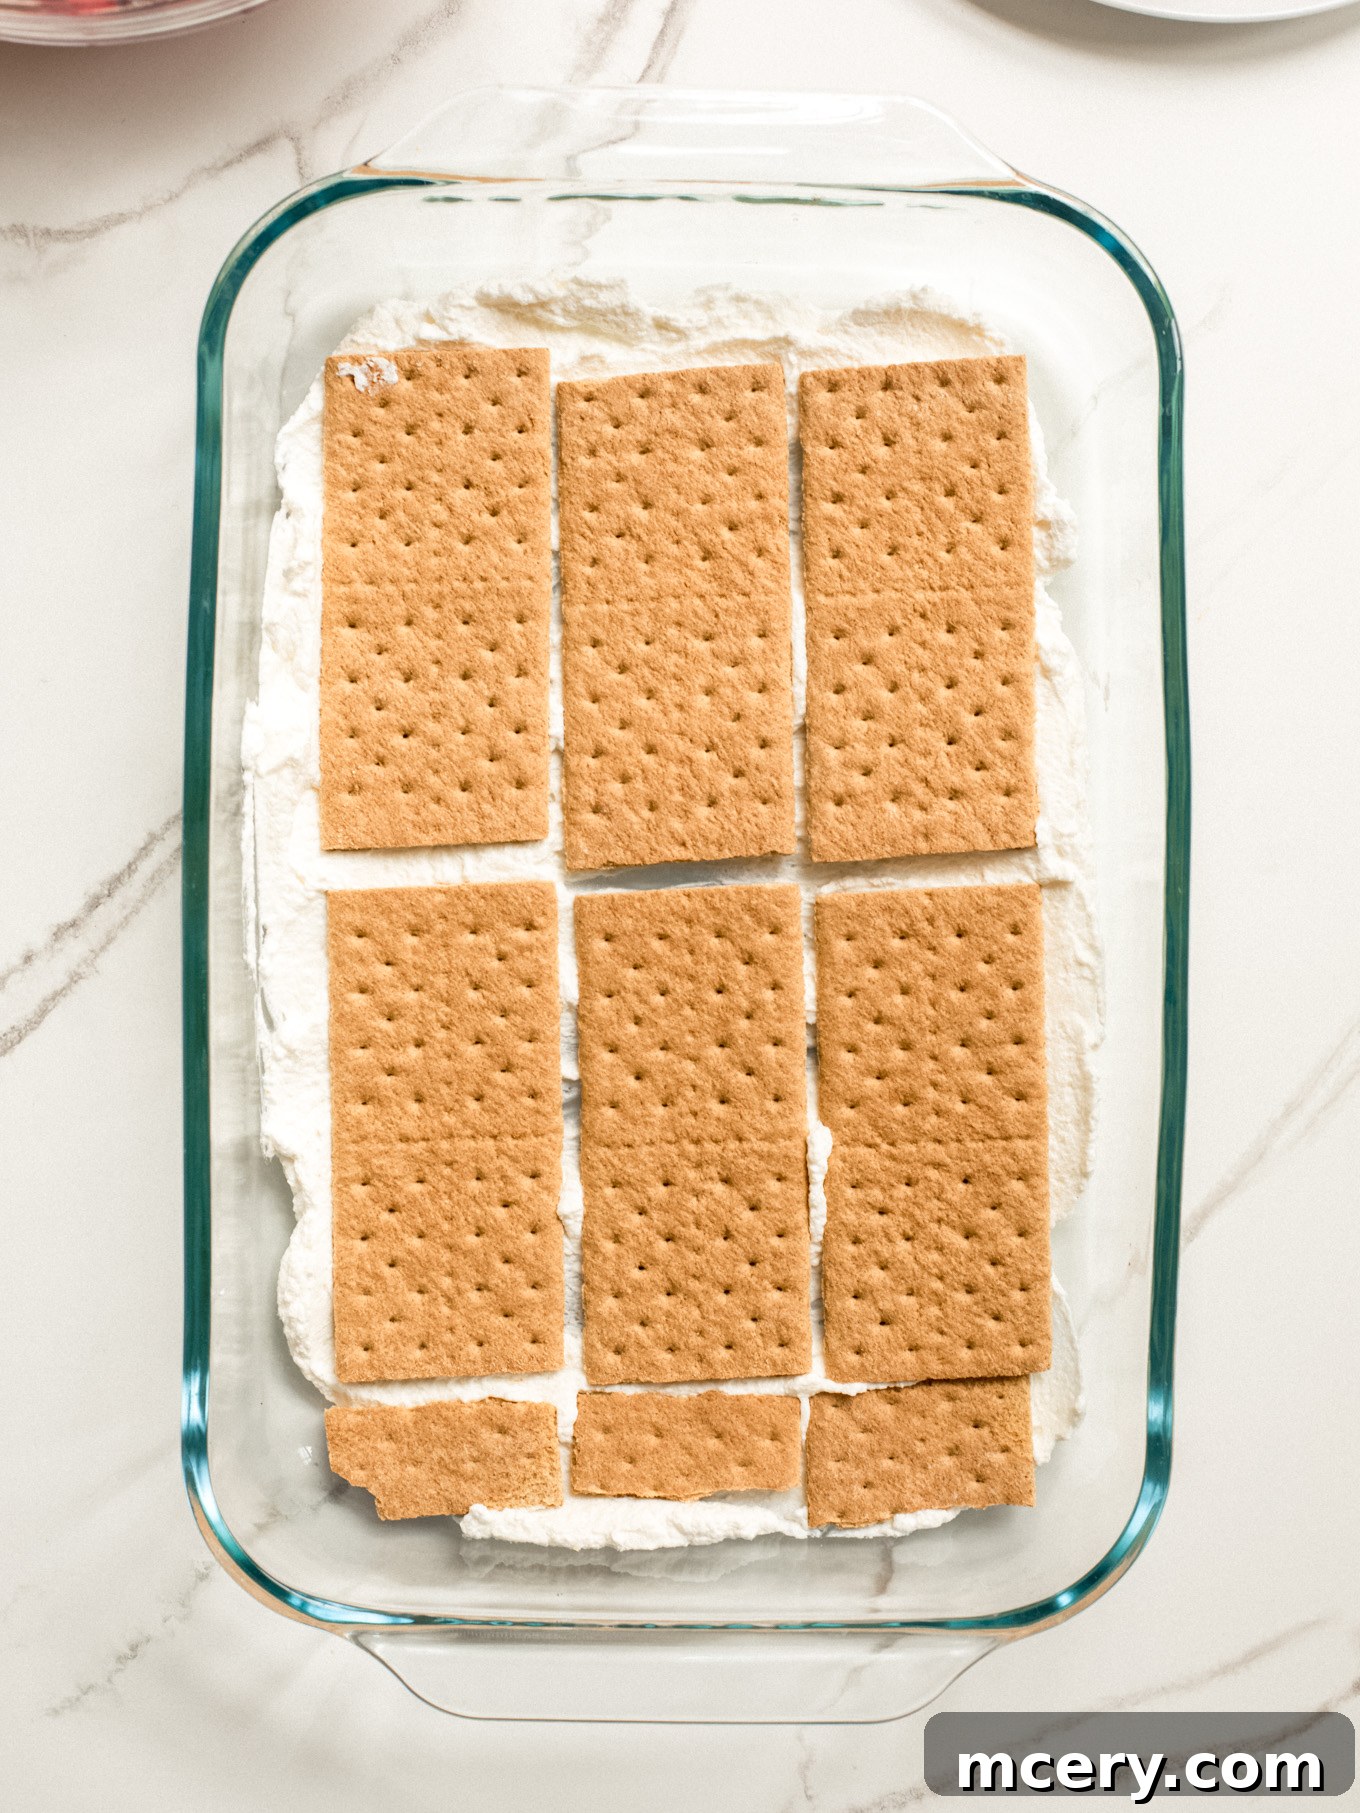
Step 7: Start Layering – The Base. Begin assembling your cake in a 9×13-inch glass baking dish. Spread the absolute smallest amount of cream mixture on the bottom of the dish; this merely acts as an adhesive to keep your first layer of graham crackers in place. Then, lay a single, even layer of graham crackers on top, breaking them as needed to fit snugly and cover the entire bottom.
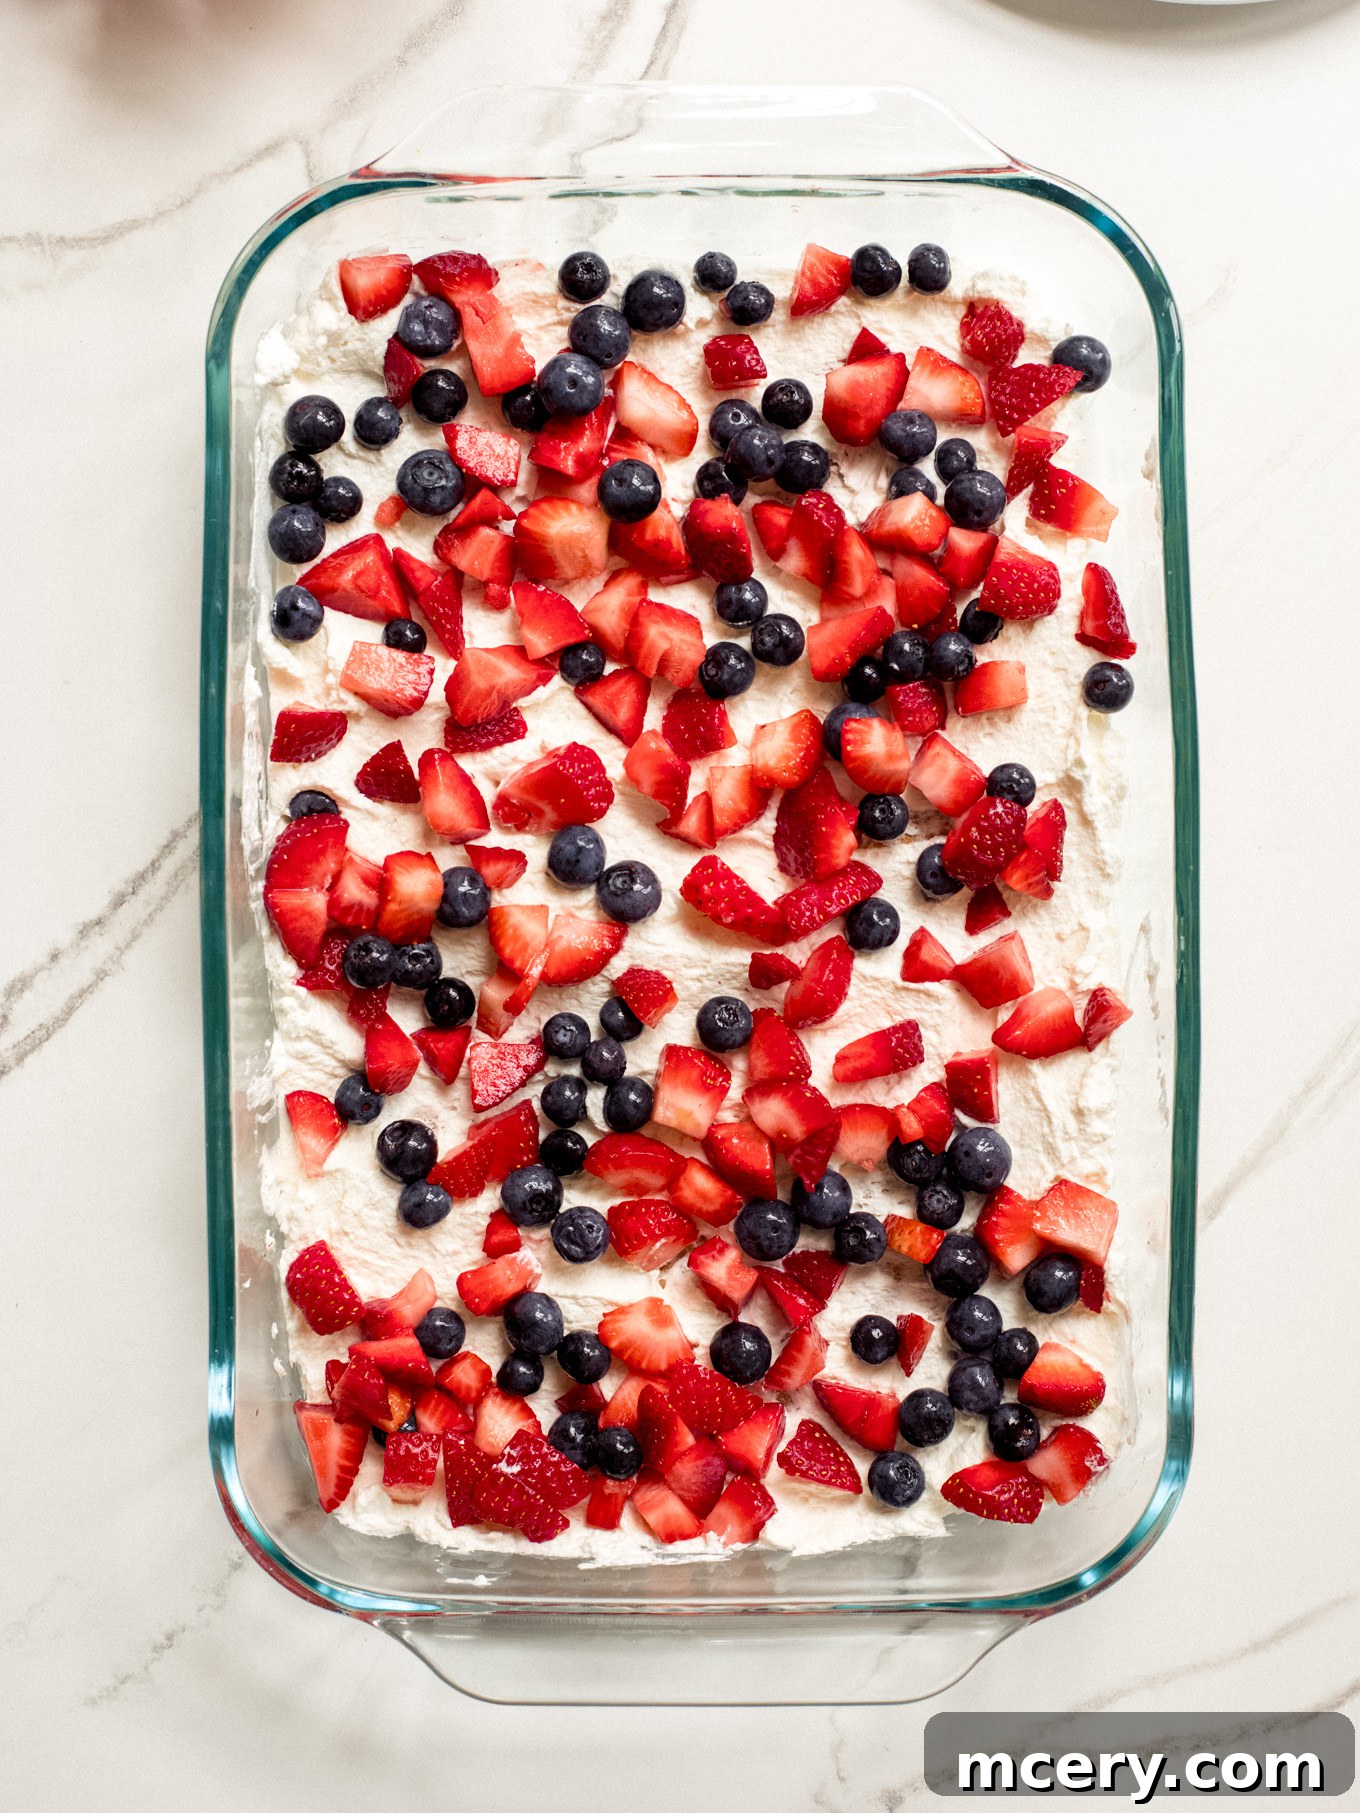
Step 8: First Cream and Berry Layer. Spoon approximately one-third of your creamy mixture evenly over the graham cracker layer. Take care to spread it gently from edge to edge. Following this, distribute half of your prepared berry mixture over the cream, creating a vibrant and flavorful layer.
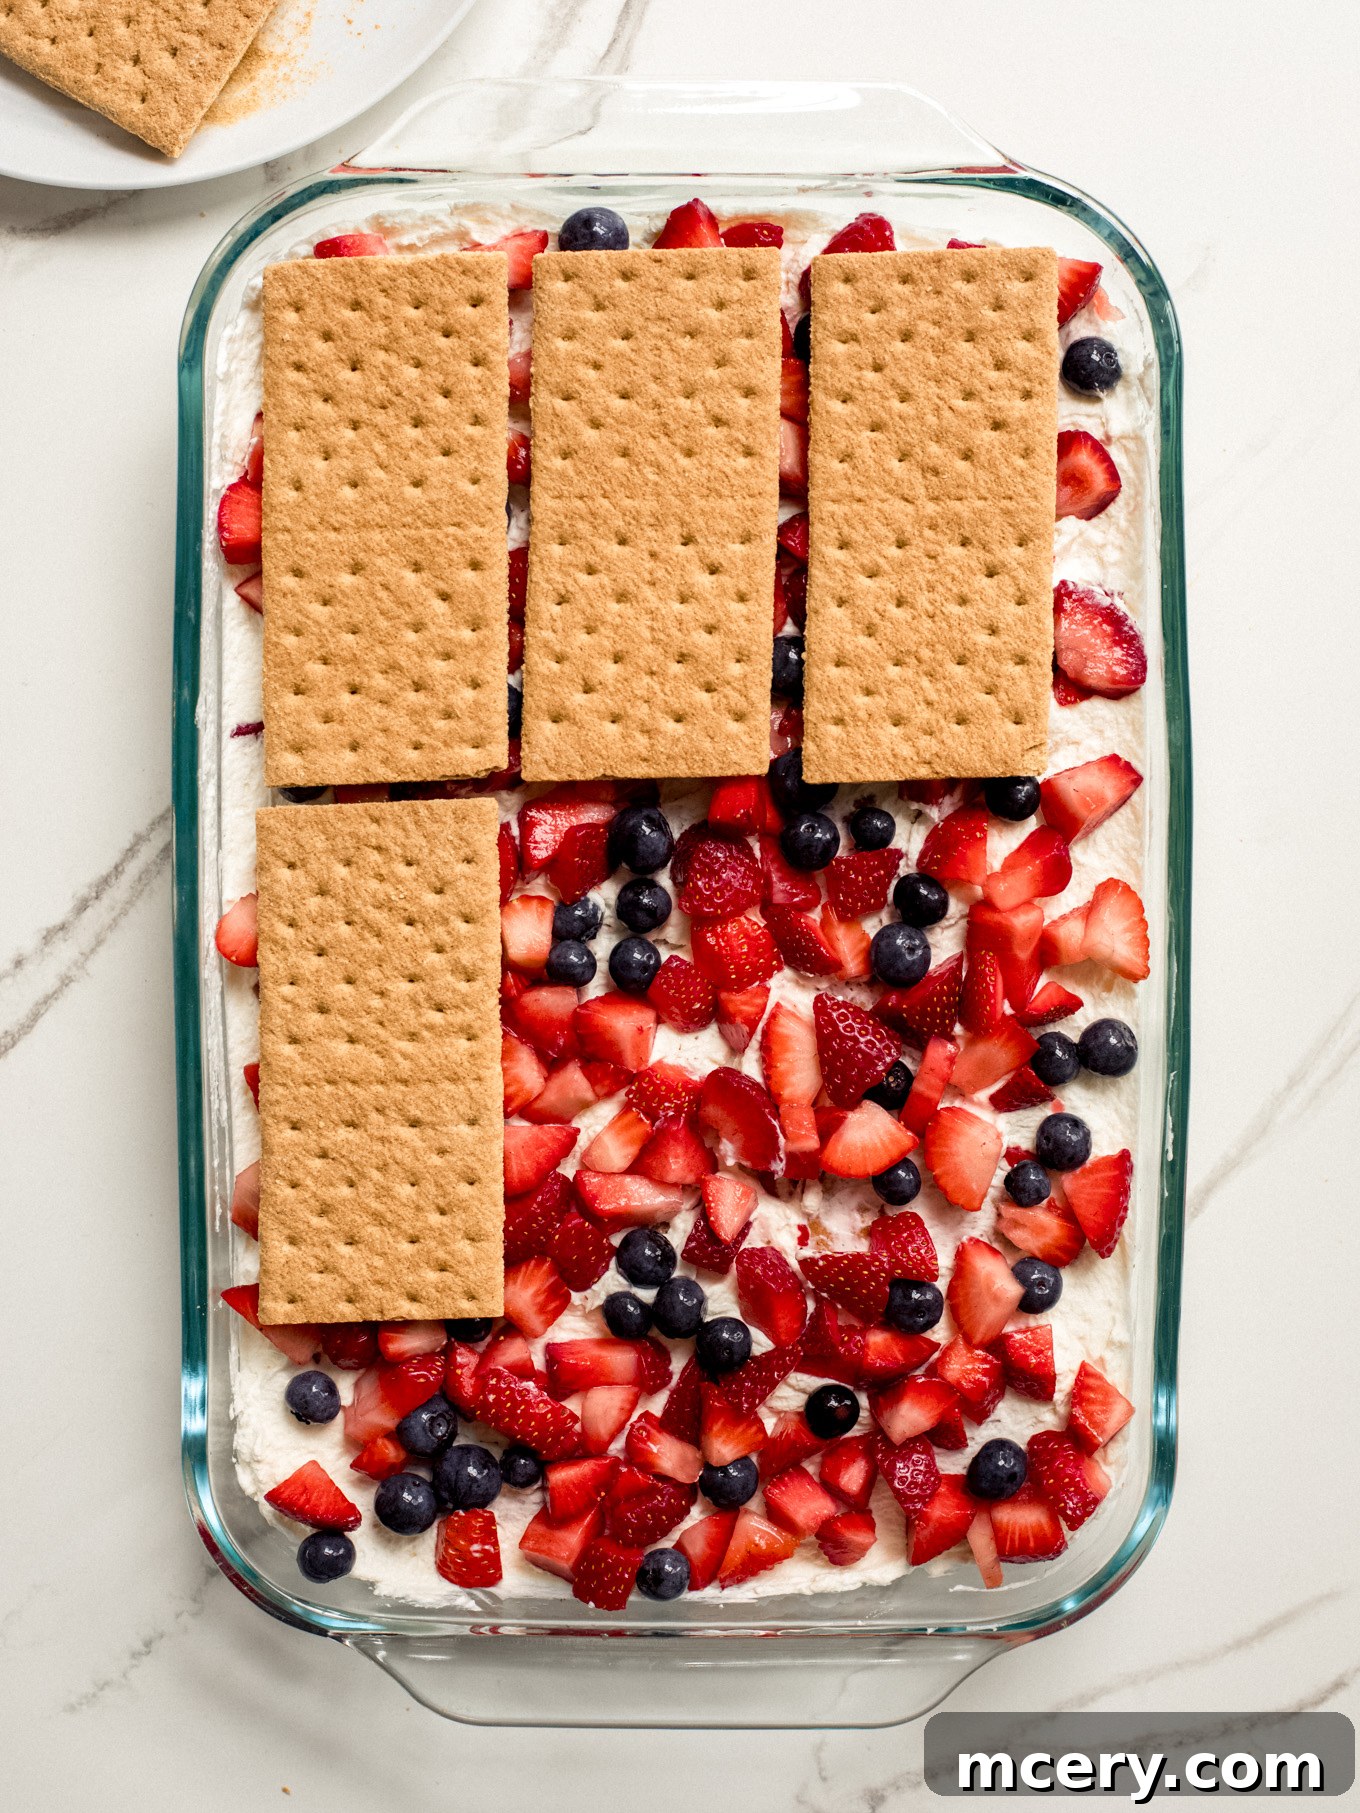
Step 9: Add Another Graham Cracker Layer. Carefully place another layer of graham crackers over the berry mixture. Don’t hesitate to break crackers into smaller pieces to ensure a complete, even layer. This provides stability and texture for the subsequent layers.
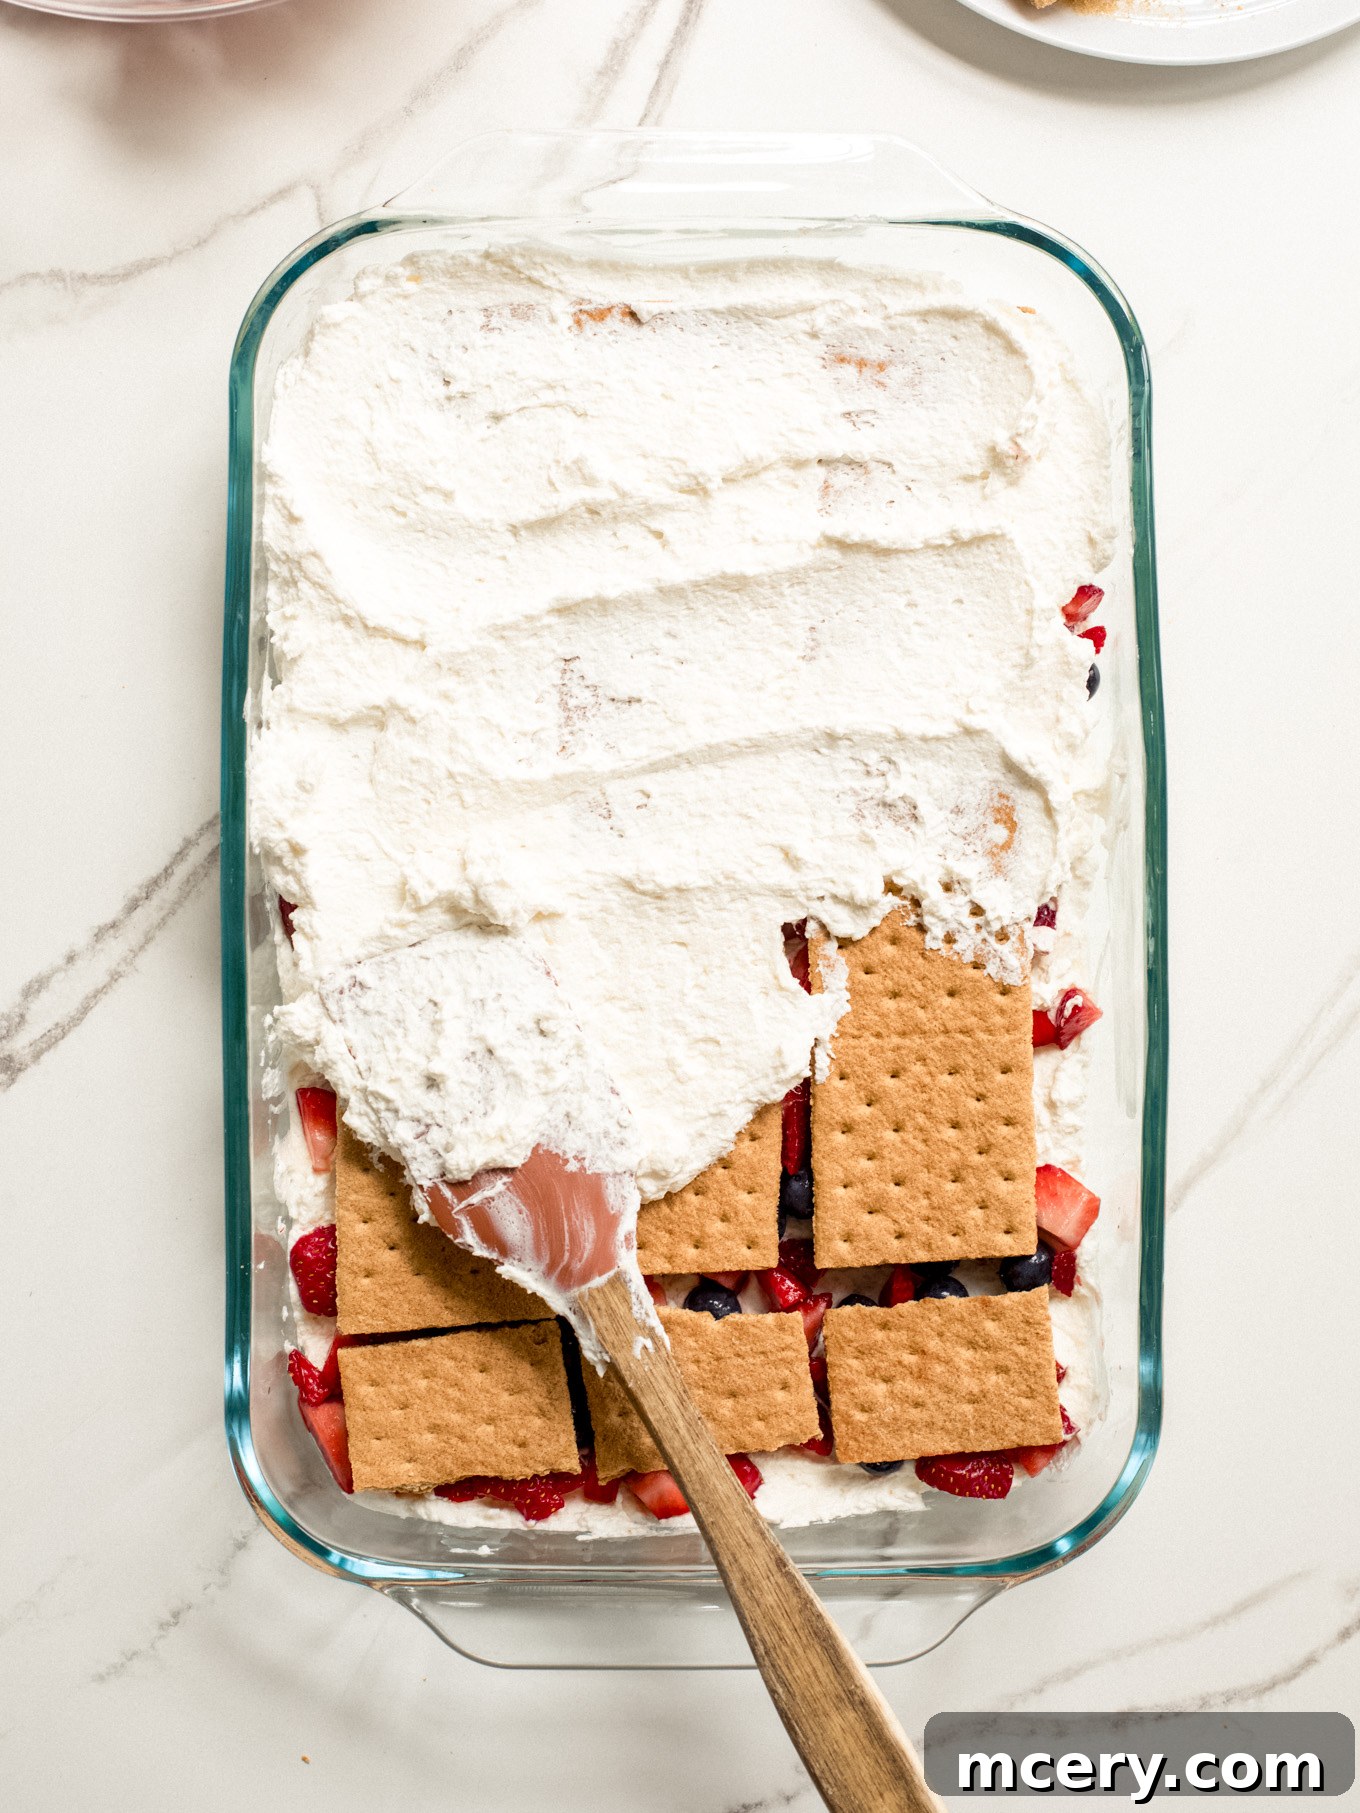
Step 10: Repeat Layers. Spread another third of the cream mixture over the newest layer of graham crackers. Repeat the layering process one more time: add the remaining berry mixture, followed by a final layer of graham crackers, and finish with the last of your creamy filling, ensuring the top is smooth and even.
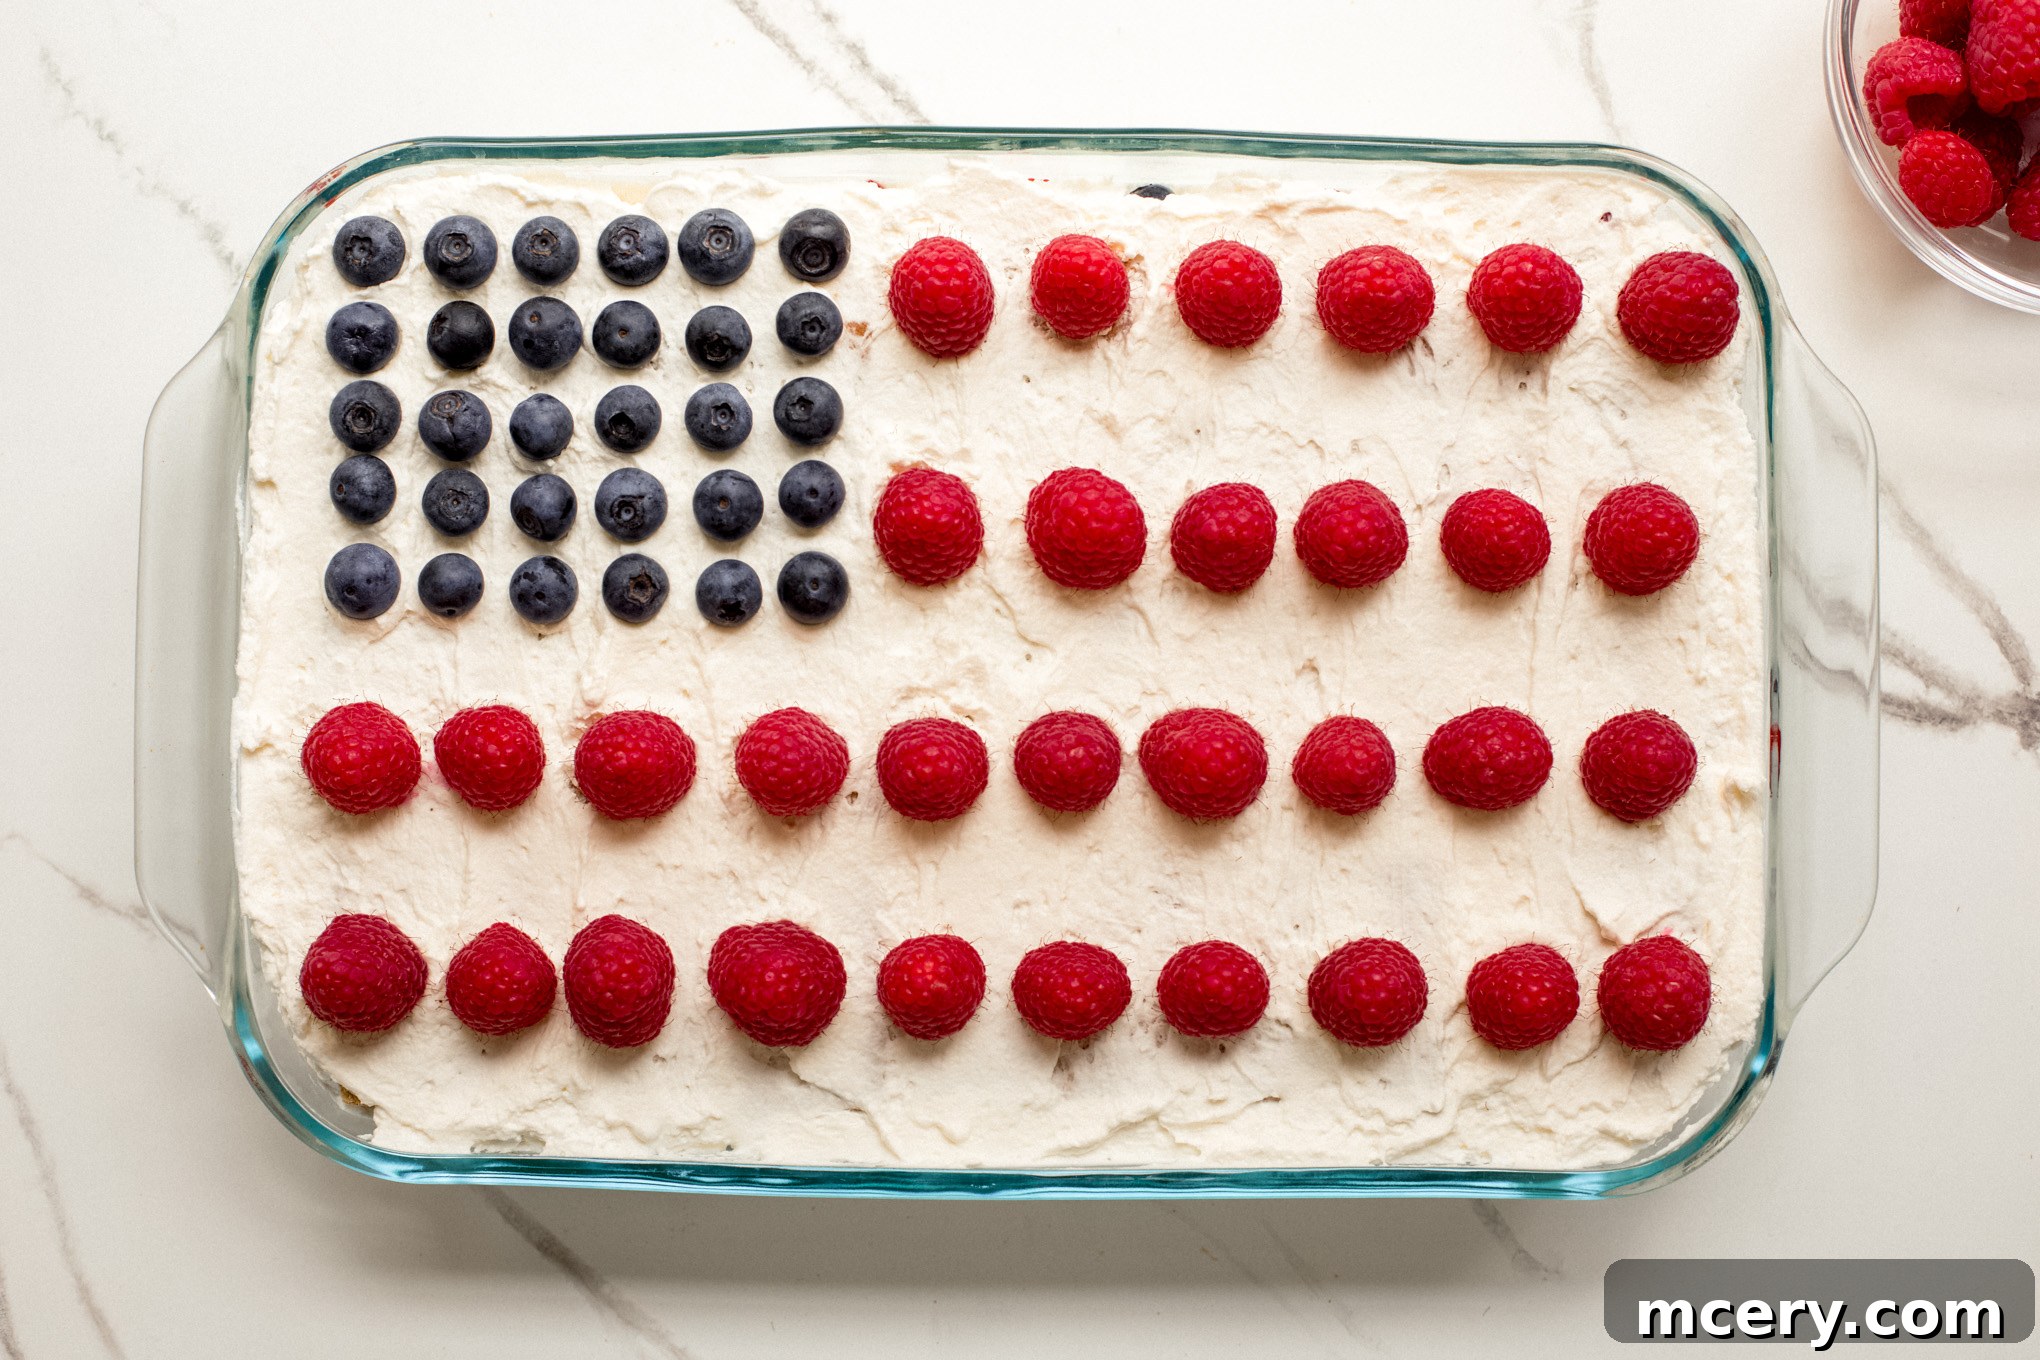
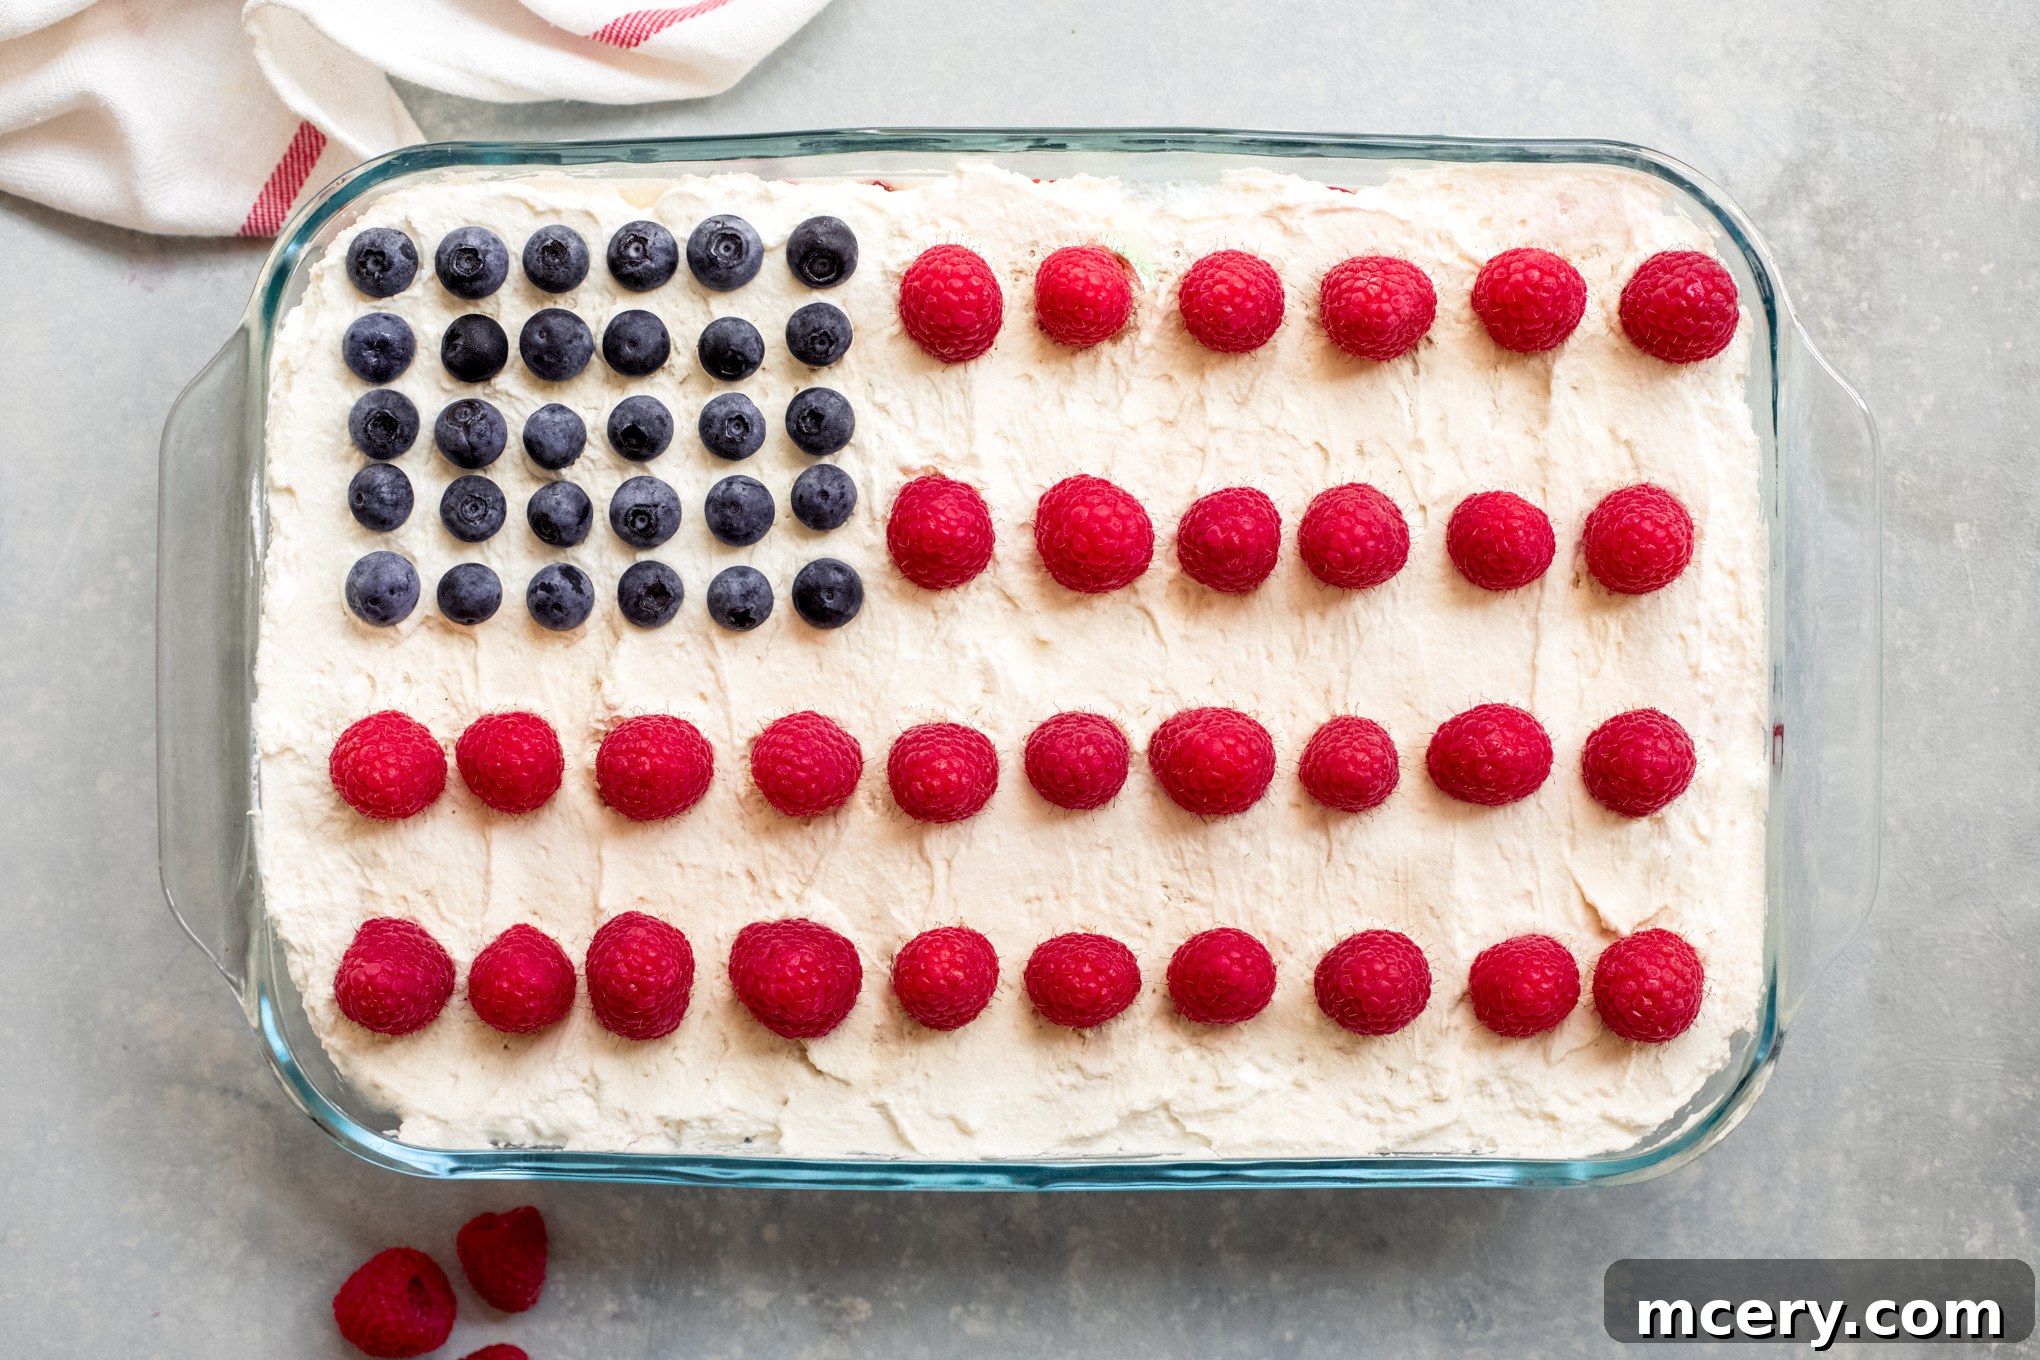
Step 11: Create the American Flag Design and Chill. Now for the festive final touch! Artfully arrange the remaining blueberries in the top left corner of the cake to form the “stars” of the American flag. Then, use the fresh raspberries (or additional strawberries) to create the vibrant “stripes” across the remaining surface of the cake. Once decorated, cover the dish tightly with plastic wrap and refrigerate overnight, or for at least 8 hours. This crucial chilling period allows the graham crackers to soften and the flavors to meld, creating that signature cake-like texture.
Pro Tips for Icebox Cake Perfection Every Time
To ensure your no-bake Icebox Cake turns out flawlessly and delights every palate, keep these expert tips in mind. Mastering these simple techniques will transform your homemade dessert into an unforgettable treat:
- Achieving Stiff Peaks for a Stable Cream: The texture of your whipped cream is paramount. Beat the heavy cream until it forms stiff peaks – meaning the cream holds its shape firmly when the beaters are lifted. However, be vigilant and stop as soon as stiff peaks form. Overbeating can quickly turn your lovely cream into grainy butter, which will not yield the desired light and fluffy cake texture.
- Berry Selection is Key: For the most vibrant flavors and visual appeal, always opt for the freshest, ripest berries available. Their natural sweetness and juicy texture will shine through. While the flag design uses specific colors, feel free to experiment with any combination of fresh berries or other soft fruits that you love for different occasions.
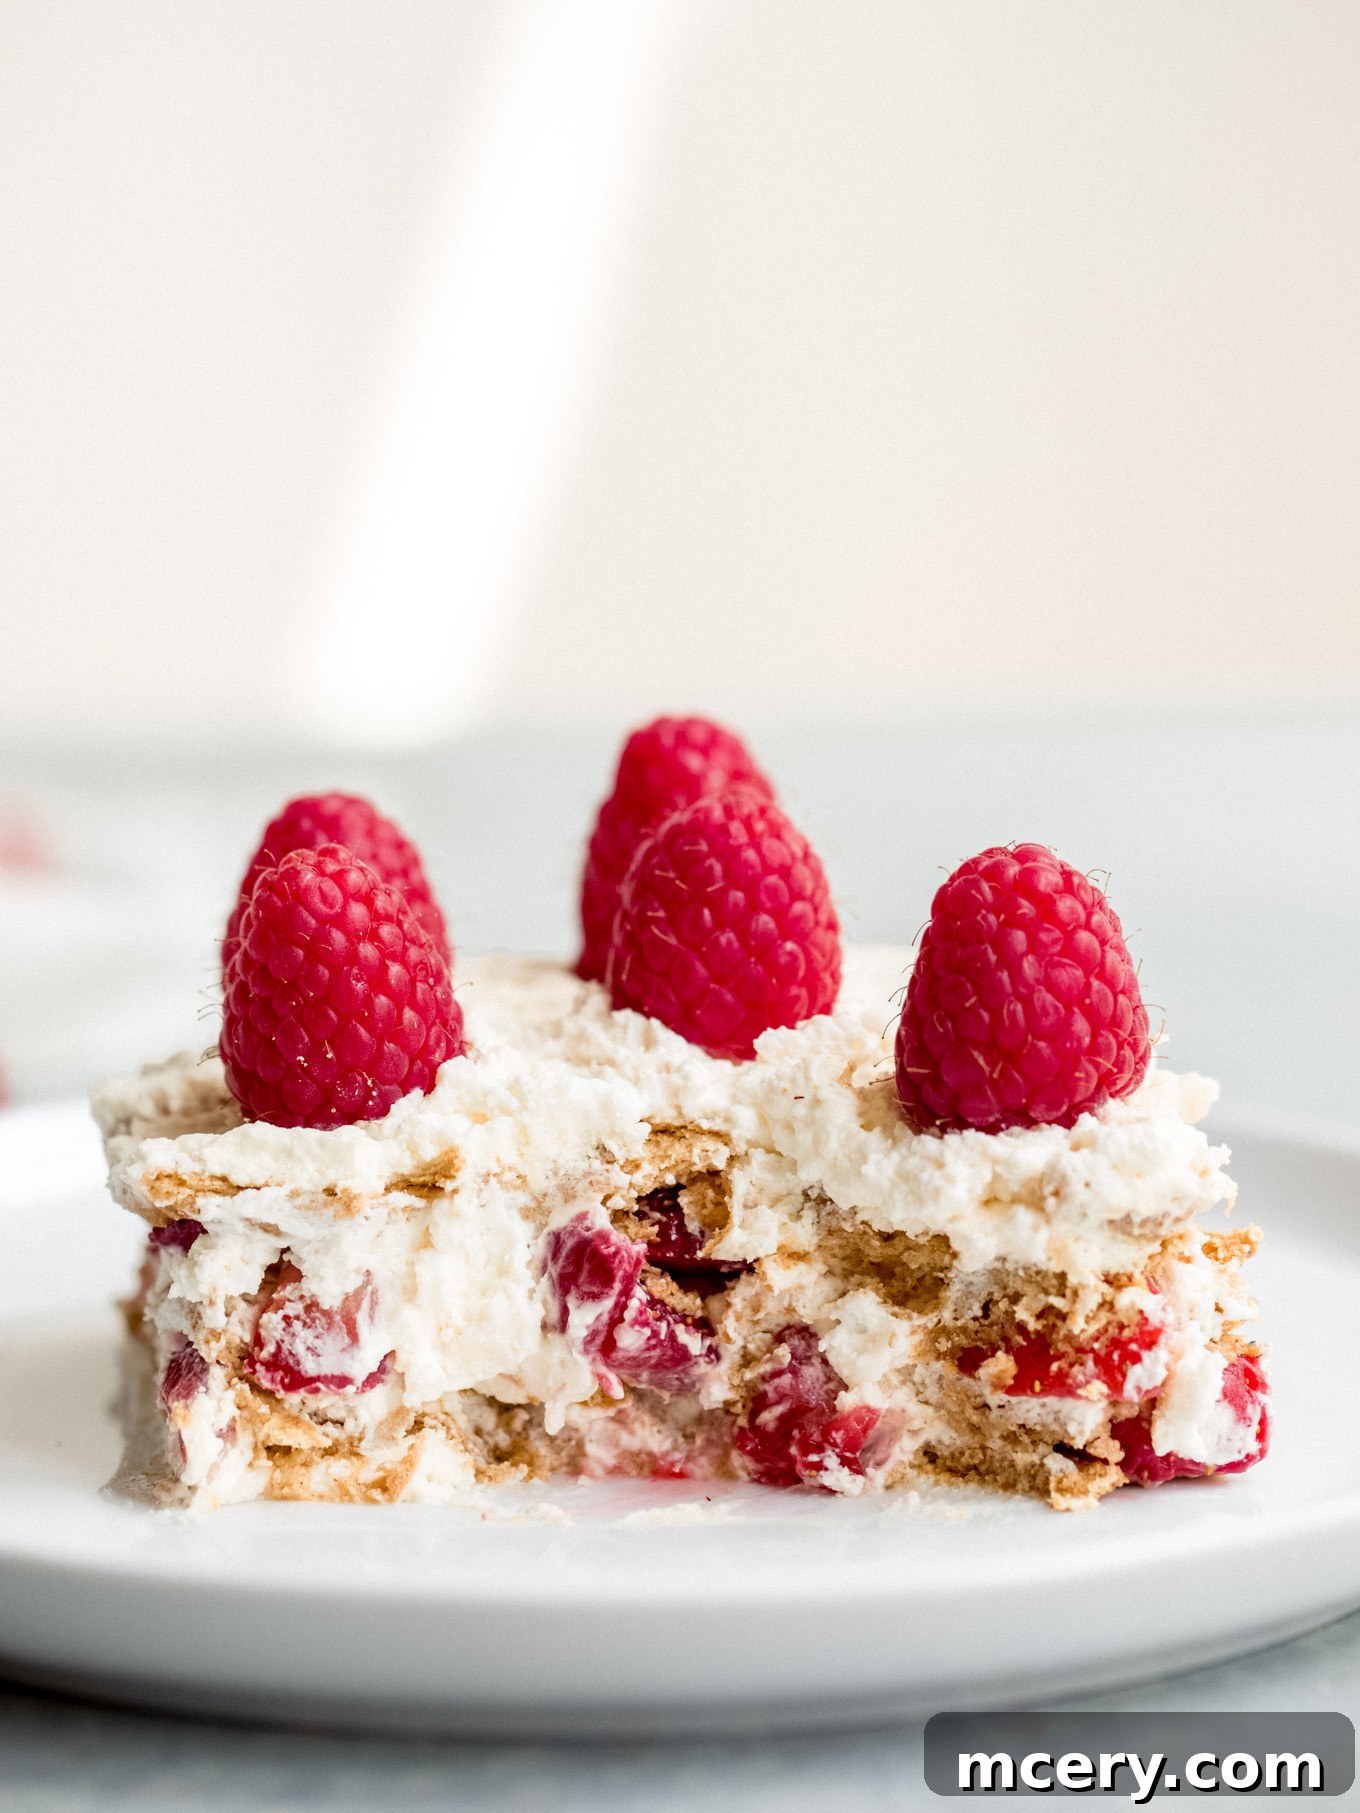
- Embrace the Chill: Patience is a Virtue: The overnight refrigeration period is not just a suggestion; it’s a critical step. This extended chill time allows the graham crackers to fully absorb the moisture from the cream, transforming them into that dreamy, soft, cake-like consistency. Rushing this step will result in crunchy crackers and a less cohesive cake. Plan ahead and give it ample time!
- Layer Consistency Matters: Pay attention to the thickness of your graham cracker layers. Aim for a single, even layer of crackers, breaking them as needed to fill any gaps. Similarly, spread the cream evenly to ensure each slice has a consistent cream-to-cracker ratio. This balance is crucial for achieving the perfect texture in every bite.
- Keep Your Cream Cold: For optimal whipping results, ensure your heavy cream is thoroughly chilled before you begin. Cold cream whips up faster, achieves greater volume, and forms more stable peaks. Warm cream will struggle to hold its form, leading to a runny filling and a less sturdy cake. You can even chill your mixing bowl and beaters for 10-15 minutes beforehand for an extra boost.
- Choosing the Right Dish: A clear glass baking dish (like a 9×13-inch pan) is ideal, not only for showcasing the beautiful layers of your cake but also for monitoring the softening process. The clear sides allow you to appreciate the visual artistry of your dessert.
- Gentle Folding Technique: When combining the whipped cream with the cream cheese mixture, use a gentle folding motion with a rubber spatula. This technique helps retain the air incorporated into the whipped cream, ensuring your filling remains light and fluffy rather than dense.
- Precision in Cutting: To get clean slices, especially after the cake has set, run a sharp knife under hot water, wipe it dry, and then make your cut. Repeat this process for each slice. This simple trick prevents the cream from sticking and allows for perfectly presented portions.
Frequently Asked Questions About Icebox Cake
Absolutely! Icebox Cakes are wonderfully versatile, making them perfect for experimentation with various fruits. While berries are classic, feel free to unleash your creativity. Sliced peaches, pitted cherries, or even a tropical medley of thinly sliced mango and pineapple can work beautifully, offering different flavor profiles and textures. Just ensure your chosen fruits are ripe but not overly juicy, as excess moisture can make the cake soggy.
Yes, definitely! In fact, making it ahead of time is not just recommended, it’s essential for achieving the perfect texture. The cake requires a minimum of 8 hours, but ideally, it should sit overnight in the refrigerator. This crucial chilling period allows the graham crackers sufficient time to absorb the rich cream and soften into that delectable, cake-like consistency. It’s the ultimate make-ahead dessert for stress-free entertaining!
When properly covered, your Icebox Cake will remain fresh and delicious in the refrigerator for about 2-3 days. Keep in mind that the crackers will continue to soften and the fruit may release more juice the longer it sits, potentially altering the texture. To prolong freshness and prevent drying out or absorbing fridge odors, ensure leftovers are tightly covered with plastic wrap or stored in an airtight container.
No, it is highly recommended to use fresh berries for this Icebox Cake recipe. Frozen berries, even after thawing, tend to release a significant amount of liquid. This excess moisture can make your cake watery and compromise the delicate balance of the creamy layers and softened graham crackers, leading to a soggy instead of a tender cake. Stick with fresh for the best results!
A 9×13-inch glass baking dish is ideal. The clear sides allow you to admire the beautiful layers, especially if you’re creating a patriotic design. Its size also offers a good surface area for assembling the layers and serving generous portions.
Absolutely! For charming individual servings, you can assemble the layers in small Mason jars, clear dessert cups, or even ramekins. This is a fantastic idea for parties as it makes serving incredibly easy and adds an elegant touch. Adjust the number of layers to fit your chosen vessels.
Serving and Garnish Suggestions
Once perfectly chilled and set, your American Flag Icebox Cake is ready to dazzle! To enhance its presentation and flavor, consider these serving and garnish tips:
- Clean Slices: For neat, beautiful slices, use a sharp knife. For even cleaner cuts, dip your knife in hot water and wipe it dry before each slice. This helps prevent the cream from sticking and dragging.
- Additional Berries: A sprinkle of extra fresh blueberries or raspberries around the base of the cake or on individual plates adds an extra burst of freshness and color.
- Mint Sprig: A small sprig of fresh mint placed artfully on top of each slice or on the corner of the cake adds a touch of gourmet elegance and a subtle, refreshing aroma.
- Light Dusting: For a snow-kissed effect, lightly dust the entire cake with a touch of confectioners’ sugar just before serving. This adds a beautiful finish and a hint of extra sweetness.
- Whipped Cream Dollop: While the cake is already creamy, a small dollop of freshly whipped cream on the side of each plate never hurts, especially if you have guests who love extra indulgence.
- Pairing Suggestions: This refreshing dessert pairs wonderfully with a tall glass of iced tea, homemade lemonade, or a light sparkling wine for adult gatherings. Its light nature makes it the perfect finish to a summer BBQ or picnic.
Explore More Delicious Recipes
If you loved this easy and delicious no-bake treat, you’ll surely enjoy these other fantastic recipes from our collection:
If you try our delightful no-bake Icebox Cake, we would absolutely love to hear from you! Please consider leaving a star rating and share your thoughts and experiences with the recipe in the comments section below. Your feedback helps us and other home cooks!
Print Recipe
Icebox Cake
- Author: Katya
- Prep Time: 30 min
- Cook Time: 0 min
- Total Time: 30 minutes
- Yield: 12 servings
- Category: Dessert
- Method: No-Bake
- Cuisine: American
Description
This 4th of July, captivate your guests with an irresistible, no-bake Icebox Cake! Featuring delectable layers of fresh berries and crisp graham crackers, all crowned with an impressive American flag design, it’s the quintessential patriotic dessert that’s both simple to prepare and wonderfully delicious.
Ingredients
- 16 oz. fresh strawberries, chopped
- 11 oz. fresh blueberries, divided (about 2 cups total)
- 8 oz. block full-fat cream cheese, softened
- ½ cup confectioners’ sugar
- 2 tsp. pure vanilla extract
- 3 cups cold heavy cream
- 1 (14.4 oz.) box graham crackers, with a few left over for decoration/minor breaks
- 12 oz. fresh raspberries, (about 3 cups total)
Instructions
- In a large bowl, combine the chopped strawberries and 1 ½ cups of blueberries. Set this berry mixture aside.
- In a separate large mixing bowl, beat the softened cream cheese with a hand mixer on high speed until completely smooth.
- Add the confectioners’ sugar to the cream cheese mixture. Beat on low speed until initially incorporated, then increase speed to medium-high and beat for about 1 minute until very smooth. Scrape down the bowl sides as needed. Add the vanilla extract and beat until well combined.
- In another separate, chilled large mixing bowl, add the cold heavy cream. Beat on high speed for 3-4 minutes, or until stiff peaks form. Be careful not to overbeat.
- Using a rubber spatula, gently fold the whipped cream into the cream cheese mixture until just combined, being careful not to deflate the mixture.
- To assemble the cake, spread a very small amount of the cream mixture on the bottom of a 9×13-inch glass baking dish to prevent the crackers from sliding. Arrange a single, even layer of graham crackers over the cream, breaking them as necessary to fit.
- Spread one-third of the prepared cream mixture evenly over the graham crackers. Then, distribute half of the reserved berry mixture over the cream.
- Add another layer of graham crackers over the berries, ensuring a complete, even coverage by breaking crackers if needed.
- Spread another third of the cream mixture over the graham crackers. Follow with the remaining berry mixture.
- Place a final layer of graham crackers, then spread the remaining cream mixture evenly over the top layer of crackers, making sure the surface is smooth.
- Decorate the top of the cake to create an American flag design: Use the remaining blueberries for the ‘stars’ in the top left corner, and arrange the raspberries (or additional strawberries) to form the ‘stripes’ across the rest of the cake’s surface.
- Cover the baking dish tightly with plastic wrap and refrigerate overnight (or for at least 8 hours) to allow the graham crackers to soften and the flavors to meld beautifully.
- Slice and serve cold for the best experience.
Notes
- Berry Substitutions: This cake is highly adaptable! Feel free to use any combination of fresh berries or soft summer fruits such as thinly-sliced bananas, kiwi, mango, blackberries, or peaches. Just ensure fruits aren’t overly ripe to prevent excess moisture.
- Storage: The cake is best enjoyed within 2-3 days of preparation. It will continue to soften the longer it remains in the fridge, especially if very juicy fruits are used. Always cover leftovers tightly with plastic wrap or store them in an airtight container to maintain freshness.
Nutrition Facts (per serving)
- Serving Size: 1 slice
- Calories: 367
- Sugar: 20.2 g
- Sodium: 288.8 mg
- Fat: 19.7 g
- Carbohydrates: 44.4 g
- Protein: 4.8 g
- Cholesterol: 53 mg