
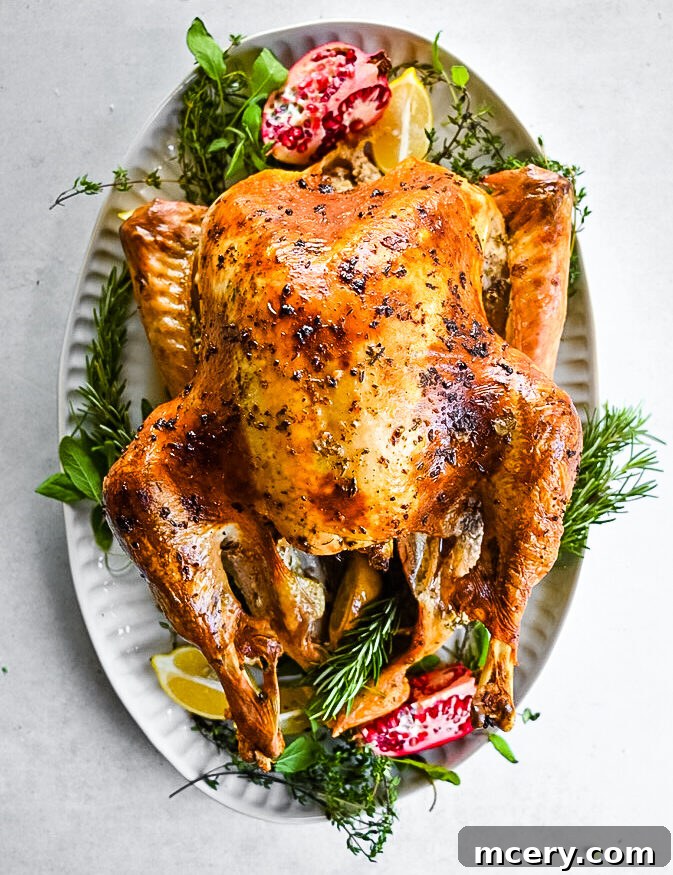
If the thought of roasting a whole turkey for Thanksgiving or any holiday gathering has ever filled you with dread, you are certainly not alone. For many years, I believed that achieving a perfectly tender, incredibly juicy turkey required an elaborate two-day brine, a secret blend of exotic seasonings, and a myriad of complex culinary tricks. The pressure to deliver a show-stopping centerpiece can be immense, often overshadowing the joy of the holiday itself.
However, after countless holiday seasons, extensive testing, and the delightful challenge of feeding my large family, I’ve finally uncovered the secret to the most effortless Thanksgiving turkey recipe imaginable. This method has become my annual tradition, a foolproof way to ensure a succulent and flavorful bird every single time, banishing all previous culinary anxieties.
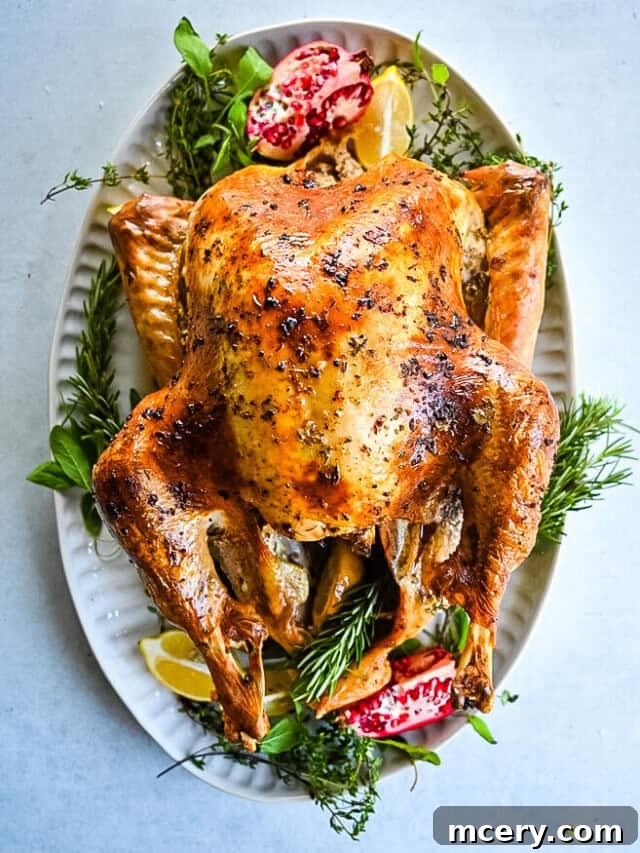
This remarkable No-Brine Thanksgiving Turkey promises to be:
- Unbelievably Juicy and Tender: Forget dry, bland turkey. This method guarantees a moist, succulent result from breast to thigh.
- Perfectly Seasoned: A harmonious blend of herbs and citrus infused deeply into the meat for an unforgettable flavor profile.
- Golden and Crispy Skinned: That coveted, irresistible crackling skin is easily achievable, making every bite a delight.
- Beginner-Friendly: Even if you’re roasting your very first turkey, this recipe sets you up for success.
- Totally Stress-Free: Simplifies the entire process, allowing you to enjoy your holiday without kitchen anxieties.
If you’re hosting Thanksgiving or Friendsgiving this year, or simply want to impress your family with a truly magnificent roast, this is the definitive turkey recipe you can rely on. It’s designed to bring maximum flavor and perfect texture with minimal fuss, transforming a daunting task into a delightful holiday memory.
Why This Easy No-Brine Turkey Will Be Your New Holiday Tradition
This turkey recipe isn’t just easy; it’s ingeniously crafted for the realities of busy holiday cooking. It liberates you from cumbersome brining buckets and intimidating, complex techniques. There’s no need for expensive, specialized equipment that clutters your kitchen. Instead, it focuses on simple, classic flavors that roast beautifully, ensuring the turkey remains tender and delicious from the first generous slice to the last flavorful leftover.
Here’s what truly sets this stress-free recipe apart, making it a beloved staple for any festive meal:
No Brining Required: Unlocking Natural Moisture
Say goodbye to the messy, time-consuming process of brining. This recipe skillfully bypasses the need for an overnight salt bath by leveraging the power of a rich herb butter and strategic roasting. The butter, applied both under and over the skin, acts as a barrier, locking in natural juices while infusing the meat with incredible flavor. This means less prep work, no colossal cooler or bucket taking up valuable fridge space, and more time to focus on other aspects of your holiday feast or simply relax.
Achieve Crispy Skin and Incredibly Juicy Meat with Ease
The ultimate goal of any roasted turkey is that perfect contrast: irresistibly crispy, golden-brown skin protecting tender, succulent meat. This recipe employs a simple yet highly effective two-stage oven method to achieve precisely that. Starting at a higher temperature ensures rapid browning and renders the fat under the skin for maximum crispness, while finishing at a lower temperature allows the turkey to cook through gently and evenly, preventing the meat from drying out. The result is a visually stunning turkey with a delightful texture in every bite.
Flavor-Packed Herb Butter: The Heart of This Recipe
The secret to this turkey’s exceptional flavor lies in its aromatic herb butter. A fragrant mixture of softened butter, fresh garlic, zesty lemon, bright orange zest, and a generous medley of fresh herbs like thyme and rosemary is prepared. This luscious butter isn’t just spread on the surface; a significant portion is carefully worked underneath the turkey’s skin. As the turkey roasts, this herb-infused butter slowly melts, basting the meat from the inside out, delivering unparalleled moisture and permeating every fiber with classic Thanksgiving flavors. It’s a game-changer for taste and tenderness.
Perfect for Beginners: A Truly Foolproof Method
Whether this is your very first time roasting a turkey or you’re a seasoned cook looking for a simpler approach, this recipe is designed for success. The steps are clearly outlined, easy to follow, and focus on foundational techniques rather than complicated maneuvers. With a reliable meat thermometer and these straightforward instructions, even a first-time turkey cook can confidently deliver a show-stopping, perfectly roasted bird that tastes like it came from a professional kitchen.
Essential Ingredients for Your Best Thanksgiving Turkey
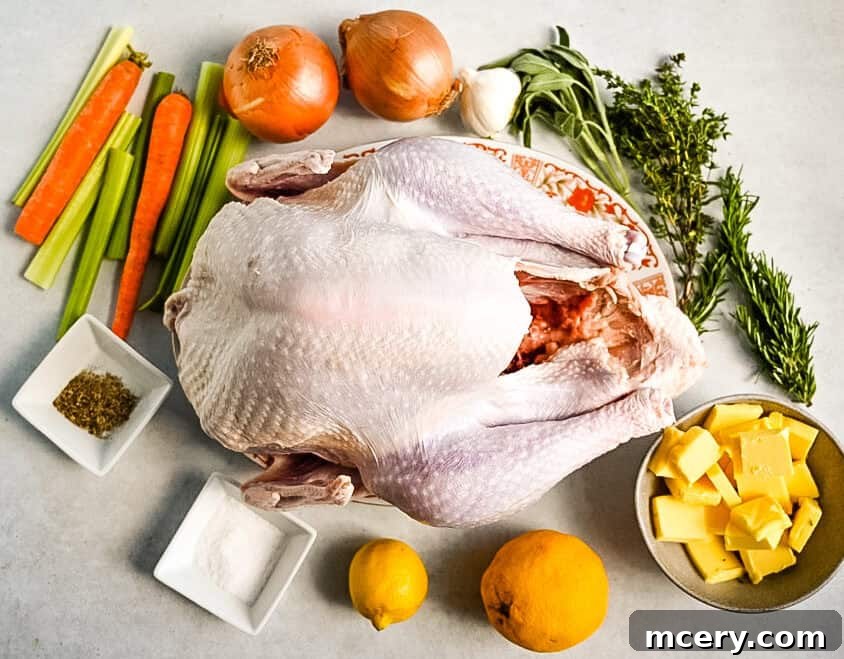
Crafting the perfect holiday turkey begins with selecting quality ingredients that work in harmony to deliver incredible flavor and texture. Here’s a detailed list of what you’ll need to create this succulent, no-brine masterpiece, divided into components for clarity.
For the Roast Turkey
- 1 (11-15 lb) Whole Turkey: A 13-pound turkey is ideal for this recipe, but any bird within the 11-15 lb range will work perfectly. Adjust cooking time accordingly (approximately 13-15 minutes per pound).
- Salt & Freshly Ground Black Pepper: Essential for seasoning the turkey’s cavity, enhancing the overall flavor.
- 1 Large Onion: Halved (no need to peel, as it adds depth to the cavity and pan aromatics).
- 1 Lemon: Quartered, contributing bright, citrusy notes to the turkey’s interior.
- 2 Celery Ribs: For aromatic stuffing inside the bird.
- 3 Sprigs Fresh Thyme: A classic herb that infuses the turkey with earthy, fragrant notes.
- 3 Sprigs Fresh Rosemary: Woody and aromatic, perfect for holiday poultry.
- 3 Sprigs Fresh Sage: Its distinct, savory aroma is synonymous with Thanksgiving.
For the Herbed Garlic Butter
This aromatic butter is the heart of our no-brine method, ensuring maximum flavor and moisture.
- 8 ounces Unsalted Butter: Softened to room temperature for easy mixing and spreading.
- 6-7 Cloves Garlic: Finely minced, providing a pungent, savory base.
- 1 Heaping Teaspoon Fine Sea Salt: Balances and enhances all the flavors.
- ½ Teaspoon Freshly Ground Black Pepper: Adds a subtle spice and depth.
- Juice of ½ Lemon: Brightens the butter and helps tenderize the meat.
- ½ Teaspoon Orange Zest: Offers a subtle, sweet citrus aroma that complements the herbs.
- 1 Tablespoon Fresh Thyme: Finely chopped, for an intense herbal infusion.
- 1 Tablespoon Fresh Rosemary: Finely chopped, adding a robust, piney fragrance.
- 2 Tablespoons Olive Oil: Helps create a smooth butter mixture and promotes crispy skin.
For Roasting Pan Aromatics
These vegetables create a flavorful bed for the turkey, prevent burning, and contribute to delicious pan drippings for gravy.
- 1 Large Onion: Quartered.
- 3 Celery Ribs: Cut into large chunks.
- 1 Large Carrot: Halved or cut into large pieces.
Mastering the Art: How to Make the BEST Thanksgiving Turkey
Follow these detailed steps to create a show-stopping, incredibly juicy, and perfectly golden Thanksgiving turkey that will impress everyone at your holiday table.
- Thaw Completely: If using a frozen turkey, ensure it is fully thawed. This is crucial for even cooking. Plan on approximately 24 hours of refrigeration for every 4-5 pounds of turkey. A partially frozen turkey will cook unevenly and can lead to a dry bird.
- Bring to Room Temperature: One hour before you plan to roast, remove the thawed turkey from the refrigerator. Letting it rest at room temperature helps the turkey cook more evenly and reduces overall roasting time.
- Preheat Oven and Rack Placement: While the turkey rests, preheat your oven to a high temperature of 420°F (215°C). Position the oven rack in the center to allow for optimal air circulation and even browning.
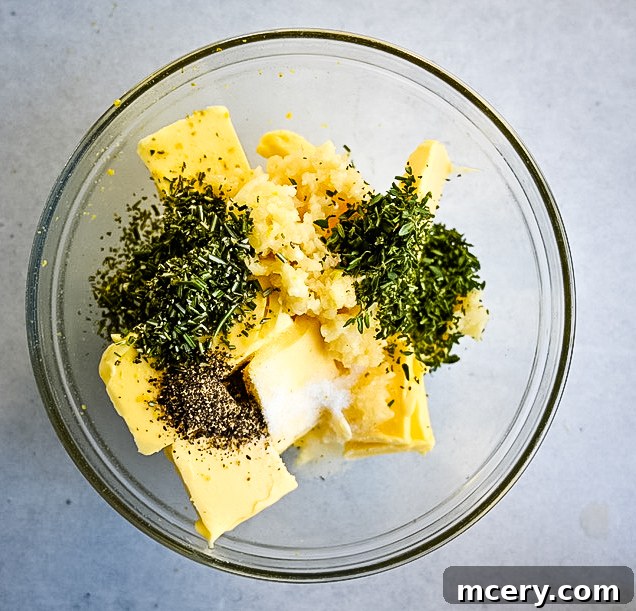
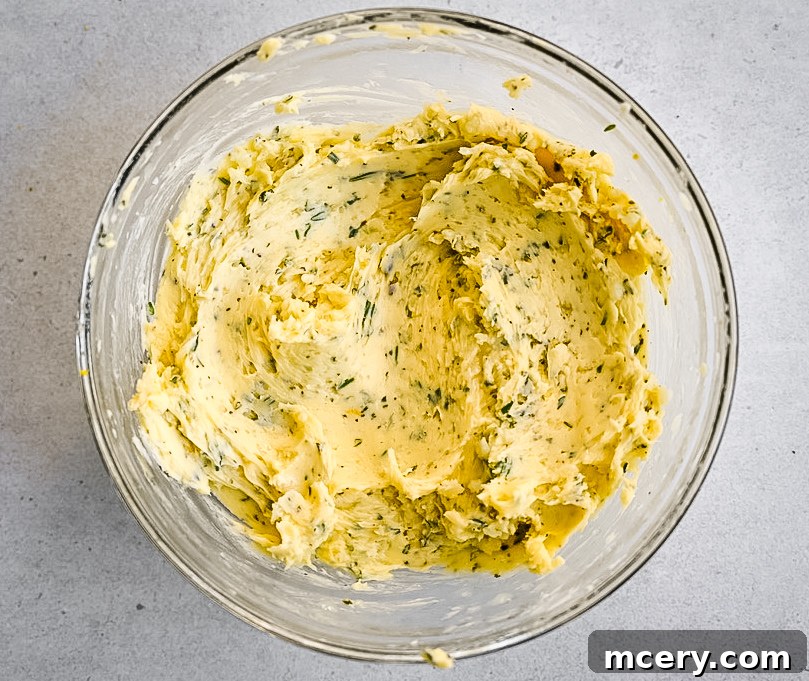
- Prepare the Herbed Garlic Butter: In a medium bowl, combine the softened unsalted butter, minced garlic, fresh lemon juice, delicate orange zest, a generous pinch of salt and pepper, finely chopped fresh thyme, and fresh rosemary, along with the olive oil. Mix thoroughly until all ingredients are well incorporated and the butter is smooth and fragrant.
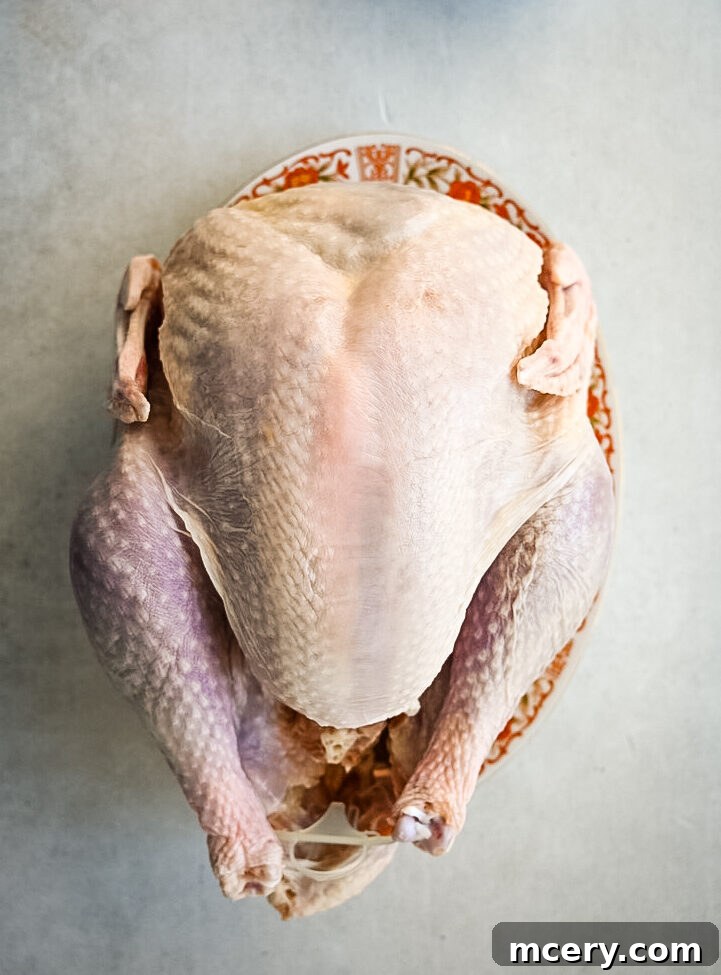
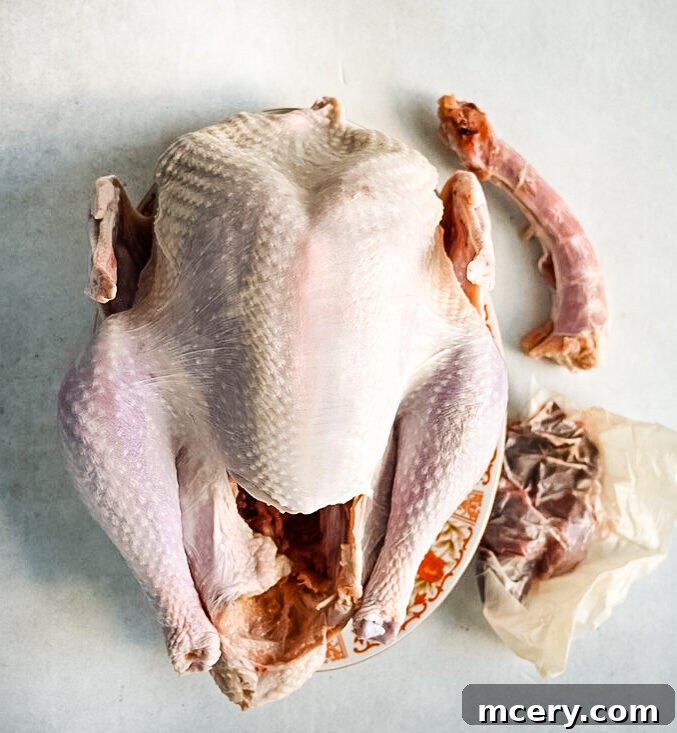
- Prep the Turkey: Carefully remove the turkey from its packaging. Locate and discard (or save for gravy) the giblets and neck from the cavity. Using paper towels, thoroughly pat the entire turkey dry, inside and out. This step is vital for achieving that desirable crispy skin.
- Season the Cavity: Generously season the interior cavity of the turkey with salt and freshly ground black pepper. This adds flavor to the deeper parts of the bird.
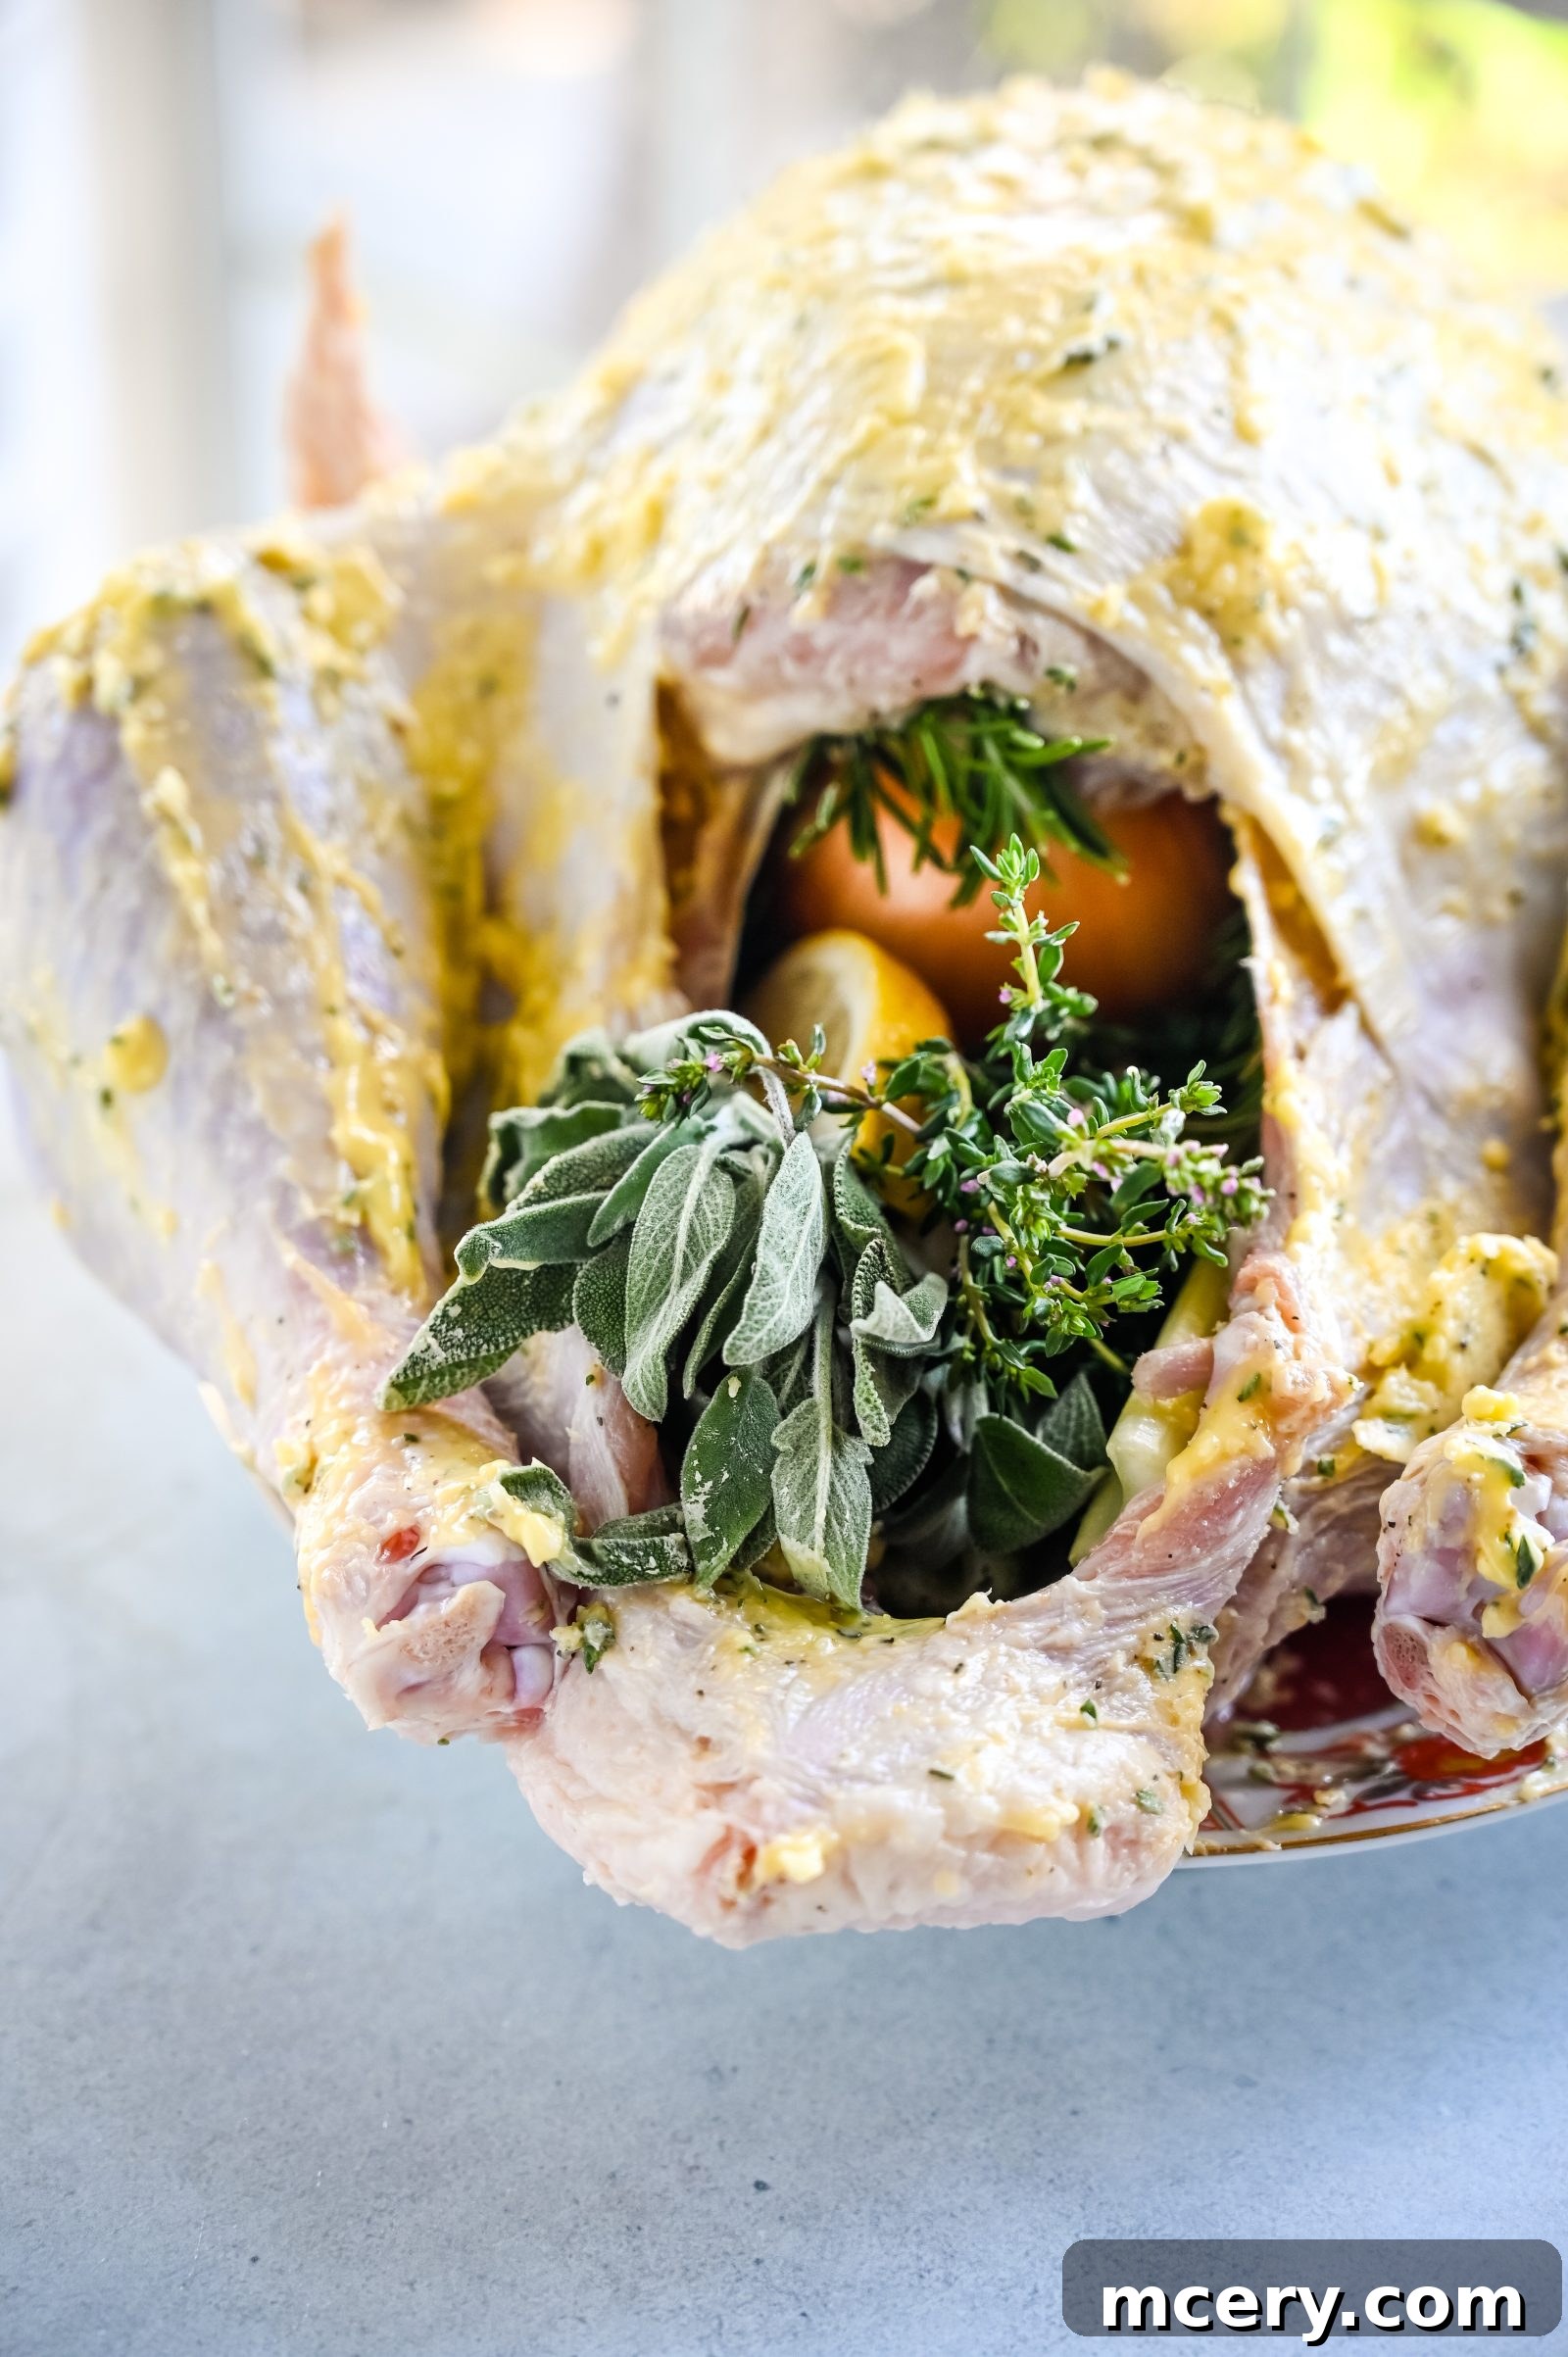
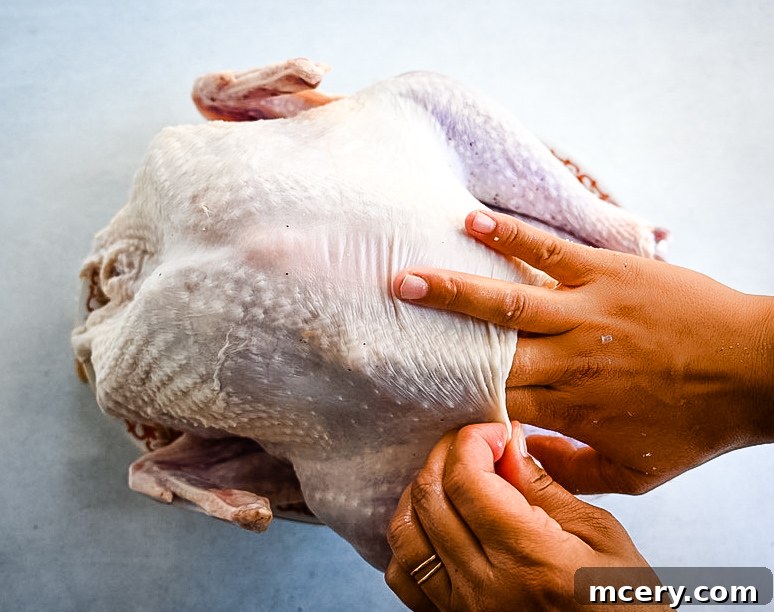
- Loosen the Skin: Gently slide your hand between the skin and the breast meat, and around the thighs, being careful not to tear the skin. The goal is to create a pocket for the herb butter, allowing it to directly infuse the meat.
- Apply Herbed Butter Under the Skin: Take half of your prepared herbed butter mixture and spread it evenly underneath the loosened skin over the breast and thigh meat. Gently massage the skin from the outside to ensure the butter is distributed thoroughly.
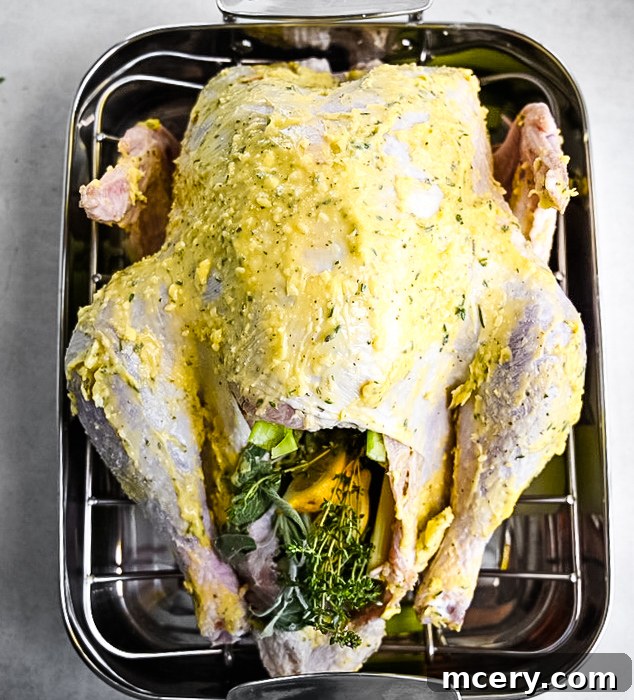
- Stuff with Aromatics: Tuck the halved onion, quartered lemon, celery ribs, and fresh sprigs of thyme, rosemary, and sage into the turkey’s cavity. These aromatics will steam from within, adding incredible flavor and moisture to the turkey as it roasts.
- Melt Remaining Butter: Melt the remaining half of the herb butter mixture in the microwave for about 30 seconds, or until it’s a brushable liquid.
- Secure Wing Tips (Optional): For best results and to prevent the delicate wing tips from burning, tuck them underneath the turkey’s body. This creates a more compact shape and protects them from direct heat.
- Brush Exterior: Use a basting brush to liberally coat the entire exterior of the turkey with the melted herbed butter. This ensures a beautifully golden, crispy crust.
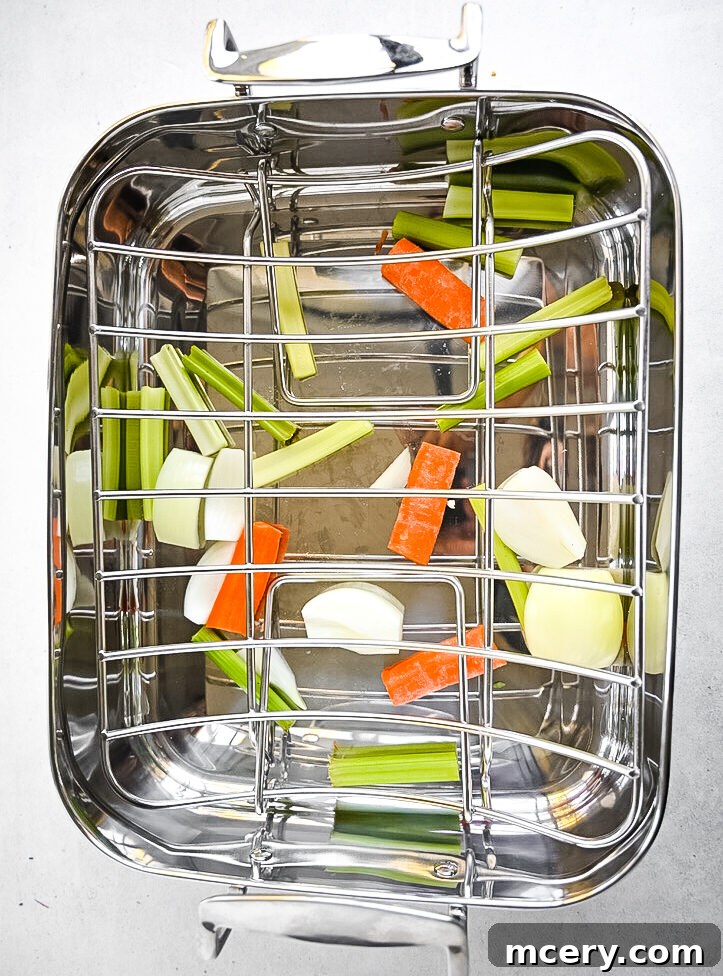
- Set Up Roasting Pan: Place the quartered onion, celery, and carrot directly into the bottom of your roasting pan. These vegetables elevate the turkey, create a flavorful steam bath, and form the foundation for your gravy. Set a roasting rack over the vegetables and place the prepared turkey breast-side up on the rack. Lightly season the outside of the turkey with a final sprinkle of salt and pepper.
- Initial High-Heat Roast: Transfer the roasting pan to the preheated 420°F (215°C) oven. Roast the turkey for 25–30 minutes. This initial high heat is key for browning the skin and rendering fat, starting the process for a crispy exterior.
- Baste and Tent: After the initial browning, carefully remove the turkey from the oven. Using a basting bulb or spoon, thoroughly baste the turkey with the flavorful pan drippings. Create a loose tent over the breast area with a triangle of aluminum foil (shiny side down) to prevent it from over-browning while the rest of the turkey cooks.
- Lower Heat and Continue Roasting: Reduce the oven temperature to 350°F (175°C). Return the turkey to the oven and continue roasting for an additional 2–2½ hours. Remember to baste the turkey occasionally (every 45-60 minutes) with the pan juices to maintain moisture and develop flavor. A general guideline is 13–15 minutes per pound, but always rely on temperature.
- Check Internal Temperature: The turkey is done when an instant-read meat thermometer inserted into the thickest part of the breast or thigh (avoiding bone) registers 160°F (71°C). Do not overcook!
- Crucial Resting Period: Once the turkey reaches 160°F, remove it from the oven and immediately transfer it to a large carving board or platter. Tent it loosely with foil. Allow the turkey to rest for at least 40 minutes before carving. This critical resting period allows the juices to redistribute throughout the meat, ensuring every slice is incredibly moist and tender. The internal temperature will also continue to rise to the safe 165°F (74°C) during this time.
Ingredients for Simple Turkey Gravy
- 2 cups Turkey Drippings: Collect these flavorful juices from the bottom of your roasting pan.
- 2 cups Chicken Broth: Low sodium is preferred to control seasoning.
- 2 tablespoons Chicken Bouillon: Such as Better Than Bouillon Roasted Chicken Base, for concentrated flavor.
- ½ cup All-Purpose Flour: Acts as a thickening agent for a smooth gravy.
Optional: Simple, Rich Turkey Gravy
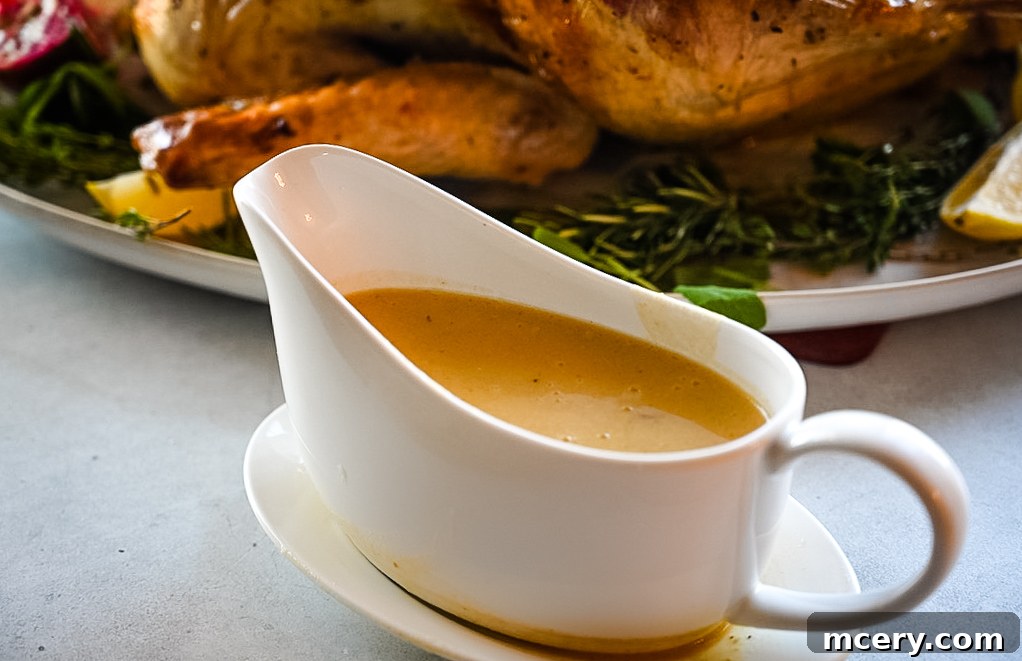
No Thanksgiving turkey is complete without a rich, savory gravy made from the pan drippings. This simple recipe ensures you don’t waste a drop of that precious flavor. First, once your turkey is out of the oven and resting, carefully pour the liquid and aromatics from the roasting pan into a large heatproof measuring cup. Allow it to sit for a few minutes, then skim off most of the fat that rises to the top, reserving the flavorful drippings.
Next, in a saucepan, combine your turkey drippings with chicken broth and the chicken bouillon. Bring this mixture to a gentle simmer over medium-low heat. In a separate small bowl, whisk the flour with a small amount of cold water or broth until a smooth slurry forms, then gradually whisk this into your simmering drippings. Continue whisking constantly until the gravy thickens to your desired consistency. Taste and adjust seasoning with salt and pepper as needed. Serve hot in a gravy boat alongside your magnificent turkey.
Complement Your Feast: What to Serve With Your Perfect Turkey
A beautifully roasted turkey deserves an array of delicious side dishes to complete the ultimate holiday spread. Here are some classic and beloved pairings that will make your Thanksgiving dinner truly unforgettable:
- Creamy Mashed Potatoes: A timeless favorite, perfect for soaking up rich gravy.
- Decadent Candied Sweet Potatoes: A sweet and comforting side that adds a touch of richness.
- Honey Baked Brie with Fig Preserves: An elegant appetizer to kick off your meal.
- Savory Stuffing (Family Famous Recipe): The quintessential turkey companion, bursting with herbs and flavor.
- Homemade Tangy Cranberry Sauce: A vibrant, tart counterpoint to the rich turkey.
- Fresh Marinated Green Beans: A crisp, refreshing vegetable dish to balance the meal.
Insider Tips for a Flawless Thanksgiving Turkey
Achieving a picture-perfect and delicious turkey doesn’t have to be a mystery. These expert tips will help ensure your no-brine turkey turns out perfectly every time:
Ensure Complete Thawing: This is a non-negotiable step for even cooking and food safety. Allow approximately 24 hours of refrigeration for every 4-5 pounds of turkey. Never thaw at room temperature. For example, a 15-pound turkey will need at least 3-4 days to thaw fully in the refrigerator. Patience here prevents a disaster.
Thoroughly Dry the Skin: After thawing and removing giblets, pat the turkey’s entire surface, inside and out, exceptionally dry with paper towels. Any residual moisture on the skin will steam rather than crisp, preventing that desirable golden, crackling finish. This small effort makes a huge difference.
Invest in a Reliable Meat Thermometer: Guessing the turkey’s doneness is a recipe for either a raw or overcooked bird. An instant-read meat thermometer is your best friend. Insert it into the thickest part of the breast and thigh, ensuring it doesn’t touch any bone. The target internal temperature is 165°F (74°C) after resting.
Allow Ample Resting Time Before Carving: Once removed from the oven, resist the urge to carve immediately. Transfer the turkey to a large platter, tent it loosely with foil, and let it rest for at least 30-40 minutes. This crucial period allows the internal temperature to equalize and, more importantly, permits the juices to redistribute throughout the meat, ensuring every slice is wonderfully moist and tender. Carving too soon will result in a dry turkey as all the juices will run out onto your cutting board.
Storing + Reheating Your Holiday Turkey
Make the most of your delicious turkey and its leftovers with these storage and reheating guidelines.
Refrigerator: Promptly store any leftover turkey in airtight containers in the refrigerator within two hours of cooking. It will stay fresh and delicious for 3–4 days.
Freeze: For longer storage, slice or shred the cooked turkey and place it in freezer-safe bags or containers. Remove as much air as possible to prevent freezer burn. It can be kept frozen for up to 3 months.
Reheat: To reheat, gently warm sliced turkey in the oven or microwave. Add a splash of chicken broth or turkey stock to the container before reheating. This simple trick prevents the meat from drying out and helps it retain its juicy tenderness.
Frequently Asked Questions About the No-Brine Thanksgiving Turkey
Keeping a turkey moist without brining is achieved through a combination of techniques. A generous herb butter rub, applied both under and over the skin, provides a protective layer and continuously bastes the meat from the inside. Additionally, filling the roasting pan with aromatics like onions, celery, and carrots creates a moist environment as they release steam, contributing to overall tenderness. Basting with pan drippings during roasting also helps.
You should start the turkey uncovered at a higher temperature to achieve that beautiful golden-brown and crispy skin. After the initial browning phase, it’s recommended to loosely tent the breast with aluminum foil. This prevents the breast meat from drying out and the skin from becoming too dark while the rest of the turkey finishes cooking.
The turkey is fully cooked and safe to eat when an instant-read thermometer inserted into the thickest part of the breast or thigh (without touching the bone) registers 165°F (74°C). For the juiciest results, many chefs recommend removing the turkey from the oven when it reaches 160°F (71°C), as its temperature will continue to rise to 165°F during the resting period.
Yes, seasoning the turkey the day before can actually enhance its flavor significantly. You can apply the herb butter rub and stuff the cavity with aromatics up to 24 hours in advance. Store the prepped turkey, covered, in the refrigerator. This allows the flavors to truly penetrate the meat, resulting in a more delicious bird.
Resting the turkey after roasting is a crucial step for a juicy bird. Allow the turkey to rest for at least 30-40 minutes, loosely tented with foil. This period allows the muscle fibers to relax and the juices to redistribute throughout the meat, ensuring that when you carve, the moisture stays in the slices rather than running out onto your cutting board.
A good rule of thumb is to plan for 1 to 1.5 pounds of turkey per person. If you love leftovers (and who doesn’t?), aim for the higher end of that range. For example, a 12-15 pound turkey is generally suitable for 8-10 people, providing some delicious leftovers.
A roasting rack is highly recommended as it elevates the turkey, allowing hot air to circulate evenly around the entire bird and preventing the bottom from becoming soggy. If you don’t have a rack, you can create a makeshift one by layering thick-cut vegetables (like carrots, celery, and onions) at the bottom of your roasting pan.
Basting helps keep the skin golden and the meat moist, especially when using a no-brine method. Baste your turkey every 45-60 minutes during the lower-temperature roasting phase. Be mindful not to open the oven door too frequently, as this can cause temperature fluctuations that prolong cooking time.
Final Thoughts: Your Easiest, Most Delicious Thanksgiving Yet
This Easy No-Brine Turkey truly offers the most straightforward and stress-free path to a perfectly juicy, beautifully golden, and exceptionally flavorful bird for your Thanksgiving table. It strips away the complexities often associated with holiday cooking, proving that you don’t need elaborate brines or secret techniques to achieve spectacular results.
This recipe has been a treasured part of my family’s holiday menu for many years, consistently delivering a succulent centerpiece that everyone raves about. I sincerely hope that this simple yet impactful method becomes a cherished tradition for your family too, bringing joy and deliciousness to your festive gatherings.
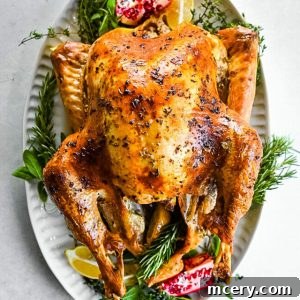
Get the Recipe: Easy No-Brine Roast Turkey
Leave a Review
Pin Recipe
Ingredients
Roast Turkey
- 13 lb turkey, anything 11–15 lbs works; cook time varies
- Salt & pepper, to season the cavity
- 1 onion, halved (no peeling needed)
- 1 lemon, quartered
- 2 celery ribs
- 3 thyme sprigs
- 3 rosemary sprigs
- 3 sage sprigs
Herbed Garlic Butter
- 8 oz unsalted butter, softened
- 6 –7 garlic cloves, minced
- 1 heaping teaspoon salt
- ½ teaspoon black pepper
- Juice of ½ lemon
- ½ teaspoon orange zest
- 1 tablespoon fresh thyme, chopped
- 1 tablespoon fresh rosemary, chopped
- 2 tablespoons olive oil
Roasting Pan Aromatics
- 1 onion, quartered
- 3 celery ribs
- 1 carrot, halved
Gravy
- 2 cups turkey drippings
- 2 cups chicken broth
- 2 tablespoons chicken bouillon (I use Better Than Bouillon Roasted Chicken Base)
- ½ cup flour
Equipment
-
Roasting pan
-
Roasting rack
-
meat thermometer
-
Basting Brush
-
Aluminum Foil
-
Large carving board
-
Chef’s knife
-
Kitchen twine
Instructions
-
If using a frozen turkey, allow it to fully thaw. Plan on 24 hours of thawing for every 5 pounds.
-
Remove the thawed turkey from the refrigerator 1 hour before roasting to bring it to room temperature.
-
Adjust the oven rack to the center position and preheat the oven to 420°F.
-
Make the herbed garlic butter: combine softened butter, garlic, lemon juice, orange zest, salt, pepper, thyme, rosemary, and olive oil.
-
Remove the turkey from the packaging. Take out the neck and giblets (reserve for gravy if desired). Pat the turkey dry with paper towels.
-
Season the cavity generously with salt and pepper.
-
Loosen the skin of the breasts and legs by carefully sliding your hands underneath, keeping the skin intact.
-
Spread half of the herbed butter mixture underneath the loosened skin. Massage from the outside so it spreads evenly.
-
Stuff the cavity with the onion halves, lemon quarters, celery ribs, thyme, rosemary, and sage.
-
Melt the remaining butter mixture in the microwave for 30 seconds.
-
Tuck the wing tips underneath the turkey (optional but helpful).
-
Brush the melted butter mixture all over the outside of the turkey.
-
Place the quartered onion, celery, and carrot in the bottom of a roasting pan. Set a rack on top and place the turkey breast-side up. Season lightly with salt and pepper.
-
Roast at 420°F for 25–30 minutes to brown the skin.
-
Remove from the oven, baste with pan juices, and tent the breast with a foil triangle (oil side down).
-
Reduce oven temperature to 350°F. Roast for 2–2½ hours, basting occasionally. Estimate 13–15 minutes per pound.
-
When the turkey reaches 160°F in the thickest part of the breast or thigh, remove it from the oven. The temperature will rise to 165°F during resting.
-
Transfer the turkey to a platter, tent loosely with foil, and rest for 40 minutes before carving.
Gravy
-
Combine turkey drippings, chicken broth, flour, and bouillon in a saucepan.
-
Whisk over medium-low heat until smooth and thickened.
-
Transfer to a gravy boat. It will thicken slightly as it cools.
Notes
- Turkey can be prepped (stuffed with aromatics and buttered under the skin) up to 3 days in advance. Keep covered in the refrigerator.
- Always check the turkey’s temperature 30 minutes before the estimated cook time, then every 15 minutes until it reaches 160°F.
- The turkey will rise to 165°F while resting.
- For convection ovens: follow the same instructions but begin checking temperature earlier — they cook faster.
- Turkey size affects roasting time. Use the 13–15 minutes per pound rule as a guide.