
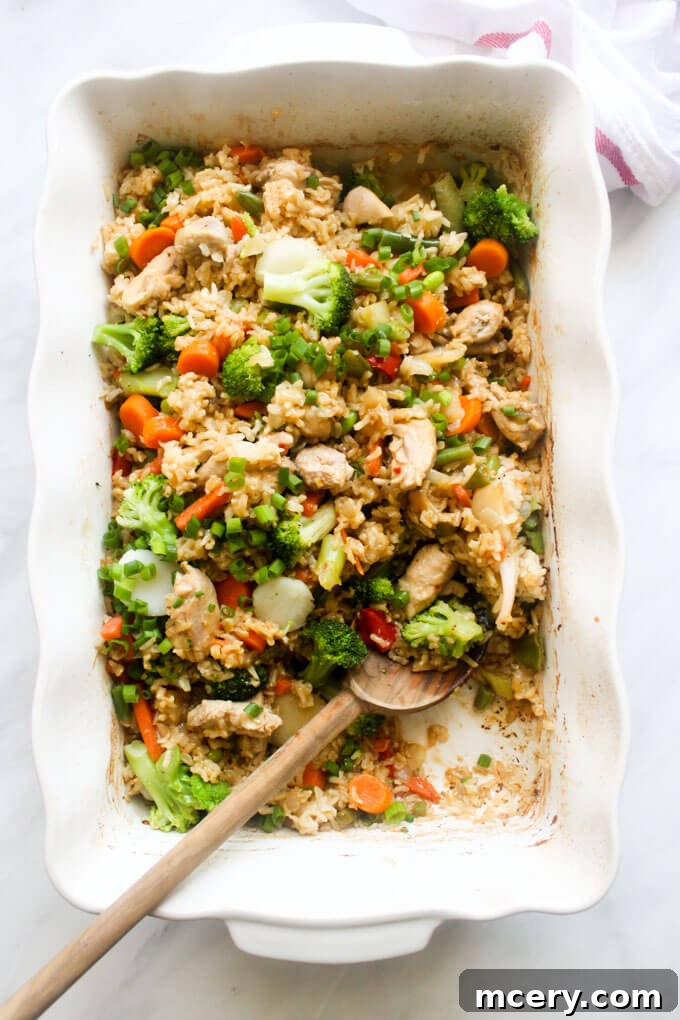
Baked teriyaki chicken and rice, featuring a delicious healthy homemade teriyaki sauce, is the ultimate easy, wholesome, and incredibly satisfying family meal. Prepare to make this one-pan wonder a regular in your dinner rotation!
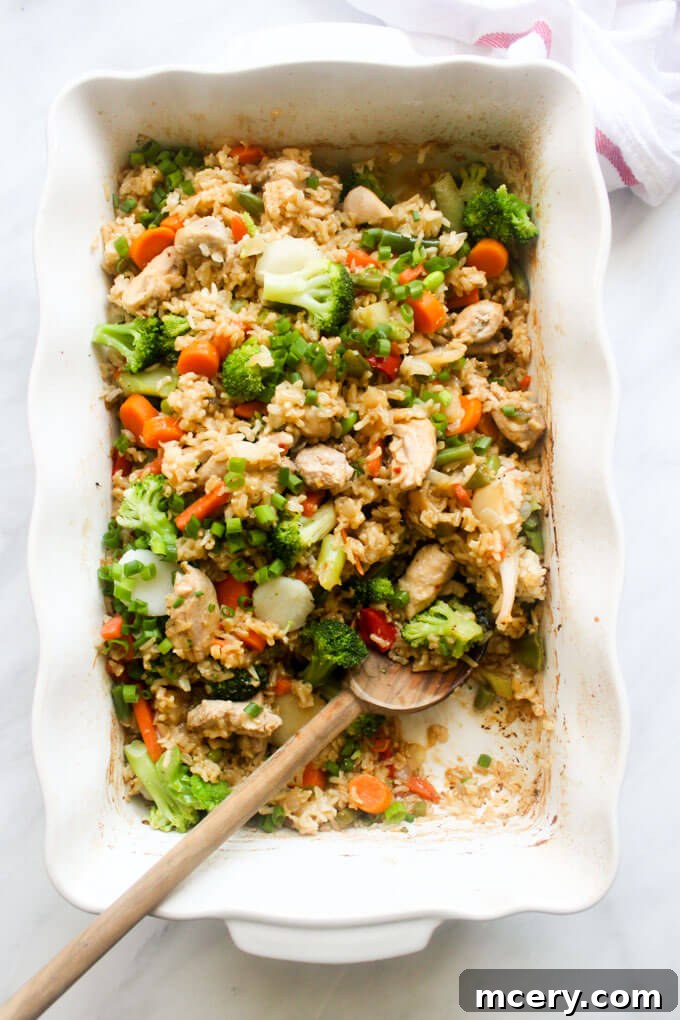
Baked Teriyaki Chicken and Rice: Your New Favorite One-Pan Meal
In the quest for delicious, healthy, and easy weeknight dinners, this Baked Teriyaki Chicken and Rice recipe stands out as a true winner. Imagine tender, juicy chicken thighs, perfectly cooked brown rice, and a medley of colorful Asian vegetables, all brought together by a vibrant, homemade healthy teriyaki sauce. The best part? It’s all made in one pan, making both cooking and clean-up an absolute breeze!
This recipe is designed for busy families who refuse to compromise on flavor or nutrition. By using simple, good-for-you ingredients and a straightforward baking method, you can achieve a restaurant-quality meal right in your own kitchen. Forget complicated steps or a mountain of dishes; this teriyaki chicken casserole delivers maximum taste with minimal effort, proving that healthy eating can be both convenient and incredibly satisfying.
Why This Baked Teriyaki Chicken Recipe is a Weeknight Essential
There are countless reasons to add this fantastic recipe to your regular meal plan. Its blend of simplicity, flavor, and nutritional benefits makes it an ideal choice for any busy household:
- Effortless Preparation: This dish truly lives up to its “easy” promise. With most of the work done in the oven, you’re free to relax, help with homework, or tackle other tasks while dinner bakes to perfection.
- Wholesome & Balanced: Packed with lean protein from chicken, fiber from brown rice, and essential vitamins from a generous serving of vegetables, it’s a complete meal that nourishes your body and keeps you feeling full.
- Healthier Homemade Sauce: Our recipe features a teriyaki sauce made from scratch, allowing you to control sugar and sodium levels. This provides a much healthier alternative to many store-bought versions that can contain hidden additives and excessive amounts of less desirable ingredients.
- One-Pan Wonder: The convenience of a single casserole dish means significantly fewer dishes to wash at the end of the meal, making it ideal for busy evenings when time is precious.
- Family-Friendly Flavors: The irresistible balance of sweet and savory notes in teriyaki is universally loved, making this a guaranteed hit with kids and adults alike. It’s a great way to introduce younger palates to global flavors.
- Highly Versatile: Easily adapt the vegetables or protein to suit your family’s preferences, dietary needs, or simply what you have on hand in your pantry or freezer.
For a complete and delightful meal, consider serving this easy chicken teriyaki casserole alongside fresh, crisp salads. A light Greek Cucumber Salad provides a refreshing counterpoint, while a classic House Salad is always a welcome addition. For something a little more substantial, a hearty Chopped Wedge Salad with Buttermilk Dressing can complete your feast.
Key Ingredients for Your Healthy Teriyaki Dish
Crafting a truly memorable baked teriyaki chicken and rice begins with understanding the role of each ingredient. We’ll break down both the components for our savory chicken and rice base and the star of the show: our healthy homemade teriyaki sauce, ensuring you have everything you need for success.
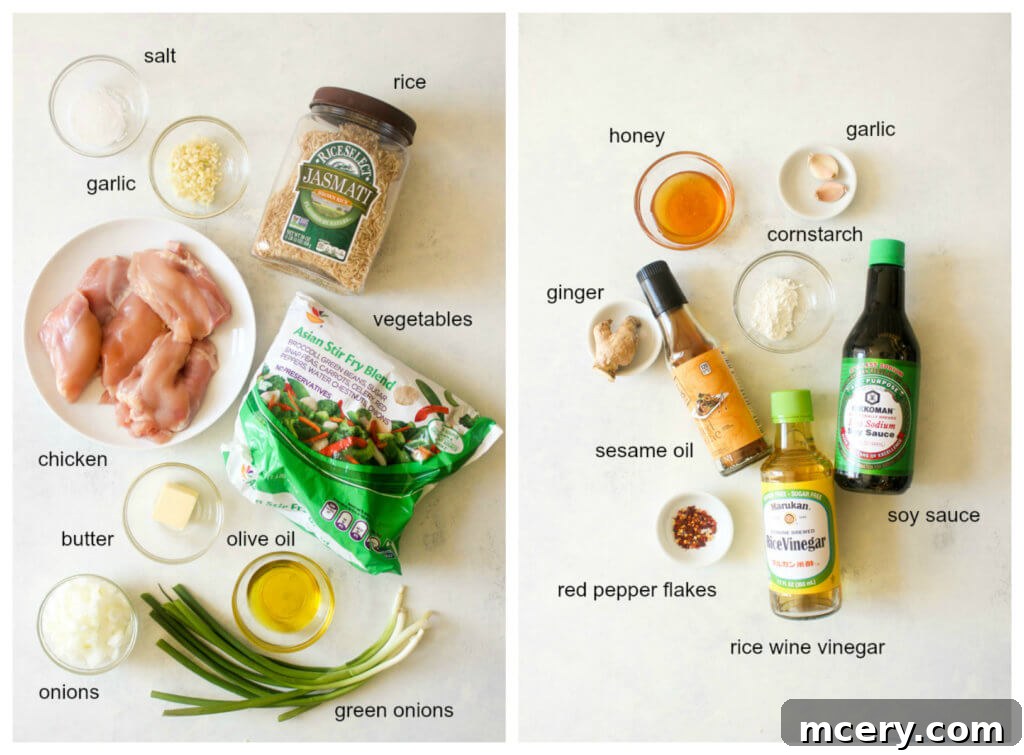
For the Flavorful Chicken and Rice Base, You Will Need:
- Onion & Garlic: These fundamental aromatics form the backbone of flavor, infusing the entire dish with a delicious savory depth.
- Brown Rice: Opting for brown rice makes this meal particularly healthy. It’s a wholesome, fiber-rich whole grain that perfectly absorbs the delicious teriyaki flavors and provides sustained energy. Long-grain varieties like Jasmati work wonderfully for their texture.
- Hot Water: Essential for proper rice cooking in the oven, using hot or boiling water helps kickstart the cooking process and ensures your brown rice becomes tender and fluffy.
- Olive Oil: Used to help distribute flavors and ensure ingredients don’t stick to the casserole dish during the initial baking phase.
- Butter: A small amount of butter adds richness to the rice and helps achieve that perfectly cooked, flavorful grain.
- Chicken Thighs: Boneless, skinless chicken thighs are the star protein of this dish. They are chosen for their superior flavor, moisture retention, and ability to remain tender during baking. Ensure they are cut into roughly bite-sized pieces for even cooking.
- Frozen Asian-Style Vegetables: A wonderfully convenient way to add a burst of color, texture, and essential nutrients. Look for blends that include popular choices like broccoli, carrots, snap peas, and water chestnuts for an authentic Asian flair.
- Kosher Salt: To season the chicken and rice perfectly, enhancing all the natural flavors.
- Optional Garnish: Fresh green onions or cilantro are fantastic for adding a final pop of freshness, vibrant color, and aromatic lift just before serving.
For the Healthy Homemade Teriyaki Sauce, You Will Need:
- Low-Sodium Soy Sauce: This ingredient provides the essential salty and umami backbone of any good teriyaki sauce, but using a low-sodium version helps maintain the healthy aspect of the dish.
- Rice Wine Vinegar: Adds a crucial tangy, slightly sweet counterpoint to the richness of the sauce, balancing the flavors beautifully.
- Sesame Oil: Delivers a distinctive, toasted nutty aroma and deep flavor that is characteristic of authentic Asian cuisine. A little goes a long way.
- Honey: A natural sweetener that contributes to the signature glossy glaze and rich sweetness of teriyaki. It’s a healthier alternative to refined sugars often found in commercial sauces.
- Garlic & Fresh Ginger: These powerhouse aromatics are non-negotiable. They infuse the sauce with pungent, warm, and subtly spicy notes that are absolutely essential for a vibrant teriyaki flavor. Always opt for fresh ginger and garlic for maximum impact.
- Cornstarch: Used to create a slurry that will thicken the sauce to a perfect, glossy consistency, allowing it to coat the chicken and rice beautifully.
- Red Pepper Flakes: An optional, but highly recommended, addition for those who enjoy a subtle kick of heat. Adjust the quantity to your personal preference for spice.
Crafting Your One-Pan Baked Teriyaki Chicken and Rice: Step-by-Step Guide
Follow these easy steps to create a mouthwatering, healthy teriyaki chicken and rice dish that will become a cherished staple in your home. Precise timing and technique will yield the best results.
-
Prepare the Rice Base:
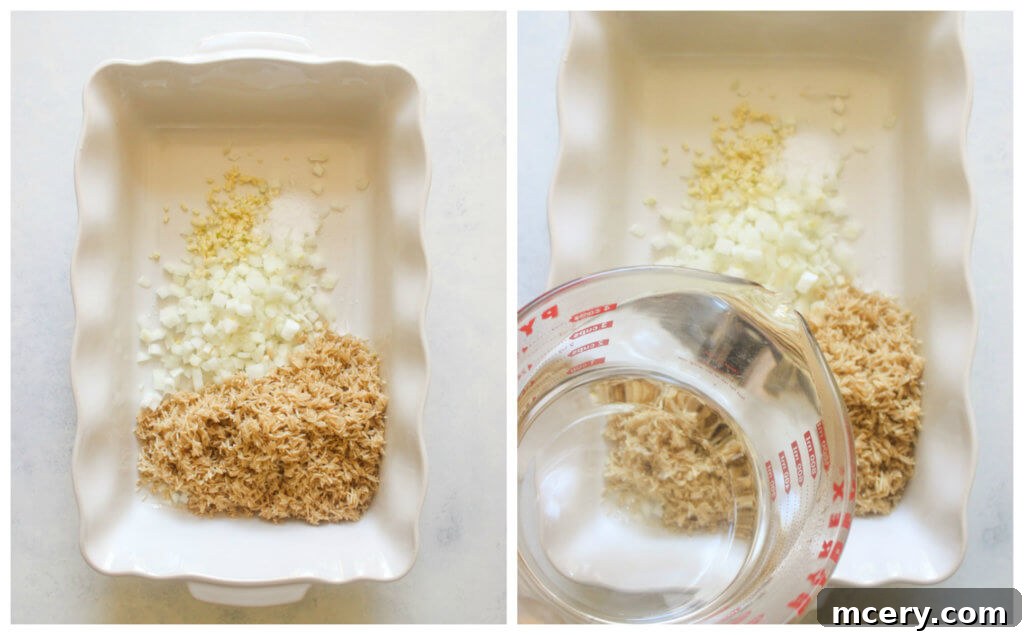
Begin by preheating your oven to 375 degrees F (190 degrees C). This ensures the oven is at the correct temperature when you place the dish inside. Thoroughly rinse your brown rice under cold water using a colander for about 30 seconds to a minute. This quick step helps remove excess surface starch, which is crucial for preventing your rice from becoming gummy or mushy during baking. In a spacious 9×13 inch casserole dish, combine the rinsed brown rice, finely chopped onions, minced garlic, and kosher salt. Pour 3 cups of hot (ideally boiling) water over the mixture and stir gently to combine everything evenly. Ensure the rice is submerged.

The aromatic foundation: rinsed brown rice and aromatics in a casserole dish, ready for the next layer. -
Add Chicken and First Bake:
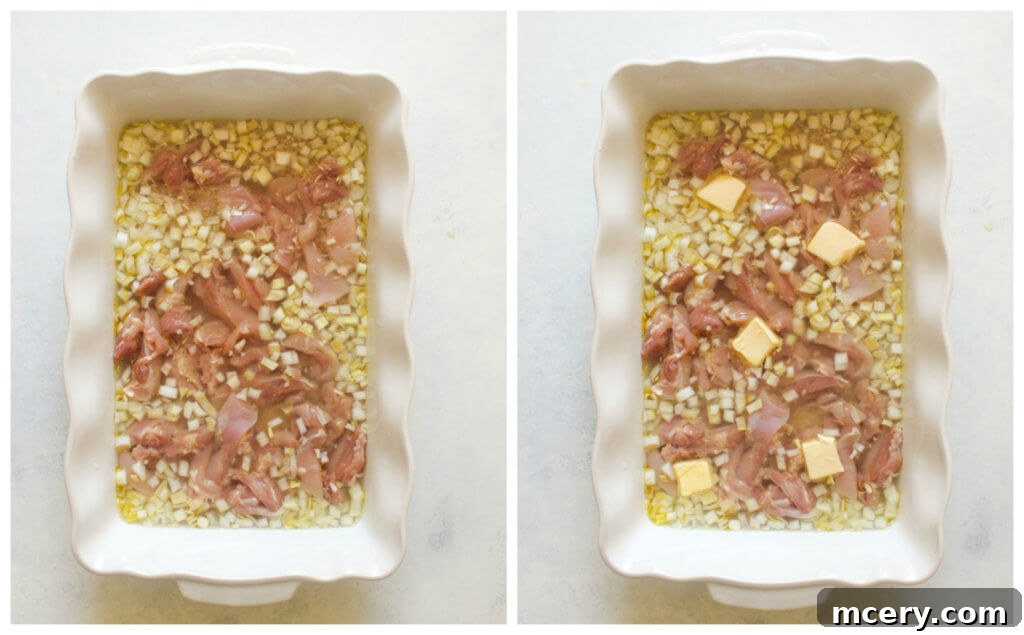
Next, stir in the olive oil, ensuring it’s well distributed. Evenly arrange the bite-sized chicken thighs over the rice mixture in the casserole dish. Dot the top with small slices of butter. The butter will melt and infuse the rice and chicken with extra flavor and moisture. Cover the casserole dish tightly with aluminum foil to create a sealed environment that traps steam, which is absolutely crucial for cooking the brown rice thoroughly and evenly. Place the covered dish into your preheated oven and bake for 45 minutes.
Chicken and rice assembled in the casserole dish, prepared for the crucial initial bake. -
Prepare the Healthy Teriyaki Sauce:
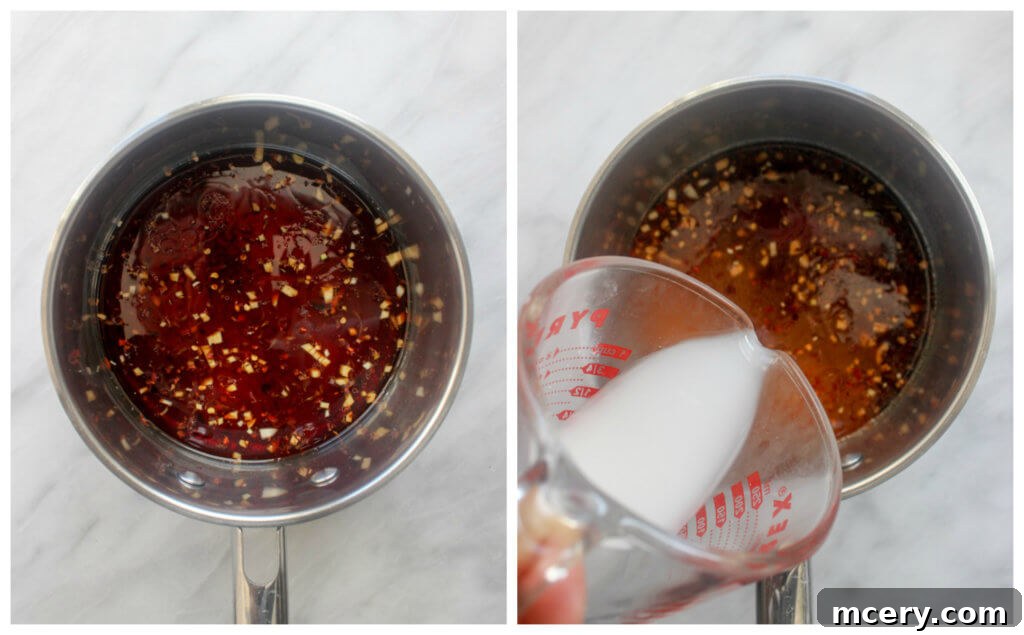
While the chicken and rice are baking, this is the perfect time to prepare your luscious homemade teriyaki sauce. In a small saucepan, combine the low-sodium soy sauce, rice wine vinegar, sesame oil, honey, minced garlic, fresh grated ginger, and red pepper flakes (if you’re opting for a little heat). Whisk these ingredients together until well combined. Bring this mixture to a slow simmer over medium heat, stirring occasionally to ensure the honey dissolves and prevents sticking. It’s important to avoid a rapid or rolling boil to prevent the sauce from burning.
The healthy teriyaki sauce simmering gently on the stovetop, developing its rich flavors. -
Thicken the Sauce:
In a separate small bowl, whisk together 2 teaspoons of cornstarch with ¼ cup of cold water until completely smooth. This creates a cornstarch slurry, which is essential for thickening the sauce. Slowly add the slurry to the simmering teriyaki sauce in the saucepan, whisking constantly to prevent lumps. Continue to simmer over medium-low heat for about 3-4 minutes, or until the sauce has visibly thickened to a perfect, glossy consistency that will beautifully coat your chicken and rice. Remove the saucepan from the heat but keep the sauce warm, ready for the final step.
-
Add Vegetables and Finish Baking:
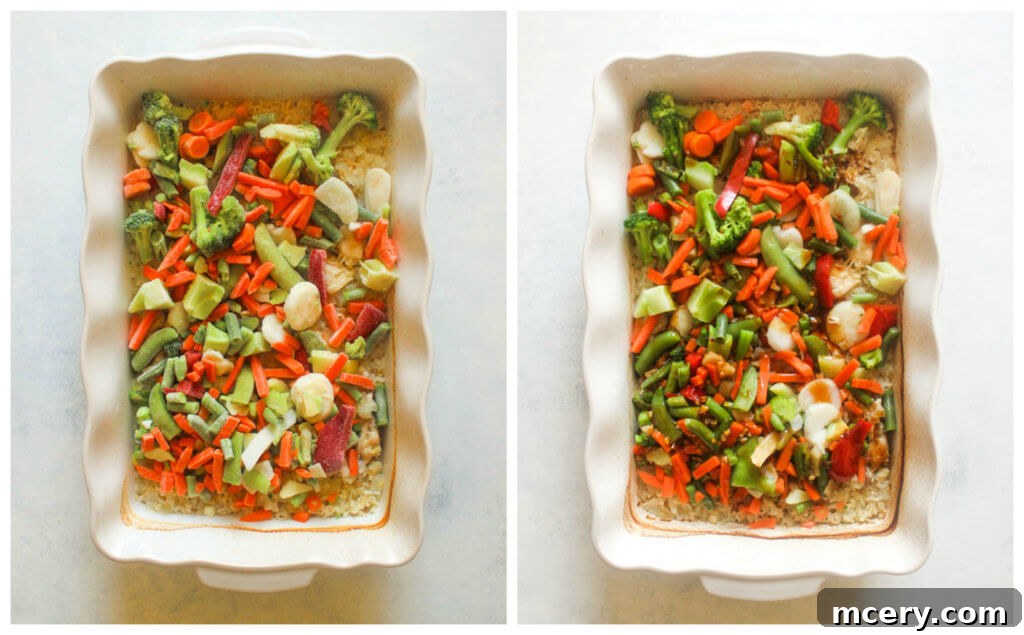
After the initial 45 minutes of baking, carefully remove the casserole dish from the oven. Gently and completely remove the aluminum foil. Evenly spread the frozen Asian-style vegetables over the chicken and rice mixture. It is crucial not to stir the vegetables into the rice at this stage, as disturbing the rice can lead to a mushy texture. Return the uncovered dish to the oven and bake for an additional 20-25 minutes, or until the vegetables are tender-crisp, the chicken is thoroughly cooked through (internal temperature of 165°F or 74°C), and the brown rice is fluffy and perfectly done.
The vibrant frozen vegetables added to the baking dish for the delicious final cooking stage. -
Sauce and Rest for Perfect Finish:
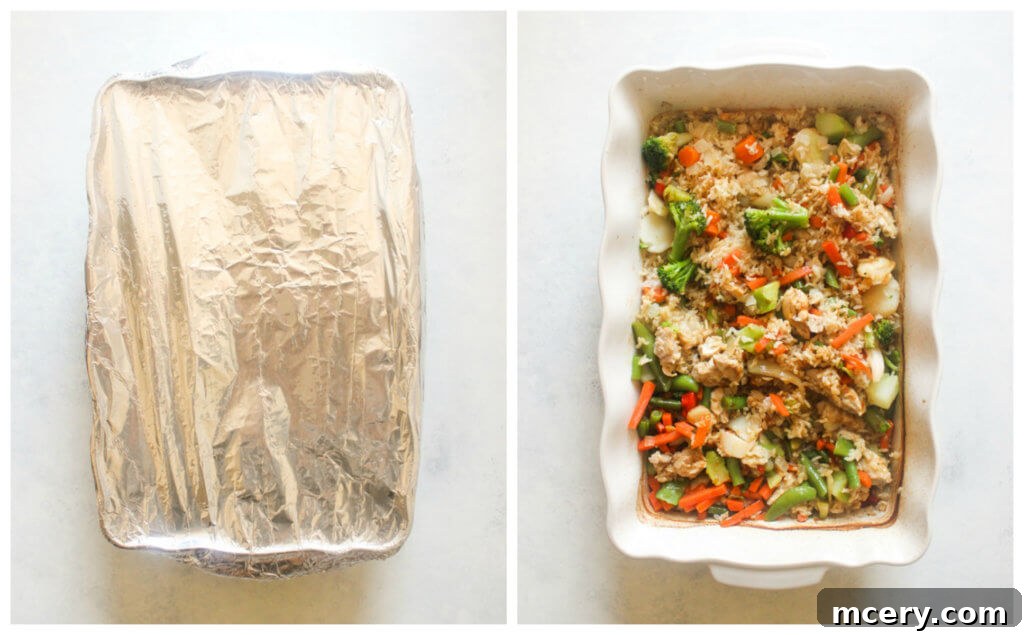
Once the casserole is fully cooked, remove it from the oven. Generously pour the warm, thickened teriyaki sauce evenly over the entire rice and chicken mixture. Cover the dish again with foil and let it rest undisturbed for 5-10 minutes. This essential resting period allows the flavors to meld beautifully, gives the rice a chance to absorb any remaining moisture and the rich sauce, resulting in a more tender and cohesive dish. It also helps the chicken reabsorb its juices. Before serving, gently stir or fluff the rice with a fork to distribute the sauce and ensure every bite is coated. If desired, garnish with fresh green onions or cilantro for a final flourish of flavor and visual appeal.
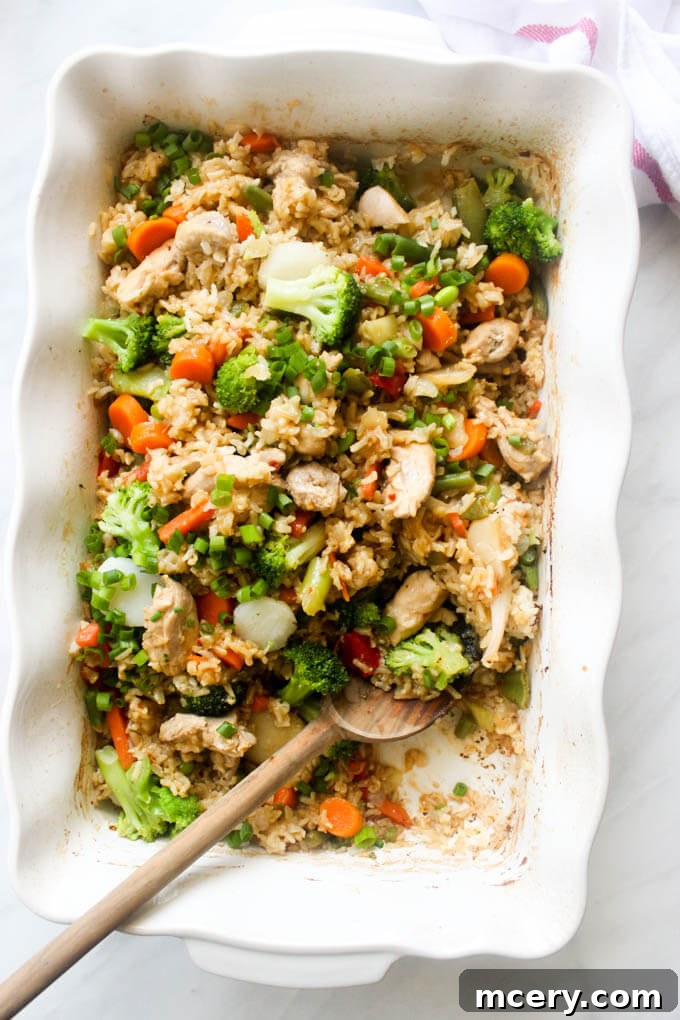
The finished baked teriyaki chicken and rice, glistening with homemade teriyaki sauce and ready to be enjoyed.
Expert Tips for the Best Baked Teriyaki Chicken and Rice
Achieving a perfect one-pan teriyaki chicken and rice is simple, especially when you keep these expert tips in mind. They’ll help you elevate your dish from good to absolutely outstanding:
- Rinse Your Rice Thoroughly: Even though brown rice generally has less surface starch than white rice, a quick and thorough rinse under cold water in a colander is still highly beneficial. This step helps to remove any excess starch, which is a common culprit for sticky or mushy rice, ensuring your grains cook up light and fluffy.
- Resist the Urge to Stir the Rice During Baking: Once the rice, water, and initial ingredients are combined and covered in the casserole dish, it’s paramount to avoid stirring during the baking process. Stirring releases starch and can disrupt the even cooking of the grains, almost guaranteeing a sticky, gummy result rather than distinct, tender rice.
- Cut Chicken Thighs Evenly: For consistent cooking and to ensure every piece of chicken is tender and juicy, make sure your boneless, skinless chicken thighs are cut into roughly the same bite-sized pieces. We highly recommend using chicken thighs for this recipe due to their higher fat content, which keeps them wonderfully moist and flavorful during the longer baking time. While chicken breast can be used, it may result in a slightly drier dish.
- Simmer Teriyaki Sauce with Care: When preparing your homemade teriyaki sauce, always maintain a low-to-medium heat. Honey, a key ingredient, can burn very quickly if exposed to high heat, leading to a bitter taste and potentially scorching your saucepan. Gentle simmering is key for proper thickening and optimal flavor development.
- Allow for Essential Resting Time: Do not skip the 5-10 minute resting period after the casserole comes out of the oven and the sauce is added. Covering it with foil creates a self-steaming environment that allows the rice to fully absorb the sauce’s flavors, become perfectly tender, and helps the chicken reabsorb its juices, making it even more succulent.
- Don’t Overcrowd Your Pan: Ensure your 9×13 inch casserole dish is appropriately sized for the ingredients. Overcrowding can lead to uneven cooking, steaming instead of baking, and generally less desirable results. The ingredients need space to cook properly.
- Customize Your Veggies: Feel free to get creative with your vegetables! While a frozen Asian blend is convenient, you can easily swap it for fresh vegetables like thinly sliced bell peppers, mushrooms, sugar snap peas, or even baby corn. Add them at the same time as the frozen veggies for optimal tenderness.
- Adjust Spice Level: If you love heat, feel free to increase the amount of red pepper flakes in the sauce. For a milder version, reduce them or omit them entirely. You can also offer sriracha or chili garlic sauce at the table for individual customization.
Serving Suggestions and Delicious Variations
This Baked Teriyaki Chicken and Rice is incredibly satisfying and a complete meal on its own, but it also pairs beautifully with a range of sides and can be easily adapted to your taste and pantry contents. Discover how to enhance your meal or explore new flavor profiles.
Perfect Pairings:
- Fresh Salads: As mentioned earlier, a light and crisp salad provides a wonderful textural and flavor contrast. Options like a simple green salad with a bright ginger-sesame dressing, a quick cucumber salad, or even a Greek Cucumber Salad offer refreshing lightness.
- Steamed Edamame: A healthy, protein-packed, and easy appetizer or side dish that perfectly complements the Asian flavors of the main course.
- Roasted Broccoli or Asparagus: For an extra boost of greens, quickly roast some broccoli florets or asparagus spears. Toss them with a drizzle of sesame oil, a pinch of salt, and perhaps a squeeze of lemon for a vibrant side.
- Spring Rolls or Dumplings: If you’re looking to make it a more elaborate Asian-inspired meal, consider serving alongside store-bought or homemade vegetable spring rolls or steamed pork dumplings.
- Pickled Ginger: A small side of pickled ginger can cleanse the palate between bites, adding a zesty, sharp counterpoint to the rich teriyaki.
Creative Variations:
- Add a Pineapple Twist: For a delightful touch of tropical sweetness and acidity, add diced fresh or canned pineapple chunks (drained) to the casserole dish along with the frozen vegetables during the second baking phase.
- Spice It Up: If you crave more heat, don’t hesitate to increase the red pepper flakes in the teriyaki sauce. You can also add a dash of sriracha directly to the sauce before simmering or offer it as a table condiment.
- Different Proteins: While chicken thighs are ideal for their juiciness, you could experiment with cubed pork tenderloin or even firm tofu for a vegetarian option. Be mindful that cooking times may need to be adjusted for different proteins.
- Extra Veggies: Don’t limit yourself to the frozen blend! Feel free to add other fresh vegetables like thinly sliced bell peppers, mushrooms, shredded carrots, or even bok choy for extra crunch and a nutrient boost.
- Garnish Options: Beyond green onions and cilantro, a sprinkle of toasted sesame seeds (white or black) adds a lovely nutty crunch and enhances the visual appeal of the dish.
Nutritional Benefits of This Healthy One-Pan Meal
One of the standout features of this baked teriyaki chicken and rice is its impressive nutritional profile. It’s a meal you can feel genuinely good about serving to your family, knowing it supports their health and well-being.
- Lean Protein Powerhouse: Chicken thighs provide a rich source of lean protein, which is absolutely essential for muscle repair, growth, and maintaining a feeling of satiety, helping to prevent overeating.
- Wholesome Whole Grains: Brown rice is a fantastic choice as it’s a whole grain. This means it contains all parts of the grain, including the fibrous bran, nutrient-rich germ, and starchy endosperm. Consequently, it delivers more fiber, B vitamins, and essential minerals compared to refined white rice, contributing to better digestive health and providing sustained energy release.
- Rich in Vitamins and Minerals from Vegetables: The generous portion of frozen Asian-style vegetables, or any fresh vegetables you choose to incorporate, contributes a wealth of essential vitamins, minerals, and disease-fighting antioxidants. This supports overall health, boosts immunity, and adds vibrant color and texture.
- Controlled Sodium & Sugar Content: By taking the time to make the teriyaki sauce from scratch, you gain complete control over the amount and type of sodium and sugar in your meal. Using low-sodium soy sauce and natural honey allows for a much healthier alternative to many commercial sauces that are often laden with high-fructose corn syrup and excessive salt.
- Balanced Macronutrient Profile: This dish offers a well-rounded and balanced macronutrient profile, providing a good mix of complex carbohydrates for energy, quality protein for muscle health, and healthy fats. This balance helps ensure you feel full, satisfied, and energized without a post-meal energy crash.
- Easy to Customize for Dietary Needs: The inherent flexibility of this recipe allows you to easily adjust it for various dietary preferences, such as gluten-free (using tamari instead of soy sauce) or even higher fiber options.
More Easy Dinner Recipes to Try
If you loved the simplicity, flavor, and health benefits of this one-pan wonder, you’ll surely enjoy these other easy dinner ideas. They are perfect for expanding your repertoire of quick, delicious, and healthy weeknight meals:
- Super Easy Korean Chicken Lettuce Wraps: A light, flavorful, and interactive meal perfect for family fun.
- Maple Mustard Salmon: A quick and healthy fish dish bursting with sweet and savory notes.
- Chicken Stuffed Zucchini: A creative way to enjoy vegetables and lean protein.
- Easy Spicy Shrimp Tacos: Fast, fresh, and full of exciting flavors for a fun dinner night.
Baked Teriyaki Chicken Recipe Card
Author: Katya @ Little Broken
Prep Time: 20 min
Cook Time: 65 min
Total Time: 1 hour 25 minutes
Yield: 8 servings
Category: Dinner
Method: Baking
Cuisine: Asian
Ingredients
For the Chicken and Rice:
- 1 medium onion, chopped
- 3 garlic cloves, minced
- 1 ½ tsp. kosher salt
- 2 cups long-grain brown rice (such as Jasmati), rinsed
- 3 cups hot (boiling) water
- 2 Tbsp. olive oil
- 1 lb. boneless, skinless chicken thighs, cut into bite-sized pieces
- 2 Tbsp. butter, sliced
- 16 oz. bag frozen Asian-style vegetables
- Optional: green onions for garnish
For the Healthy Teriyaki Sauce:
- ⅓ cup low-sodium soy sauce
- ¼ cup rice wine vinegar
- 1 tsp. sesame oil
- 3 Tbsp. honey
- 2 garlic cloves, minced
- 1 tsp. fresh grated ginger
- ¼ tsp. red pepper flakes
- 2 tsp. cornstarch (whisked together with ¼ cup water to make a slurry)
Instructions
- Preheat the oven to 375 degrees F (190°C).
- Rinse the brown rice thoroughly under cold water using a colander.
- In a 9×13 inch casserole dish, combine the chopped onions, minced garlic, kosher salt, and rinsed brown rice. Pour in the hot water and stir to combine.
- Add the olive oil and evenly distribute the bite-sized chicken thighs over the rice mixture. Top with sliced butter. Cover the dish tightly with aluminum foil and bake for 45 minutes.
- While the casserole bakes, prepare the teriyaki sauce. In a small saucepan, combine low-sodium soy sauce, rice wine vinegar, sesame oil, honey, minced garlic, fresh grated ginger, and red pepper flakes. Bring to a slow simmer over medium heat.
- In a small bowl, whisk 2 tsp. cornstarch with ¼ cup water to create a slurry. Add the slurry to the simmering sauce, whisking constantly. Continue to simmer over medium-low heat for 3-4 minutes, until thickened and glossy. Remove from heat and keep warm.
- After the initial 45 minutes, remove the casserole from the oven and carefully remove the foil. Spread the frozen Asian-style vegetables over the chicken and rice (do not stir). Return the uncovered dish to the oven and bake for an additional 20-25 minutes, or until the vegetables are tender and the chicken is fully cooked (internal temperature of 165°F / 74°C).
- Pour the warm teriyaki sauce evenly over the cooked rice and chicken mixture. Cover the dish again with foil and let it rest for 5-10 minutes. This allows flavors to meld and the rice to absorb the sauce.
- Gently fluff the rice with a fork before serving. Garnish with fresh green onions or cilantro, if desired.
Nutrition Information (Approximate Per Serving)
- Calories: 777
- Sugar: 8.2 g
- Sodium: 1057.5 mg
- Fat: 14.5 g
- Carbohydrates: 122.9 g
- Protein: 38.2 g
- Cholesterol: 77.7 mg
Did you make this delicious recipe?
Share your culinary creation on Instagram! Tag @littlebrokenblog and use the hashtag #littlebrokenblog so we can see your amazing dish!