
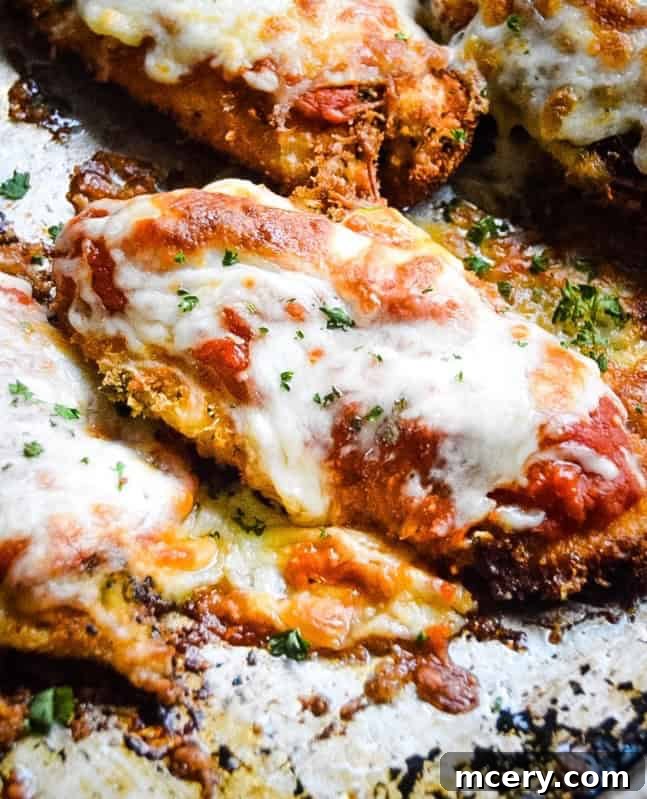
If you’re craving a cozy, comforting dinner that tastes like it came straight from your favorite Italian trattoria, this **Crispy Chicken Parmesan** is about to become your go-to obsession. Imagine perfectly golden, audibly crunchy chicken cutlets, tender and juicy on the inside, generously smothered with rich marinara sauce, and topped with bubbly, melted mozzarella cheese. It’s truly everything a perfect chicken parm should be, and the best part? It all comes together using simple, everyday ingredients you likely already have stocked in your kitchen.
This recipe has earned its place as a long-time favorite in my home because it embodies comfort food done absolutely right. Each chicken breast is meticulously seasoned, then allowed a crucial marinating period to infuse deep flavor and ensure maximum juiciness. A quick pan-fry creates those coveted crispy edges and a beautiful golden-brown crust before it’s nestled into a baking dish, blanketed in a vibrant marinara, and crowned with a generous layer of mozzarella. The oven then works its magic, melting the cheese to gooey perfection and unifying all the incredible flavors. It’s one of those dinners that brings an instant smile to everyone at the table, transforming an ordinary weeknight into a special occasion.
Whether you’re preparing a hearty meal for your bustling family, aiming to streamline your week with efficient meal-prepping, or simply yearning to recreate a beloved restaurant classic within the comfort of your own home, this recipe is remarkably foolproof. And here’s a little secret: the leftovers, if you’re fortunate enough to have any, are often even more delicious the very next day. This dish truly promises a satisfying and memorable dining experience for any occasion.
⭐ The Best Crispy Chicken Parmesan You’ll Ever Make!
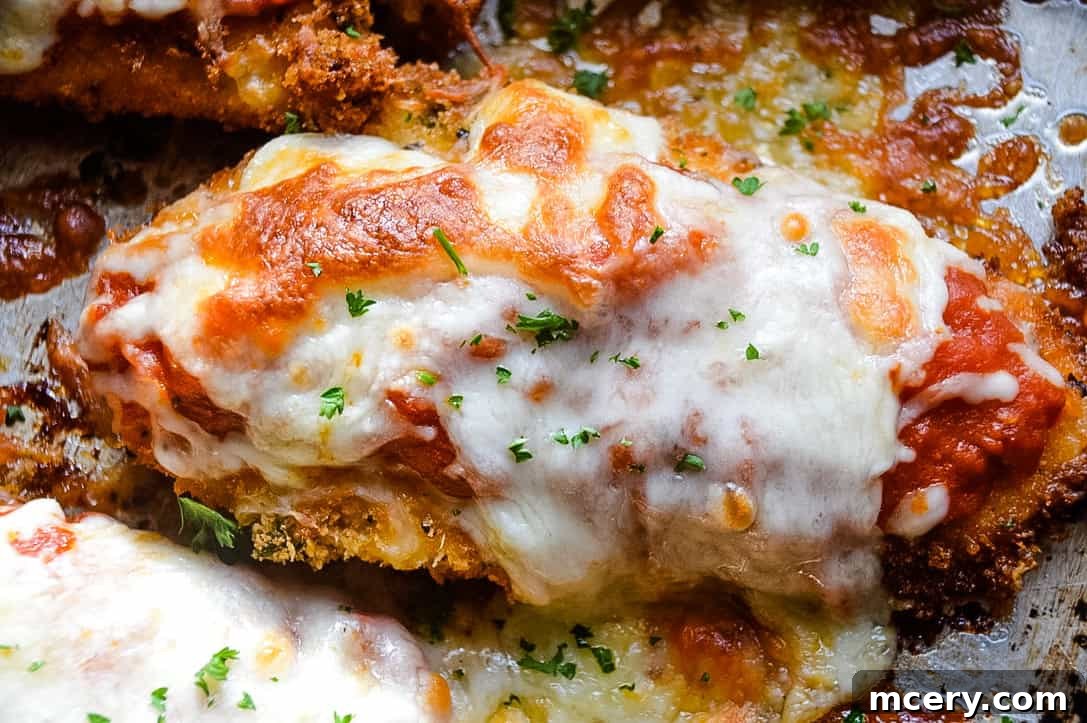
⭐ Why You’ll Love This Crispy Chicken Parmesan Recipe
This isn’t just another chicken parmesan recipe; it’s *the* chicken parmesan recipe you’ll want to keep in your rotation. Here’s why it stands out:
✔ Unbeatable Crispy & Juicy Texture
The secret to achieving that perfect texture lies in two key steps: first, marinating the chicken. This simple step infuses flavor and helps keep the chicken incredibly tender and moist from the inside out. Second, we use a strategic blend of panko and traditional breadcrumbs. Panko provides that signature light, airy, and incredibly crispy crunch, while traditional breadcrumbs add structure and a classic golden-brown finish. The combination ensures every bite is a delightful contrast of textures – a truly crispy exterior enveloping a beautifully juicy interior.
✔ Surprisingly Easy to Make
Despite its impressive, restaurant-quality appearance, this homemade chicken parm is incredibly approachable for home cooks of all skill levels. It relies on basic, readily available ingredients and a series of straightforward, easy-to-follow steps. You don’t need any special culinary techniques to master this dish; just a little patience and a desire for delicious food. It’s perfect for busy weeknights when you want something special without spending hours in the kitchen.
✔ A Guaranteed Family Favorite
Chicken Parmesan is a universal crowd-pleaser, and this crispy version is no exception. Kids absolutely adore the crunchy chicken and gooey cheese, while adults appreciate the rich flavors and satisfying textures. It’s a rare dish that manages to delight every palate at the table, practically guaranteeing clean plates and requests for seconds. Say goodbye to dinner-time negotiations and hello to a meal everyone will love.
✔ Budget-Friendly Alternative
Enjoying a classic Italian meal out can quickly add up, especially when feeding the whole family. This homemade Crispy Chicken Parmesan offers all the indulgence and flavor of your favorite takeout or restaurant dish but at a fraction of the cost. By preparing it yourself, you control the quality of ingredients and save significantly, making it a smart and delicious choice for any budget-conscious household.
✔ Versatile for Any Meal
While it’s a stellar centerpiece for a traditional pasta night served over spaghetti or linguine, this chicken parm is incredibly versatile. Enjoy it simply on its own with a side salad, nestle it into a crusty toasted sandwich roll for an epic chicken parm sandwich, or pair it with garlic bread for an extra indulgent experience. Its adaptability makes it suitable for various dining preferences and occasions.
✔ Excellent Leftovers
Unlike many breaded dishes that lose their appeal after a night in the fridge, this crispy chicken parmesan holds up remarkably well. The robust breading maintains much of its crunchiness, especially when reheated correctly. An air fryer is truly magic for revitalizing leftovers, bringing them back to almost original crispiness, making it a fantastic option for a quick and satisfying lunch the next day.
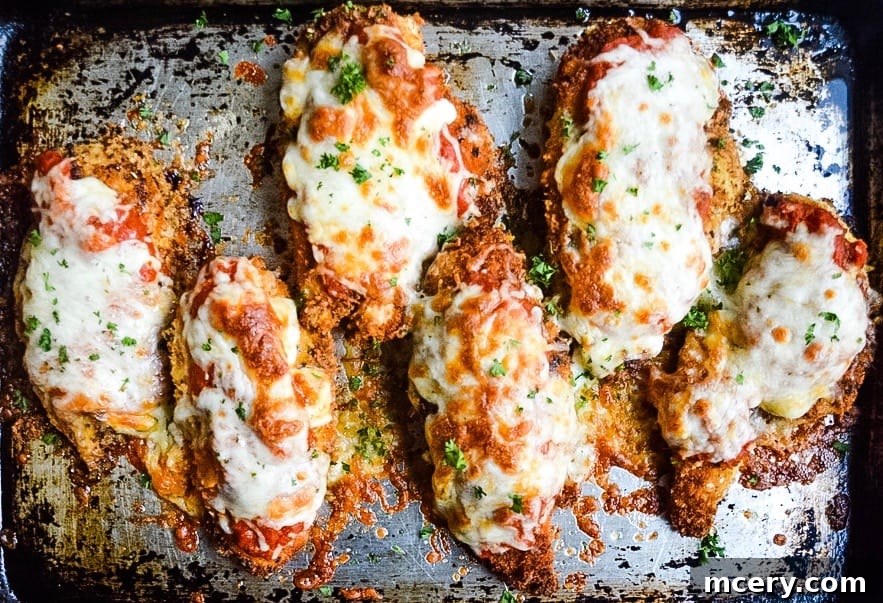
⭐ Essential Ingredients for Crispy Chicken Parmesan
Crafting the perfect Crispy Chicken Parmesan starts with a carefully selected list of fresh, high-quality ingredients. Here’s what you’ll need, along with a few insights into why each component is essential for that signature flavor and texture:
- **2 large eggs:** These form the base of our wet mixture, helping the breadcrumbs adhere to the chicken and keeping the meat moist.
- **3 garlic cloves, grated:** Fresh garlic adds an undeniable depth of savory flavor to the marinade, infusing the chicken from within.
- **2 tbsp chopped parsley:** Fresh parsley brightens the marinade with its herbaceous notes and adds a touch of color.
- **6 chicken cutlets:** For optimal crispiness and even cooking, thin chicken cutlets are key. If using full chicken breasts, slice them horizontally and pound them to about ½ inch thickness.
- **1 cup panko breadcrumbs:** The star of our crispy coating! Panko’s larger, flakier texture delivers an exceptional crunch that traditional breadcrumbs can’t match.
- **½ cup traditional breadcrumbs:** These finely ground breadcrumbs help fill in the gaps between the panko flakes, creating a more cohesive and sturdy crust.
- **½ cup grated Parmesan cheese:** Essential for both flavor and an extra layer of crispiness in the breading mixture. Use freshly grated for the best results.
- **1 tsp dried basil:** A classic Italian herb that brings aromatic sweetness to our breading.
- **1 tsp dried oregano:** Another cornerstone of Italian cuisine, offering a robust, earthy counterpoint to the basil.
- **1 tsp garlic powder:** Provides an additional layer of garlic flavor to the breading, complementing the fresh garlic in the marinade.
- **¼ tsp salt:** Crucial for seasoning the breading mixture and enhancing all the other flavors. Adjust to your preference.
- **½ cup avocado oil:** A high smoke point oil that’s perfect for pan-frying to achieve a golden, crispy crust without burning. Vegetable or canola oil also work well.
- **1 (24 oz) jar marinara sauce:** Choose your favorite high-quality marinara sauce. A good sauce is vital as it blankets the chicken and provides rich flavor.
- **½ cup shredded mozzarella:** The quintessential cheese for melting into gooey, stretchy perfection. Freshly shredded mozzarella melts more smoothly than pre-shredded.
- **Fresh basil or parsley, for topping:** A final flourish of fresh herbs not only adds a beautiful garnish but also brightens the entire dish with their vibrant aroma and flavor.
⭐ How to Make the Best Crispy Chicken Parmesan: Step-by-Step Guide
Creating restaurant-quality Crispy Chicken Parmesan at home is simpler than you think. Follow these clear and concise steps to achieve perfectly golden, juicy, and cheesy results every time.
Step 1: Preheat the Oven & Prepare Your Baking Dish
Begin by preheating your oven to **400°F (200°C)**. While the oven warms up, lightly grease a sturdy baking dish or a rimmed baking sheet. This crucial step not only prevents the chicken from sticking but also helps to preserve the crispiness of the breading after its final bake in the oven.
Step 2: Craft the Flavorful Egg Mixture & Marinate the Chicken
In a shallow bowl, combine your wet ingredients: vigorously whisk together the **large eggs**, **grated garlic**, **chopped fresh parsley**, and a generous pinch of **salt and freshly ground black pepper**. This creates a fragrant marinade that will adhere beautifully to the chicken. Dip each chicken cutlet into this aromatic egg mixture, ensuring it’s fully coated. Transfer the coated cutlets to another shallow dish, allowing them to marinate for a minimum of 15 minutes, and up to 45 minutes. This vital marinating step is key to infusing the chicken with deep flavor and guaranteeing a tender, juicy interior, providing a flavorful base before breading.
Step 3: Prepare the Ultimate Crispy Breading Mixture
In a second shallow bowl, assemble your dry ingredients for the perfect crispy coating. Combine the **panko breadcrumbs**, **traditional breadcrumbs**, **grated Parmesan cheese**, **dried basil**, **dried oregano**, **garlic powder**, and a tiny pinch more of **salt**. Use a fork or whisk to stir these ingredients thoroughly. This ensures all the herbs and spices are evenly distributed throughout the breading, contributing to a consistently delicious and seasoned crust on every piece of chicken.
Step 4: Expertly Bread the Chicken Cutlets
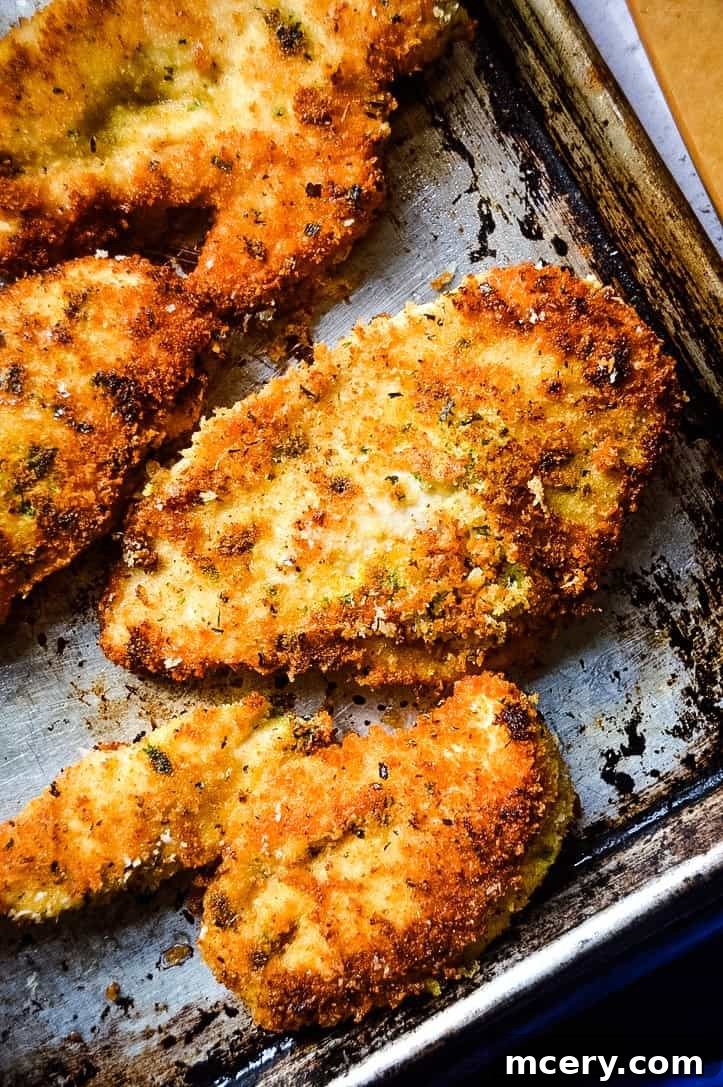
Carefully lift each marinated chicken cutlet from the egg mixture, allowing any excess liquid to drip off. Then, firmly press the cutlet into the prepared breadcrumb mixture, ensuring that all sides are thoroughly and evenly coated. Don’t be shy about pressing; applying firm pressure helps the breading adhere securely to the chicken, creating a thick, uniform layer that will result in an irresistibly golden and crunchy crust once cooked. Place the breaded cutlets on a separate plate or cutting board as you finish each one.
Step 5: Pan-Fry to Golden Perfection
Heat approximately **½ cup of avocado oil** (or another high-smoke-point oil like vegetable or canola) in a large, heavy-bottomed skillet over medium-high heat. You’ll know the oil is hot enough when it shimmers slightly and a test breadcrumb sizzles immediately upon contact. Carefully place the breaded chicken cutlets into the hot oil, ensuring not to overcrowd the pan (cook in batches if necessary). Fry each cutlet for about **4–5 minutes per side**, or until they achieve a beautiful, deep golden-brown color and are wonderfully crispy. Once fried, transfer the golden cutlets to your previously prepared baking sheet.
Step 6: Layer with Sauce and Cheese
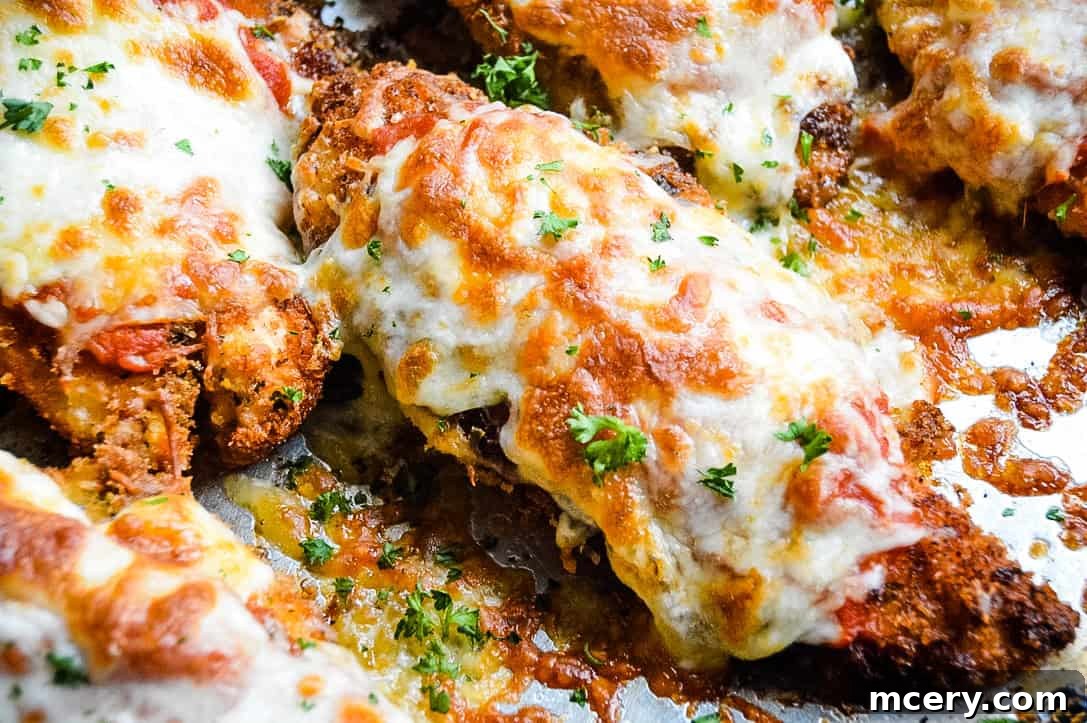
Now for the luscious toppings! Generously spoon about **¼ cup of marinara sauce** over the top of each pan-fried chicken cutlet, spreading it almost to the edges. Next, sprinkle a good handful of **shredded mozzarella cheese** over the marinara-covered chicken. For extra richness and flavor, you can also add a touch more grated Parmesan cheese at this stage. This layering sets the stage for a gooey, cheesy, and saucy finish.
Step 7: Bake Until Bubbly and Cooked Through
Transfer the baking sheet with the sauced and cheesed chicken cutlets to your preheated oven. Bake for approximately **17–20 minutes**, or until the chicken is thoroughly cooked through (an internal temperature of **165°F / 74°C** when measured with a meat thermometer). The cheese should be perfectly melted, golden, and bubbling enticingly, with a few deliciously browned spots. Once baked, remove from the oven and let it rest for a minute.
Step 8: Garnish and Serve Hot
Before serving, sprinkle your freshly baked Crispy Chicken Parmesan with a scattering of **fresh parsley or basil**. These vibrant herbs add a burst of freshness, a lovely aroma, and a beautiful pop of color that elevates the presentation. Serve immediately while hot, allowing everyone to savor the incredible combination of crispy chicken, rich marinara, and gooey melted cheese. Enjoy your homemade Italian masterpiece!
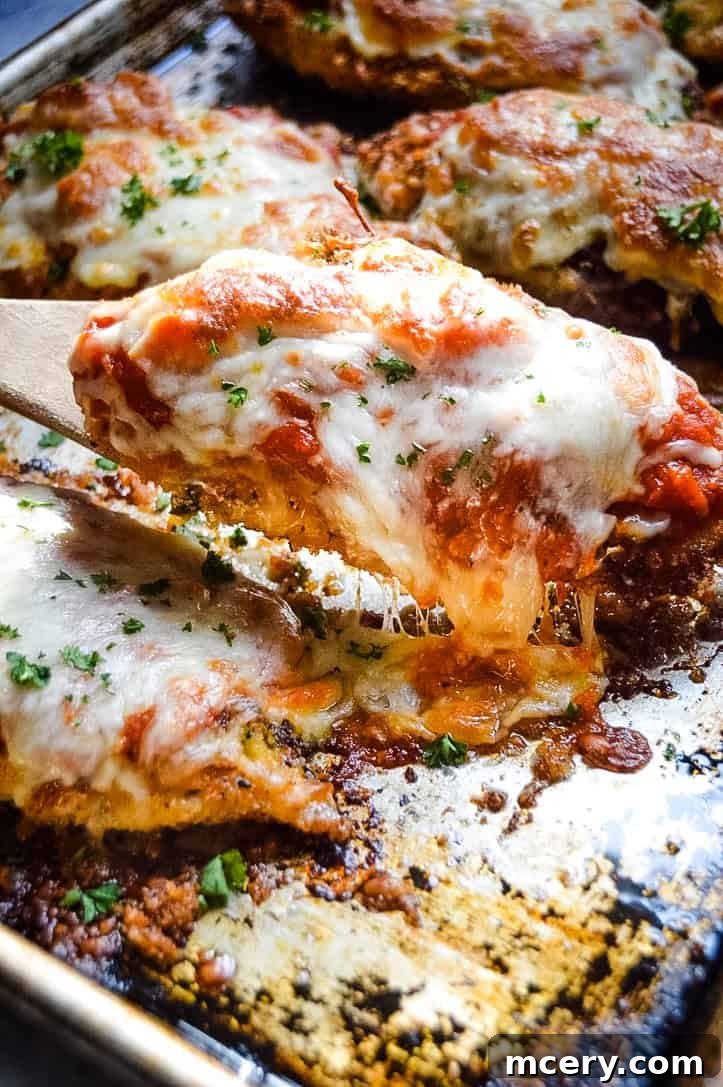
⭐ Pro Tips for the Crispiest Chicken Parmesan Ever
Achieving that perfectly crispy, golden-brown crust on your chicken parmesan is an art, but with these pro tips, you’ll master it in no time. Follow these expert suggestions to elevate your homemade chicken parm to a new level of deliciousness:
✨ **Combine Panko and Regular Breadcrumbs:**
This isn’t a suggestion, it’s a secret weapon! Panko breadcrumbs, with their larger, flaky texture, are unrivaled for creating an incredibly light and airy crunch. However, pairing them with traditional, finer breadcrumbs provides crucial structure, ensuring the coating adheres well and forms a robust, satisfying crust. This dynamic duo delivers the best of both worlds: unbeatable crispiness and a beautiful golden-brown finish that holds up under the sauce.
✨ **Never Skip the Marinating Step:**
While often seen as optional, marinating your chicken cutlets is paramount for both flavor and moisture. The mixture of garlic, fresh parsley, and eggs doesn’t just add aromatic depth; the egg also creates a protective barrier that locks in the chicken’s natural juices. This means your chicken stays incredibly tender and juicy on the inside, providing a delightful contrast to the crispy exterior. Even a short 15-minute marinade makes a significant difference.
✨ **Press the Breading Firmly into the Chicken:**
When you’re breading each chicken cutlet, don’t be gentle! Firmly press the breadcrumb mixture onto all sides of the chicken. This aggressive pressing ensures a thick, even coating that won’t fall off during frying or baking. A well-adhered breading is essential for forming that desired golden-brown, crunchy crust and preventing soggy patches.
✨ **Fry in a Single Layer to Prevent Soggy Breading:**
Patience is a virtue, especially when pan-frying. Overcrowding your skillet will drastically lower the oil’s temperature, leading to steamed chicken rather than fried. This causes the breading to become soggy and pale instead of crisp and golden. Always fry your chicken in a single layer, in batches if necessary, allowing each piece ample space to crisp up. This maintains consistent oil temperature and guarantees maximum crunch.
✨ **Finish in the Oven for Perfect Texture and Melted Cheese:**
The combination of pan-frying and oven-baking is what makes this chicken parm truly special. Pan-frying delivers that initial, intense crispiness and beautiful color. Finishing the cooking process in the oven allows the chicken to cook through evenly without burning the crust, while simultaneously melting the mozzarella into a bubbly, golden, irresistible blanket. This two-stage cooking method locks in crispiness and ensures perfect overall texture.
✨ **Use a Meat Thermometer:**
To ensure your chicken is perfectly cooked and safe to eat without being overcooked and dry, always use a meat thermometer. The chicken is done when it reaches an internal temperature of 165°F (74°C). This small tool is a game-changer for consistently tender and juicy chicken.
✨ **Don’t Overcrowd the Pan When Frying:**
As mentioned, give your chicken room to breathe. Frying too many cutlets at once will lower the oil temperature, resulting in soggy chicken. Cook in batches if necessary, allowing each piece to achieve its full golden potential.
✨ **Drain Excess Oil:**
After pan-frying, transfer the golden chicken cutlets to a wire rack set over a baking sheet (or a plate lined with paper towels). This allows any excess oil to drain away, preventing the bottom of the cutlets from becoming soggy while they wait for their oven finish.
⭐ What to Serve With Crispy Chicken Parmesan
Crispy Chicken Parmesan is a hearty and satisfying main course that pairs wonderfully with a variety of side dishes. Here are some classic and delightful accompaniments to complete your Italian feast:
- **Spaghetti or Linguine:** The ultimate classic pairing! Toss your favorite pasta with a simple marinara sauce, or even a little extra sauce from the chicken, for a comforting and complete meal.
- **Roasted Vegetables:** A medley of seasonal roasted vegetables like asparagus, broccoli, zucchini, or bell peppers adds a healthy, vibrant, and slightly sweet counterpoint to the rich chicken.
- **Garlic Bread:** Crusty garlic bread is perfect for soaking up every last drop of the delicious marinara sauce.
- **Caesar Salad:** A crisp and tangy Caesar salad offers a refreshing contrast and a burst of freshness that cuts through the richness of the chicken and cheese.
- **Caprese Salad:** A simple Caprese salad with fresh mozzarella, ripe tomatoes, basil, and a drizzle of balsamic glaze provides a light, flavorful, and colorful side.
- **Buttered Noodles:** For a simpler, kid-friendly option, buttered egg noodles offer a gentle and comforting accompaniment.
- **Sautéed Spinach or Green Beans:** Lightly sautéed greens with a touch of garlic make for a quick, healthy, and flavorful side dish that doesn’t overpower the main event.
- **Creamy Polenta:** For a more rustic touch, serve your chicken parm over a bed of creamy, cheesy polenta.
And don’t forget, any leftover chicken parm makes for incredibly delicious sandwiches the next day – just tuck it into a toasted roll with a bit more sauce!
⭐ Storing + Reheating Crispy Chicken Parmesan
Proper storage and reheating are key to enjoying your delicious Crispy Chicken Parmesan even after the first meal. Here’s how to keep it fresh and crispy:
Fridge Storage
To keep leftovers fresh, allow the chicken parmesan to cool completely before transferring it to an airtight container. Store it in the refrigerator for **3–4 days**. Ensuring it’s sealed properly will prevent it from drying out or absorbing other odors from the fridge.
Freezer Storage
If you plan to freeze your chicken parmesan, it’s best to freeze the baked cutlets *without* the sauce. Wrap each cooked and cooled chicken cutlet tightly in plastic wrap, then place them in a freezer-safe bag or container. They can be frozen for up to **3 months**. When ready to enjoy, thaw them in the refrigerator overnight, then add sauce and cheese before reheating.
Reheating for Optimal Crispiness
The goal when reheating is to bring back that delightful crispiness. Avoid the microwave at all costs, as it will inevitably soften the breading and yield a rubbery texture.
- **Air Fryer:** This is the gold standard for reheating chicken parm. Preheat your air fryer to **375°F (190°C)**. Place the chicken cutlets in a single layer in the basket and cook for **5–6 minutes**, or until heated through and crispy.
- **Oven:** For a traditional method, preheat your oven to **350°F (175°C)**. Place the chicken parmesan on a baking sheet and heat for **8–10 minutes**, or until warm and the cheese is bubbly again. You can also cover loosely with foil for the first few minutes to prevent drying, then remove for the last few to crisp up.
⭐ Delicious Variations for Your Chicken Parmesan
This Crispy Chicken Parmesan recipe is fantastic as is, but it’s also wonderfully adaptable! Feel free to experiment with these variations to suit your taste, dietary needs, or simply to try something new:
- **Chicken Parmesan Sandwiches:** Elevate your lunch game by serving these crispy cutlets on toasted ciabatta rolls or crusty baguettes. Add extra marinara, a slice of provolone, and a generous handful of fresh basil for an unforgettable sandwich.
- **Spicy Chicken Parmesan:** For those who love a bit of heat, simply add a pinch or two of red pepper flakes to your marinara sauce. You can also mix a small amount into the breading mixture for a subtle kick in every bite.
- **Extra Crispy Version:** To achieve an even more substantial and crispy crust, try a double-dredge method. After the initial egg dip and breading, dip the chicken back into the egg mixture and then into the panko mixture a second time. This builds a thicker, super-crunchy layer.
- **Gluten-Free Chicken Parmesan:** Easily make this recipe gluten-free by swapping out traditional breadcrumbs and panko for their gluten-free counterparts. Most brands offer excellent gluten-free options that maintain the desired crispiness.
- **Baked Only Chicken Parmesan:** If you prefer to skip the pan-frying step, you can bake the breaded chicken directly in the oven. Bake at 400°F (200°C) for 20-25 minutes, or until cooked through and golden. While it might not be *as* crispy as pan-fried, it’s a lighter option.
- **Different Cheese Blends:** While mozzarella and Parmesan are classic, don’t hesitate to try other melting cheeses. Provolone adds a sharper, more assertive flavor, or a blend of fontina and mozzarella can create a wonderfully creamy and complex cheesy layer.
- **Low-Carb Option:** Skip the breadcrumbs entirely and use a coating of almond flour mixed with Parmesan cheese and seasonings for a delicious low-carb alternative. You can also use crushed pork rinds for a super crispy, keto-friendly crust.
⭐ Helpful Tools for Making Crispy Chicken Parmesan
Having the right kitchen tools can make preparing this Crispy Chicken Parmesan even easier and more enjoyable. Here are a few recommended items:
- **Large Skillet:** Essential for perfectly pan-frying your chicken cutlets. A cast iron or heavy-bottomed non-stick skillet works best for even heat distribution.
- **Baking Sheet:** A sturdy rimmed baking sheet is needed for the final oven baking, holding the chicken cutlets securely.
- **Tongs:** Indispensable for safely flipping chicken cutlets in hot oil and transferring them without damaging the breading.
- **Meat Thermometer:** Your best friend for ensuring chicken is cooked to the perfect internal temperature (165°F / 74°C) every time, preventing overcooking and dryness.
- **Shallow Bowls:** Ideal for setting up your breading station (one for the egg mixture, one for the breadcrumb mixture).
- **Wire Rack (optional for crisping):** Placing fried chicken on a wire rack set over a baking sheet allows air to circulate, keeping the bottom crispy while it waits to be topped and baked.
- **Pounding Mallet:** If you’re starting with whole chicken breasts, a meat mallet helps you pound them into even cutlets, ensuring uniform cooking.
Frequently Asked Questions about Crispy Chicken Parmesan
Q: How do I keep chicken parmesan crispy?
A: The key to maintaining crispiness is a combination of techniques. First, use a panko-breadcrumb blend and firmly press the breading onto the chicken. Second, pan-fry the chicken until golden and crispy *before* baking. Finally, when reheating leftovers, always use an air fryer or oven, as microwaving will make the breading soggy.
Q: Can I use chicken breasts instead of cutlets?
A: Absolutely! If you have full chicken breasts, simply slice them horizontally into thin cutlets (aim for about ½ inch thick). For best results, place them between two pieces of plastic wrap and pound them gently with a meat mallet or rolling pin to an even thickness. This ensures they cook uniformly and quickly.
Q: What cheese is best for chicken parmesan?
A: The classic choice for chicken parmesan is a combination of shredded mozzarella and grated Parmesan cheese. Mozzarella provides that irresistible gooey, stretchy melt, while Parmesan adds a sharp, salty depth of flavor. You can also experiment with provolone for a slightly stronger flavor, or a blend of Italian cheeses.
Q: Can I freeze chicken parmesan?
A: Yes, you can! For the best texture, it’s recommended to freeze the *baked chicken cutlets without the marinara sauce and mozzarella*. Once cooked and cooled, wrap them individually and freeze for up to 3 months. When ready to serve, thaw, add sauce and cheese, and bake until bubbly.
Q: How do I reheat chicken parmesan leftovers?
A: To preserve the crispy breading, avoid the microwave. The best methods are an air fryer (375°F for 5-6 minutes) or an oven (350°F for 8-10 minutes). These methods ensure the chicken heats through while the crust regains its delightful crispness.
Q: Can I make this recipe in an air fryer from start to finish?
A: You can definitely make crispy breaded chicken in the air fryer, and then top it with sauce and cheese for a quicker version. Air fry breaded chicken at 375°F (190°C) for about 12-15 minutes, flipping halfway, until cooked through and golden. Then add sauce and cheese, and air fry for another 2-3 minutes until cheese is melted and bubbly.
More Easy Dinner Recipes You’ll Love
If your family adored this Crispy Chicken Parmesan, you’re in for a treat with these other incredibly delicious and easy dinner recipes:
- 🍗 Cilantro Lime Chicken: A zesty and flavorful chicken dish perfect for tacos, bowls, or simply grilled.
- 🔥 Chipotle Chicken Copycat: Recreate your favorite fast-casual chicken at home with this smoky and spicy recipe.
- 🥣 Instant Pot Lentil & Sausage Soup: A hearty, comforting, and incredibly easy soup that’s packed with flavor and protein.
- 🥗 Fall Harvest Bowls: A vibrant and wholesome meal featuring seasonal ingredients, perfect for a nutritious and satisfying dinner.
- 🍛 White Chicken Chili: A creamy, savory, and slightly spicy chili that’s a perfect twist on a classic comfort food.
Get the Recipe:
Crispy Chicken Parmesan
20
25
25
1 10
6 servings
Leave a Review
Pin Recipe
Ingredients
- 2 large eggs
- 3 garlic cloves, grated
- 2 tbsp chopped parsley
- 6 chicken cutlets
- 1 cup panko breadcrumbs
- ½ cup traditional breadcrumbs
- ½ cup grated Parmesan cheese
- 1 tsp dried basil
- 1 tsp dried oregano
- 1 tsp garlic powder
- ¼ tsp salt
- ½ cup avocado oil
- 1 (24 oz) jar marinara sauce
- ½ cup shredded mozzarella
- Fresh parsley or basil, for serving
Equipment
-
large skillet
-
shallow bowls
-
tongs
-
baking sheet
-
meat thermometer
-
cooling racks
Instructions
- Preheat the oven to 400°F and lightly grease a baking dish or rimmed baking sheet.
- In a shallow bowl, whisk together the eggs, grated garlic, chopped parsley, salt, and pepper. Dip each chicken cutlet into the mixture and place in a shallow dish. Marinate for 15–45 minutes.
- In another shallow bowl, combine the panko, breadcrumbs, Parmesan, dried basil, dried oregano, garlic powder, and a pinch of salt. Stir well.
- Lift each chicken cutlet from the egg mixture and press firmly into the breadcrumb mixture, coating all sides evenly.
- Heat the avocado oil in a large skillet over medium-high heat. When hot and shimmering, fry the chicken 4–5 minutes per side, until golden and crispy. Transfer to the prepared baking sheet.
- Spoon about ¼ cup marinara sauce over each cutlet, then top with shredded mozzarella.
- Bake for 17–20 minutes, or until cooked through (165°F internal temperature) and the cheese is melted and bubbly.
- Finish with fresh parsley or basil and serve warm. Enjoy!
Notes
Serve With:
Pair this Crispy Chicken Parmesan with one of these reader-favorite sides:
- Black Beans & Rice
More Easy Dinner Recipes:
- Cilantro Lime Chicken
- Chipotle Chicken Copycat
- Instant Pot Lentil & Sausage Soup
Storage:
Store leftovers in an airtight container for 3–4 days. Reheat in the air fryer (375°F for 5–6 minutes) to keep the breading crispy.
Serving: 8g,
Calories: 519kcal,
Carbohydrates: 16g,
Protein: 45g,
Fat: 29g,
Saturated Fat: 6g,
Polyunsaturated Fat: 4g,
Monounsaturated Fat: 16g,
Trans Fat: 0.02g,
Cholesterol: 178mg,
Sodium: 661mg,
Potassium: 737mg,
Fiber: 1g,
Sugar: 1g,
Vitamin A: 385IU,
Vitamin C: 4mg,
Calcium: 186mg,
Iron: 2mg
Did you make this recipe?
Please leave a star rating and review below!